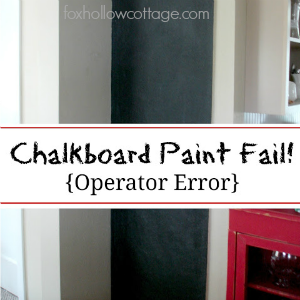
My {failure of a} Chalkboard Paint Project
Welcome to my failure — pull up a chair! I recently painted a wall with chalkboard paint and I wanted to share the results with you, because it was not a success, and I’d love to save you the time and trouble of repeating my mistake!

My most important tip for you? Don’t bother wasting your time painting on a wall that is too heavily textured!
If your wall, “your canvas per say” is too rough, the chalk will only float across the surface peeks of the texture and you can’t get a strong enough impression from the chalk for the line you are leaving to be clear or visible. At least.. not with regular chalk. Even if you wet it.
Trust me on this one.
So after a full coat of paint. And waiting 4 hours.
(*not my strong suit, the patience thing.)
And then applying another coat and letting it cure for 2 of the 3 recommended days.
(*see my previous comment…)
My wall is simply way too rough.
Jim said he would sand the whole wall down and get it nice and smooth, then I can repaint it. Which was really sweet. I could even manage that task on my own.. but, I think I’ll live with it a little and make sure I like the feature before either of us makes that big mess. The idea is on the table though.
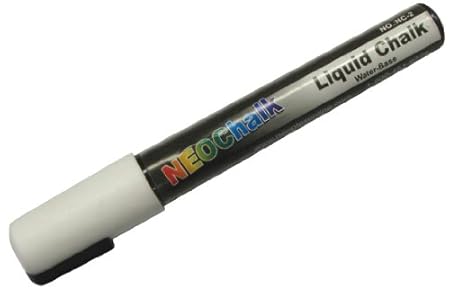
One of those chalkboard pens might help, but I actually wanted to use regular chalk so when I shared the seasonal art or whatever I popped up it would be a more realistic, attainable project. Just the chalkboard paint & chalk.
We’ll see… maybe the smart thing to do is just get a chalk pen! LOL
No one ever accused me of being smart though…

-
This is my first bold stroke of black.
-
The paint after 2 coats, and 2 days wait/dry time.
-
Seasoning the surface: Don’t skip this step! You place your chalk on it’s side, and chalk the entire surface to prevent ghosting (a design that imprints and will not disappear) when you write or draw for the first time. You can see here in this photo the problem to come, and how my chalk is only hitting the peeks of the texture.
-
My method then reverted to using the entire flat of my hand to really spread that chalk around.
Let me add that the paint itself was wonderful to work with.
I used a foam roller and after the second coat, my wall was super black!

It gave wonderful coverage, even on my textured wall.
I used Rust-Oleum chalkboard paint in Black Finish.

This is the wall with just chalkboard paint.
It’s super black.

This is after seasoning it and wiping off the excess chalk.
This was my first and only attempt at
drawing on the wall so far.

Because my chalk was not showing up, even with dipping it in water, I was only able to get a large graphic of any kind to show up. I had to double-up every line and re-draw over them and I could not do anything small or with any amount of fine detail. I didn’t intend to show this very lame “test” drawing, but it makes a great “SEE how sucky it is!!” example.
Here is what that wall looked like before.

It’s the perfect little spot. See that little bump in the wall? A great stopping point.
I thought on it for a long time before I cracked out that black paint.

I tend to roll things around in my head (most times) for a long time before I act on them. So, we’ll see if it makes the cut. I’ll play around a little. And I might get a chalk pen.
But I can for sure pass on that if you want to paint a chalkboard wall. Make sure your surface is smoother then mine!
Please don’t get me wrong, I am a Chalkboard Paint LOVER! And in the right places it’s a fantastic accent or feature. I know trends also come and go, but for me this is true-love. I might tire of it eventually, but it won’t disappear simply because someone claims it ‘out’. I always do what I like, and suggest you do too. Chasing trends is no way to live!
Click on the links below to visit some of my happily completed chalkboard paint projects:
-
Chalkboard fireplace wall makeover [click here]
-
Tips & Tricks for stenciling with chalk! [click here]
-
Chalkboard Wall Art [click here]
The house has changed a lot since this post was shared back in 2012, I invite you to come take a look around.
***Simply CLICK on the image to visit the post***


My {failure of a} Chalkboard Paint Project

Subscribe for free today to receive all my latest DIY tutorials, decorating ideas, upcoming projects & more, sent right to your in-box!

Join us on our adventures... and let's make our houses "homes" together!
Your email address will never be shared or sold. I promise!
More Ideas & Inspiration
 Before And After White House Paint Reveal
 Spray and Chalk Paint Folding Chair Makeover
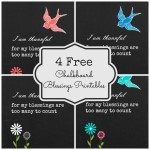 Four Free Chalkboard Printables {thankful blessings}
 DIY Fireplace Mantel and Hearth Makeover
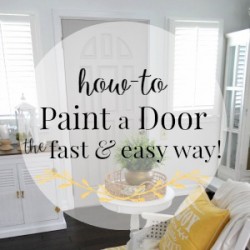 How To Paint A Door Fast and Easy
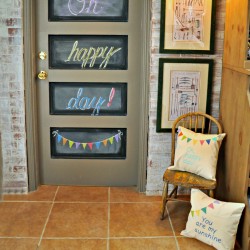 Chalkboard Fun At The French Farmhouse
 My First Crack at a Coffee Filter Wreath
 Aqua Blue Painted Interior Door
I also have a rough-cast wall and i though chalkboard stickers would help. They definitely did not! I had the exact same problem, at least it was easier to remove.
I bought some of those chalk pens…but I like the look of a little more freehanded art and lettering. Dont be too hard on yourself…you will love your new canvas the more you use it!
I have trouble with regular chalk on smooth surfaces too. I always wonder what I am doing wrong.
Bliss
I think it looks great Shannon. We are always our worst critics! Thanks for mentioning the chalk pen. I haven’t ever seen one of those. Guess it’s off to Hobby Lobby and Michaels this week!
Looked really awesome. Glad I’ve read some tips ahead, been planning to have on like that. Got my eye on your next posts.
Girl…
I LOVE chalkboard walls. I haven’t done it because I have textured walls as well.
It looks good black!
Hey Shannon.. I’ve used both chalk and the chalk pen. I love the chalk pen because it does make it so much easier to do detail (for me anyways). Here is the address to the pen I love to use from amazon (I think it is the same one you pictured). It works great!
http://www.amazon.com/dp/B002MARSJM/ref=as_li_tf_til?tag=anyon08-20&camp=0&creative=0&linkCode=as1&creativeASIN=B002MARSJM&adid=0FV9845V2NZB4VGCSY5T
BTW – Your chalkboard picture is adorable 🙂
Well even a flub up looks perfect in my book…but I so get it by not being able to do a fine line with the chalk. I’ve had this problem years ago with some pans that I painted. Needless to say, I still have them in the storage room, lol. I know whatever you decide to do will be perfect! Live with it like you said and see before doing all that messy work. I love it Shannon!
It does look really nice! I never thought about how it would work on a textured wall before. I hope you are able to use that chalk marker instead.
I think I would try the chalk pen to see if it works any better. I love that brand of chalkboard paint, it works awesome. That is the perfect wall, awesome!
I think you should let hubby sand it (since he offered…take it when they offer..:)) and redo it..I love that spot and you are right it is perfect for a chalkboard wall. It would be perfect for seasonal artwork…I would love to have one in my house, but I am afraid when the hubby was ticking me off I would write “bite me” in big letters on the wall and thats just not good for the children…LOL!!! Its gonna look great when you smooth it out!
Far from a fail, just a bump in the road.
Hugs,
karin
artisbeauty1@gmail.com
Shan, it looks good, though!! LOL!! I never really thought about how chalkboard paint would work on a textured wall. Good to know! I’ve been thinking about using it on the door from the kitchen, leading to the garage. Just haven’t gotten around to it yet!