Please welcome Kimberly today as she shows us how to make this adorable Spring craft!
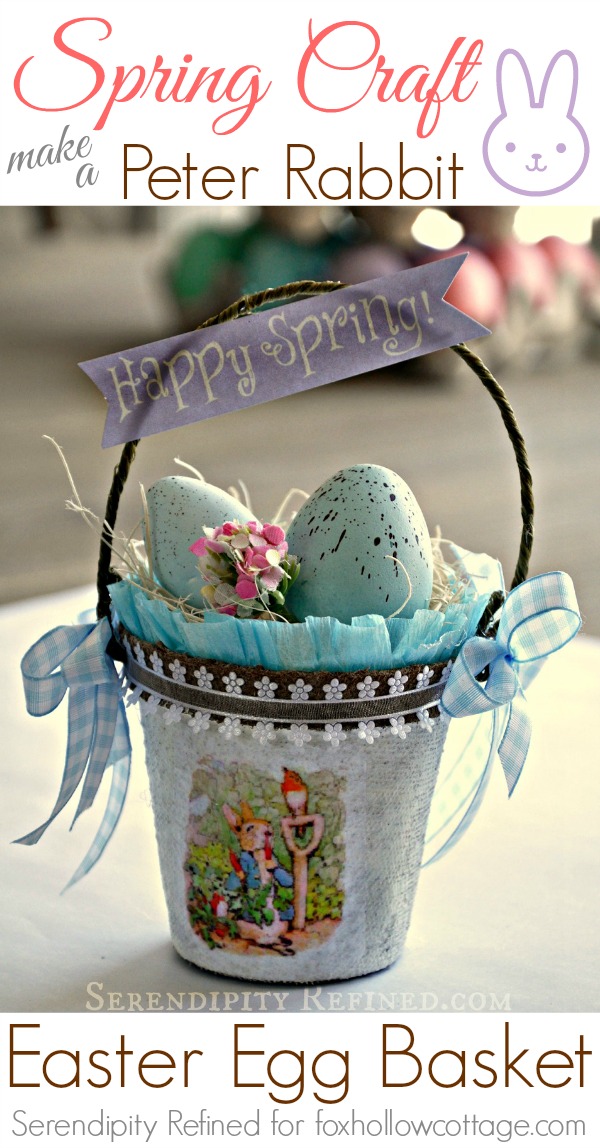
A Diy Spring Craft: Peter Rabbit Easter Egg Basket
I have been waiting patiently for Spring to arrive for the last week and since I had a few peat pots left over after starting my seeds, I decided to decorate a few of them to use in a spring tablescape. Of course I realize that spring is still weeks away here in Illinois but they’re forecasting temperatures in the 40’s this week and my thoughts have turned to sunshine, fresh air, and Peter Rabbit!
To create this craft I used peat pots that are four inches across. I purchased mine at a local garden center for about thirty cents each. First, paint the bottoms of the pots with a heavy layer of white craft paint starting just below the rim.
Next, find an image that you want to use on the Internet (I searched “Peter Rabbit” in Google image). I opened it in a word document, sized the image to about 2.5 inches and duplicated it several times on the page. Then, I printed it onto white tissue paper by cutting a piece of tissue that was slightly larger than an 8.5 by 11 inch inch sheet of paper and taping the top edge to a piece of card stock and feeding it into my printer.
Cut the images apart leaving about 3/8 of an inch all the way around. Apply Mod Podge to the side of the pot covering an area slightly larger than the tissue would cover. Carefully apply the tissue to the Mod Podge and tap it gently to straighten it and to make sure that it is adhered. After it dries, apply a second coat of Mod Podge to seal the image and blend the tissue into the side of the pot.
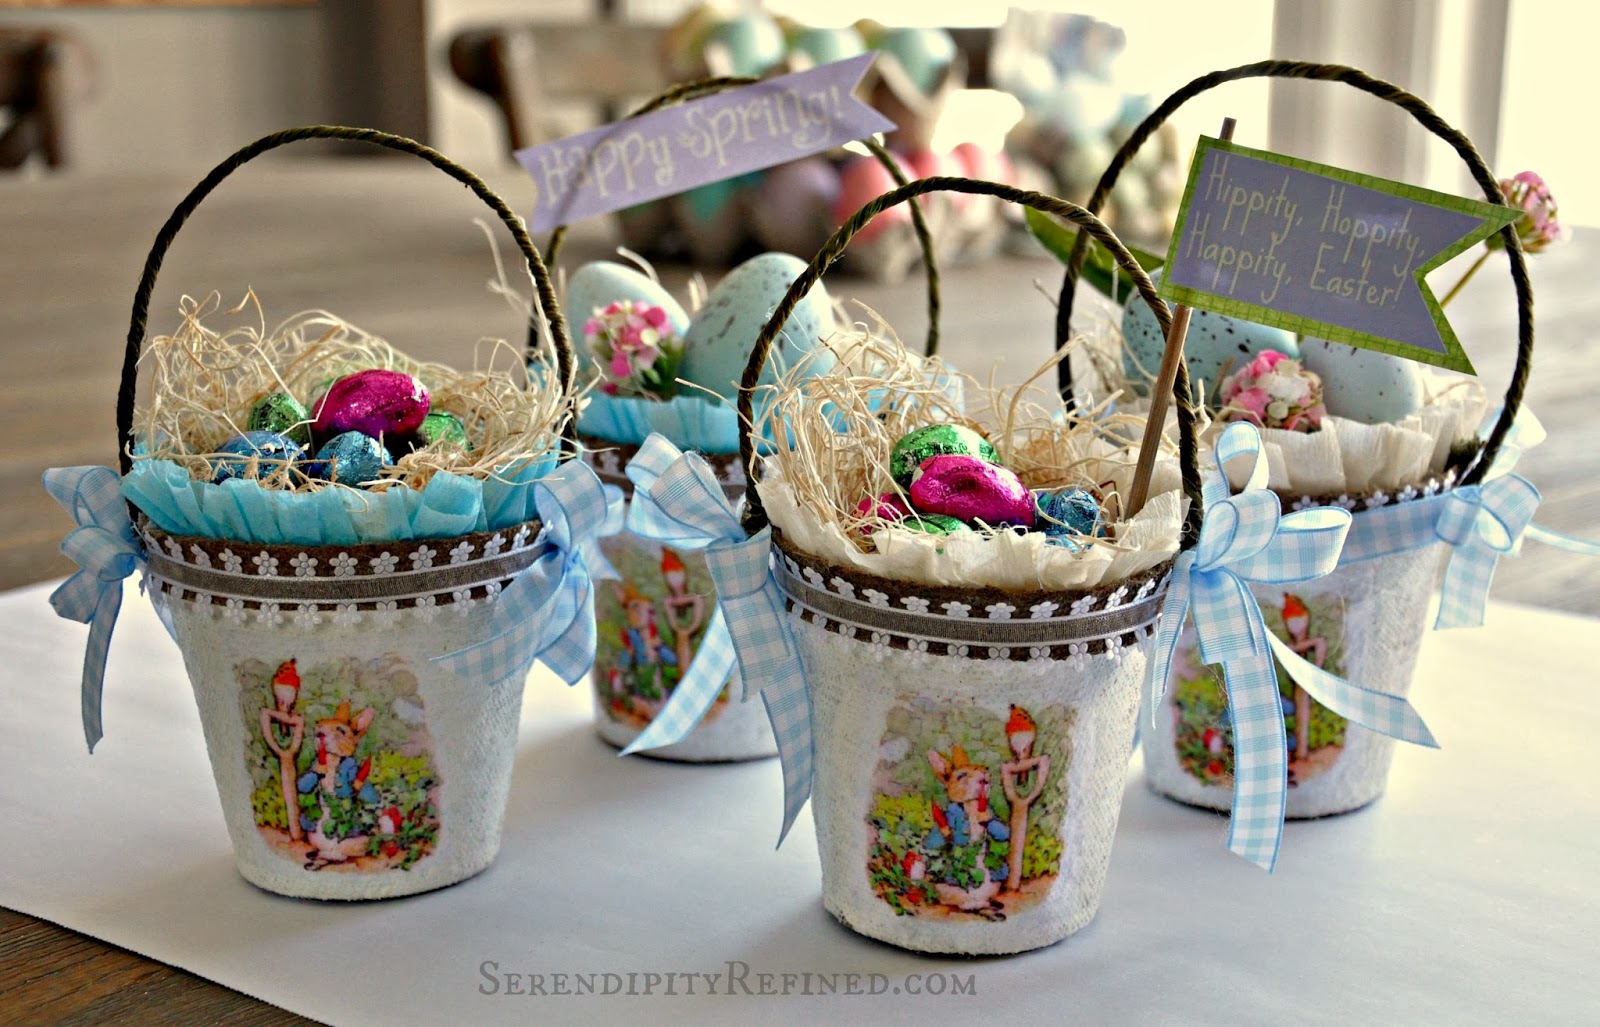
Wrap a piece of ribbon around the rim of the pot and hot glue it into place. Then, using a skewer or the tip of your scissors, poke a hole through the ribbon and the side of the pot to attach the handle which is formed from a seven inch piece of jute covered wire that I found at the craft store. Simply push one end of the handle through each side of the pot and form a loop to keep the handle in place.
I made the little ruffle that peeks out of the top edge using about a yard of crepe paper that I had on hand. Simply run a line of hot glue inside the rim of the pot then push the crepe paper into the glue and scrunch it to form the “ruffle”. Then, I added a couple of gingham bows on the sides to cover the holes where the handle attaches.
Add a little excelsior (or Easter grass…or moss) and fill it with whatever you please.
So far, I’ve tried a few chocolate eggs…
a couple of faux eggs and a spring flower or two…. even some little signs.
I’m going to use these Peter Rabbit decorated baskets as a part of my Easter tablescape but I’ve decided that they’d also make adorable baby shower favors or cute May baskets! I’m not certain what I’ll end up filling them with on Easter morning, but I’m excited at how inexpensive and easy it was to DIY them using scraps of ribbon and peat pots that I already had on hand. I hope that you’ll make a few for yourself!
Happy (almost) Spring!









These are so precious, love them. PINNED!!!
Cynthia
Those little baskets are adorable! You have such talent. Thanks for sharing and I hope to make a couple
of them for Easter.
I love these for Spring! My sister made some for Christmas that were adorable. She used the smallest pot to hang on her tree & to give to friends.
Oh I bet that was so cute. They’ve got such a vintage-y vibe! Happy SPRING to you (:
These are so cute! I love all the little details you added. Perfect for spring & Easter and I bet they would work for other seasons as well.
Debbie 🙂
I love this! Perfect 🙂
Debbie