DIY Fireplace Mantel and Hearth Makeover
If you’ve got a fireplace you’d love to makeover but your budget isn’t as big as your vision, I hope our $150 before and after fireplace makeover makes you feel like you can tackle it! It’s amazing what you can do with paint alone, and add it a little tile and wood and you can work some serious magic. This is the evolution of our fireplace. From ghastly green ceramic kitchen tile and pumpkin orange paint… to neutral hearth tiles, chunky white wood, crown molding and a deep moody over the mantel paint-job. Admittedly we waited far to long, but we finally got there! Take my advice and don’t settle for as long as I did!

OUR MAKEOVER STEPS:
-
Painted the glossy orange brick
-
Built a larger/deeper mantel
-
Added new wood hearth frame, installed new hearth tiles and re-trimmed with baseboard
-
Painted the accent wall over the fireplace with chalkboard paint
-
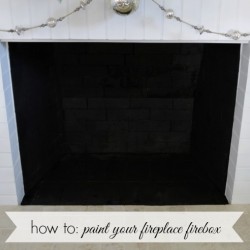
Painted the fire box
-
Installed crown molding
This is a pretty photo heavy post in order to share the full process. All the steps are linked at the bottom in one place, so you can find them all there if you want to jump ahead.
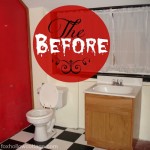
Below is a photo of what we started with, the day we closed on the house. When I look back at some of these photos I wonder what I was even thinking buying this house!

PAINTING THE WALL
We immediately painted the entire house, and I covered the hunter green mantel surround with fresh white paint. It took many coats, as the paint was a shelac base and kept bleeding into the white, but I was determined!

DEMO OF THE GREEN TILE
After eagerly and (looking back) very prematurely busting out the hunter green tile, I proceeded to cover up the hearth for a few years. Not my smartest move. I don’t know how I stood it like that?
But frankly, there were so many other big projects to tackle that took precedence the time just seemed to speed by. And truthfully, sometimes just picking something is overwhelming. Choices are often hard for me because I like far too many styles, and that makes it hard to commit.

HOW TO SPRAY PAINT BRICK (in the house)
One day I got so sick of the orange-toned, shiny brick that I just spray painted it! I didn’t want brush strokes on our slick brick so spray paint felt like the perfect option. It worked like a charm.
- Clean your brick. A TSP solution works great.
- Tape off mantel area.
- Cover and protect surfaces from overstay.
- Use spray shield (cardboard works great).
- Properly ventilate the area. I opened my front and sun room doors for a cross breeze.
- Coat slowly and evenly, do not rush.
- Build your coverage in multiple coats until you like the coverage.


After that, I decided on some pale aqua paint as an accent.
That lasted about a week.

It was replaced with this richer, deeper aqua.
I liked that much, much better! It’s funny how “lighter” was not the answer. It was practically glowing, the base was just too white and pastel in tone! The deeper aqua lasted over a year, if I recall incorrectly.

EVOLUTION

How To Make A Deeper Mantel
The previous mantel was so shallow, I could hardly put a thing on it! Not good for decorating at all. So we decided to fatten it up! We doubled the size and it’s perfect now.
We used a table saw and a miter saw on this project. As well as a router to create custom trim. Also used were: clamps, nail gun (or nails, hammer, nail set), measuring tape, wood filler for nail holes and paint.


My personal handy (dream come true maker) man!

It was actually sunny that day {shocker!} so we put up some sun protection to work under.

We needed a big board and I knew I would be painting it white so we went with a Melamine product. It was much less expensive than a stain grade wood and we knew it would not warp. It was the perfect choice for this project.
It needed to be trimmed out though so it would have smooth finished edges. Here we are putting the mitered cuts together, and then gluing and clamping into place.


We Jim milled some clear vertical grain Douglas Fir stock pieces into custom trim with this cool tool! A router bit. (because lets face it, they never let you use the tools if they are around! At least my husband and dad don’t.)

Whenever we go anywhere with a tool department, I am happy to let my hubby buy whatever tools he wants. In fact, I encourage it!
More tools = More awesome projects! (and they say blondes are dumb) wink wink.

The new hearth piece was installed and attached right on top of the old shallow one. We glued in place and clamped it down to dry.

This is what was covered up under the hunter green tiles.

A new hearth frame was built and some chunky, fat trim was installed.

Next the boys did the lined the cavity for the cement to be added in to fill the void and prepare for the tiles to be laid on top.


At this point, we still thought we were going to use the marble. You can read about the marble I bought for the hearth makeover here. You can see some sitting below with all the tools, etc…

We were so excited to have a gorgeous marble hearth! Alas, when we opened the marble up, we discovered we had two completely different lots.
TIP (and note to self): check lot numbers when buying multiples to ensure the color, pattern, etc… matches.
- We loved one – stunning white & grey
- The other not so much – tan and brown. Yuck
That whole story would practically be another whole post so I’ll fast forward to what we ended up with.

Basically I bought what was in stock because Jim was in the zone to get this project done! So it was neutral, in-stock, and we took it home and it was installed the same weekend! Austin helped Jim with the dry fitting stage by running all the cuts out to him, bringing them back in, and putting them where they belonged to be laid.
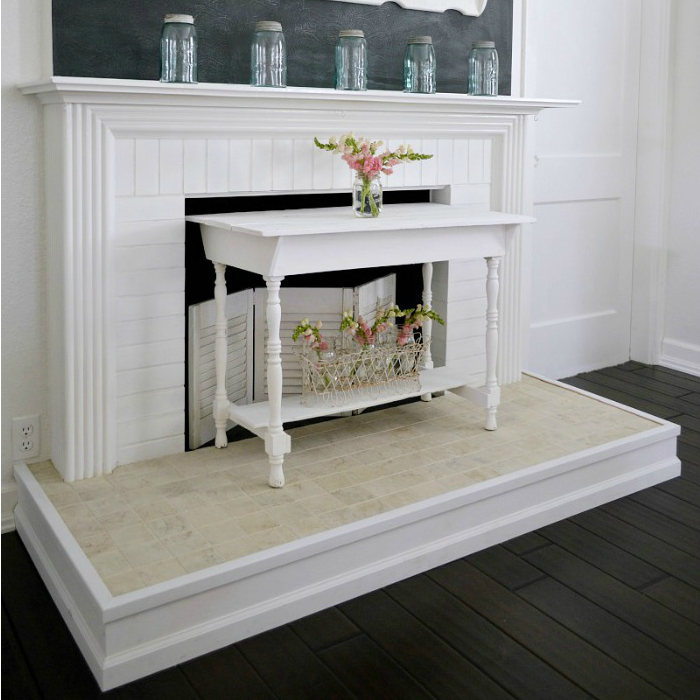
DRY FIT AND WAITING FOR GROUT

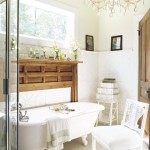
INSTALLED AND GROUTED

After the boys got the new hearth tile installed, it was my job to prime clean/prep, prime all the raw wood and paint.


If you have any questions about how we did anything in particular that I was not clear on, just ask. We will be happy to answer. Thanks a bunch for checking out how we did our DIY fireplace makeover.
I hope it makes you feel like there is hope for yours! xo, Shannon
Chalkboard Painted Fireplace Wall [read here]

How To Paint A Fireplace Firebox [read here]

Spring Mantel [read here]

How We Added Crown Molding [read here]

And our LATEST Update!
A DIY SHIPLAP WALL OVER THE FIREPLACE [click here]


Subscribe for free today to receive all my latest DIY tutorials, decorating ideas, upcoming projects & more, sent right to your in-box!

Join us on our adventures... and let's make our houses "homes" together!
Your email address will never be shared or sold. I promise!


Looks great! Love the wall color too.
-Erin @ DIY On the Cheap
What a transformation! I love it!!
Your mantle renovation is AMAZING. I love the final look, the aqua on the wall is perfect! AND I have to say this reall gives me hope… I don’t have perfect mantle right now…. but someday someday someday maybe I can copy you and DIY one!!! AND sweet friend a special heartfelt thank you for linking up!!! It means a lot to me!
Jaime
It looks great Shannon! Although I find it hard to believe that you didn’t just LOVE that “before” mantle…VERY nice job.
Beautiful Shannon…you know I love everything you do but thank you for sharing at our first linky party and helping us inspire others…xo
What a beautiful new look for your fireplace and mantel and hearth, Shannon–I love what you all did with it!
It is beautiful! Bigger is better 😉 I can’t wait to see her dressed up for fall! What an awesome crew you guys are. There is nothing that Fox Hollow and Company can’t do!!! Love it all!
Debbie
Looks awesome. Love the colors and the tile looks perfect. Great job by all!
Blessings, Ginger
gurl…that is a stunning makeover!!! Absolutely perfect!! I agree..let him buy whateva!!!!! 🙂
It’s gorgeous Shannon! The white brick is fab and I am so jealous of your nice fat mantel!!!
Hold on a second while I pick my jaw up off the ground. HOLY WHITE AQUA SMOKERS SHANNON! This Fireplace is a Beaut! The tile you picked out is perfect, paint on the wall…stunning screaming awesome! I love everything about this fat mantel! Everything..feed it some m&m’s because it deserves them! 🙂
WOW, WOW and WOW!! I didn’t even know you could do something like this to make an existing mantle bigger! I have a skinny minny of a mantle too. It is chunky vertically, but does me no good for decorating, so I sort of pretend it is not there….kind of like the unfinished projects that live all over my home.
The new tile work is gorgeous, just gorgeous. You are lucky you have a talented carpenter right there in your home!
I am really confused though, why did you paint that lovely Green and Red over? Truly, people have some interesting decorating choices! 😉
looks fabulous, love the aqua, love the clock in the frame!
Wow! What a GORGEOUS difference. Can’t believe it was the same fireplace & mantel.
Now THAT is a Shannon mantel. All pretty, wearing the appropriate colors, happy and fresh!
That makes it Shannonized.
~Bliss~