Diy Home Decor: Cheater Art Tutorial
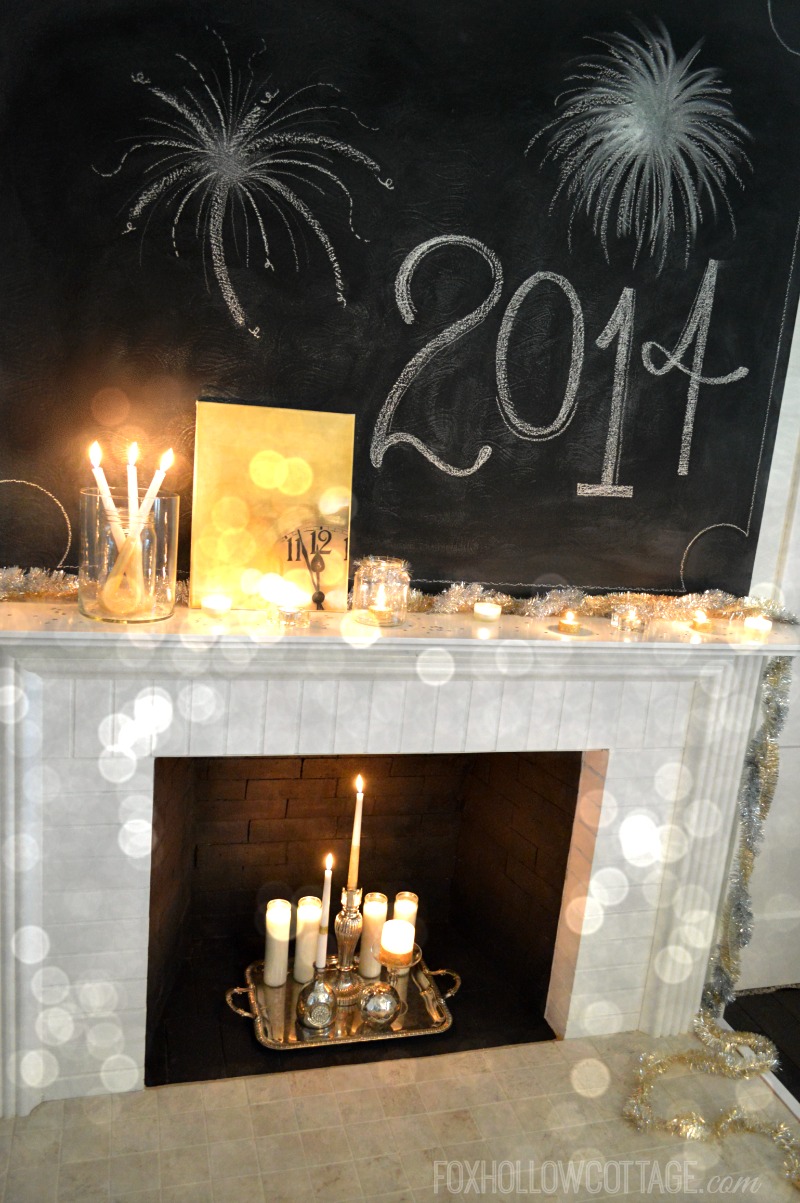
I recently shared my New Year’s Eve mantel with you and I promised to share how I made the art I decorated it with so here I am. Adding a bit of art here and there, like canvas prints Australia, can really spruce up your home decor!
I wanted a sort of understated focus to anchor the mantel. And of course it need to be relatively easy… and cheap always factors in! So, I messed around and ended up with what you see.
It was really easy and I loved the results so I thought I had better share!
I don’t know that it’s anything Earth shattering, but I had a great time making it and was pretty pleased with how it turned out. It was simple, didn’t cost much and I wasn’t stressed while I did it. It was surprisingly relaxing in fact.
My mom’s mom was a talented artist. Like oil painting talented (among other skills) and even though I was just cheating… simply having the brush in my hand, I felt a flood of memories of my time with her. Which was a lot. She and I were very close. She had a room in her home she used as a studio and lots of images of that room and the paintings she created flitted across my mind. I made this very early in the morning, while the boys were both still sleeping. It was very peaceful.
Okay, enough nostalgia… sorry. Back to my cheating ways!!
If you want to be a cheater too, come on…
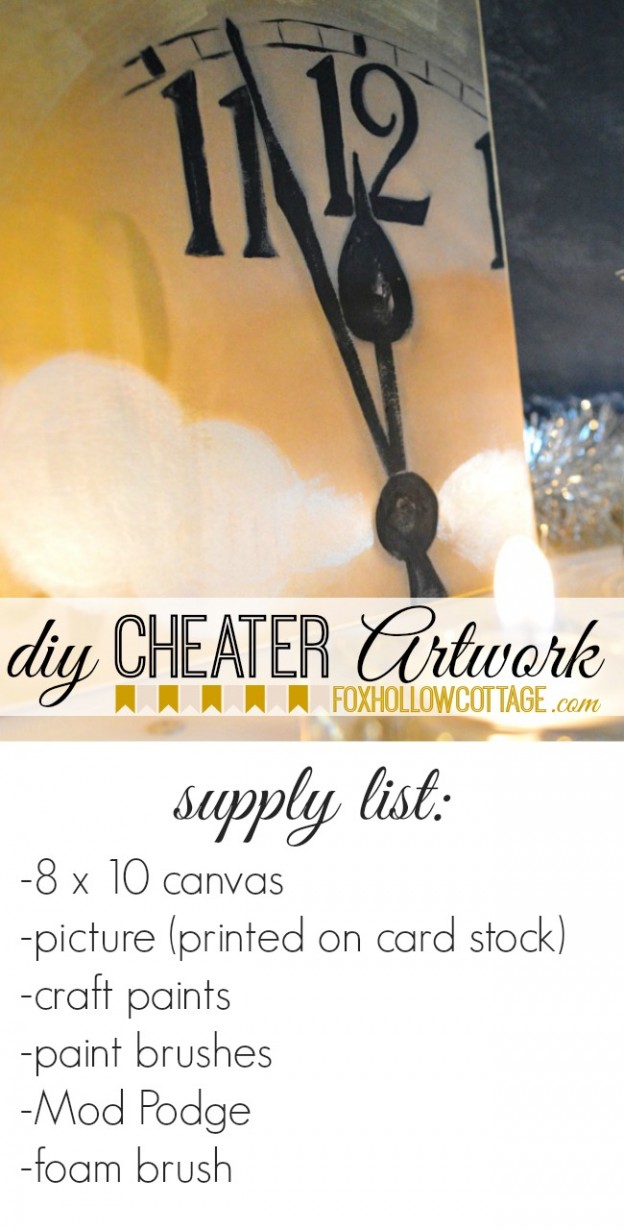
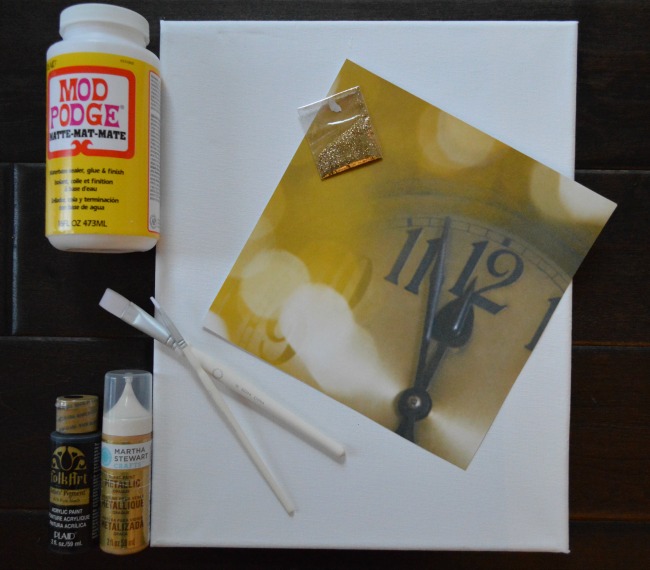 (Select supplies pictured. I didn’t end up using the glitter, so disregard that) Shocker right!?
After you gather your supplies, do this:
1. Print a photo you wish to enhance onto cardstock weight paper.
2. Paint your canvas with a base coat/color you think will best blend or accent the picture your printed out. Let dry thoroughly. Mine sat overnight.
3. Cut or manipulate your photo to size. Torn edges might add a pleasing effect.
4. With foam brush, apply Mod Podge or Decoupage type medium to the area you wish the photo to cover.
5. Place photo onto Mod Podge covered area. Press down and smooth.
5. Lightly brush over the edges of the photo too, to seal them to the canvas. Let dry.
6. This is where I began applying paint to the photo and blending it to the canvas. My photo sort of faded into nothing at the edges, so it was perfect. I matched the colors to my canvas and started blending the two, so the line between canvas and photo would blur.
7. This is where the FUN starts! Select areas to highlight and enhance! I brushed on gold metallic paint, champagne pearl and enhanced the strength of the black clock face features. It’s sort of like outlining when you were a kid and you colored.

This is the photo I used. You can see how much more layered and alive it looks and how the clock features are much bolder.
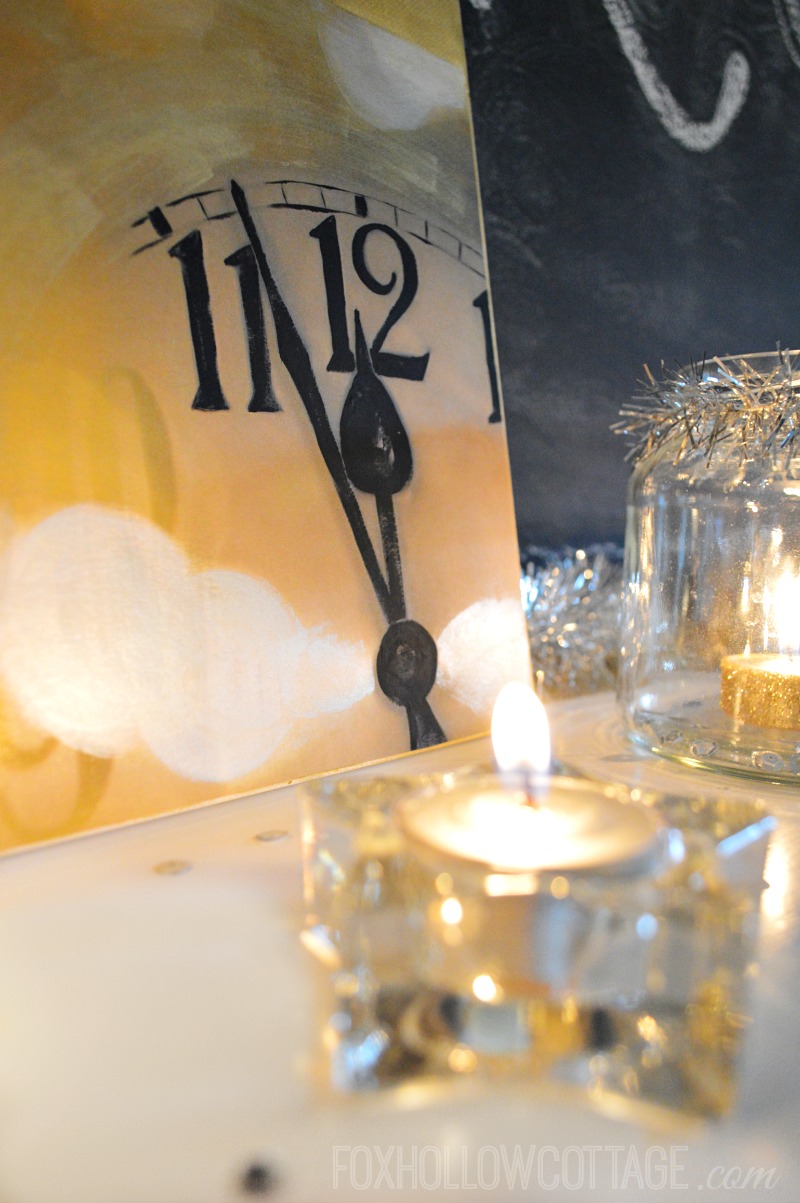
It’s much prettier in person and more textural. The metallic and pearl paints add a shimmer that is incredible! You can just see the brush strokes in the gold section above, where I feathered the paint on.
I hope you found this interesting and that it might be something you’d like to try. I will continue to share affordable decorating ideas in the new year and as I stretch to learn new things and challenge myself in ways both big and small, I will make sure and share my experiences here with you.
I’m so glad you join me!

Diy Home Decor: Cheater Art Tutorial


More Ideas & Inspiration
 Pop, Fizz, Clink! Easy New Year’s Eve Ideas
 Spring Bird Art: diy custom home decor
 New Year’s Eve Diy Decorating Ideas
 Simple Serving Tray – A Coastal Home Decor DIY
 How To Make Pallet Wood into A Round Circle Shape
 DIY Thanksgiving Table with Gold Feather Polka Dot Place Cards
 DIY Thanksgiving Home Decor (pillow + placemats)
 Cottage Style Decorating with Shabby Vintage Garlands
Your all photos are fabulous – everything looks beautiful as always. I was signed up to take a topiary workshop at Sung Harbor Farm earlier this month but couldn’t make the drive as a huge storm arrived the night before. I will certainly pick up a copy of the magazine – that might be all the instruction I need! decorating with home
Great project, Shannon! Happy New Year to you!
xo Heidi
happy New Year to YOU too Heidi. I hope 2014 is rocking for us all!!
Perfect, as always! Happy New Year!