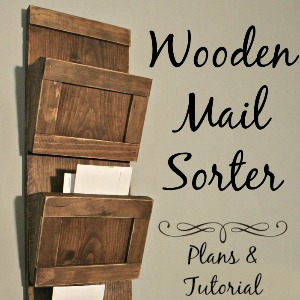
Get Organized: Diy Wood Mail Sorter Plans and Tutorial
Hello, all my Fox Hollow Cottage friends! My name is Candace and I blog over at Vintage News Junkie. I am an Emmy Award winning former news gal who now has a DIY/Home blog chock full of fun crafts, lots of home projects, and tutorial videos to boot! If you listen close enough, you may just hear the click of the clapperboard amidst the sawing and sanding of our latest project!

It’s that time of year… time to pack up all the Christmas decor and get things organized for the new year! Doesn’t it feel good? I love getting things all cleaned up after the hustle bustle of the holidays… and today I’m starting with the big pile of mail on the kitchen table. You have a pile like this too, right??
If you follow my blog, you know I like chunky stuff! Chunky furniture, chunky jewelry, chunky peanut butter. Okay, I digress. And the more rustic the better! I searched and searched for a mail sorter that fit the bill. (no pun intended!) But just couldn’t find one… so the hubs and I decided to make one! And I’ve got the build plan so you can make one too!!

Here’s what you need to buy at the hardware store:
1- 1″ x 8′ x 10′ whitewood board 3- 3/8″ x 2″ x 36″ whitewood strips 3 coat hooks 1 sawtooth hook (hanger)Here are the cuts you need to make:
1- 36″ x 9¼” (back of sorter) 3- 9¼” x 7″ (front facing) 6- 6¼” x 2 5/8″ x 6¾” (triangle braces) 7- 9¼” x 1½” (long framing) 6- 4″ x 1½” (short framing)
Start by attaching your triangle braces to the back of your facings on all three pieces. These will be your mail slots. We attached all of our pieces of wood using a little wood glue and a nail to hold it in place.

Then once you have your mail slots built, attach your framing to the front. Four pieces to each mail slot.

You can go ahead and attach your extra piece of framing to the very top of your long board. That will be the top of your mail sorter. And then stain all of your pieces. You want to stain it now, because once you put it together, you won’t be able to get down in the crevases behind the mail slots.

I use a foam brush to apply my stain. I wanted a dark rich color so I went with Rustoleum stain in Dark Walnut. I applied the stain, let it sit for about 3 minutes or so and then wiped off the excess. Then once it was dry, a light sanding around the edges gives her the finish I wanted. Then it was time to put her togther!
The back of our mail sorter is 3 feet long, so to make sure our mail slots are evenly spaced, take a piece of chalk and mark on your board at 5″, 14½” and 24½”. This is where you will place your mail slots so they are evenly spaced and will allow enough room at the bottom for your hooks! Place the bottom of each mail slot on your marks and attach. We use our Ryobi AirStrike Nailer, but a good old fashion hammer and nails would do the trick too!

I’m an eye-baller when it comes to something like the hooks… I just put the hooks where I thought they looked good and drilled a couple pilot holes. Then popped the hooks in place!

A simple sawtooth hook on the back is how we hung our mail sorter. Make sure you get a stout one… your mail sorter will be heavy! So what do you think?

Chunky and rustic… just the way I like it.


This was my first ever build tutorial, so if I left something out or you have any questions… let’s chat over on Facebook! I am here for YOU, friend! And if you like building things, you will love our DIY Kitchen Shutters… we made them from IKEA bed slats! I know, right?!

Or if you want something a little softer for your space… I whipped up a Ruffly Burlap Wreath that seems to be a hit! There’s even a video tutorial!! You can catch all of my video tutorials by subscribing to my YouTube channel. And be sure to follow along on Facebook and Pinterest for inspiration and DIY tutorials!
Thank you, Shannon, for inviting me to meet your friends today! It has been a blast! And I sure hope to see some of you over at Vintage News Junkie soon!
Until next time,
Candace
Get Organized: Diy Wood Mail Sorter Plans and Tutorial


More Ideas & Inspiration
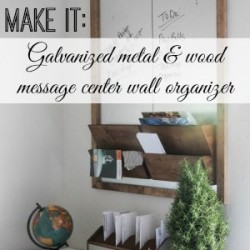 Diy Office Wall Organizer Message Center Tutorial
  20 Ways to Make Thanksgiving Extra Special
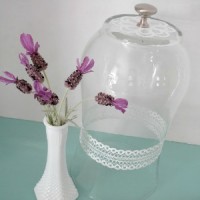 DIY a Glass Vase into a Cloche
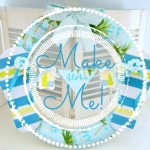 Pool Noodle Wreath Tutorial {a diy craft}
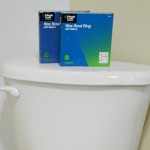 How To Replace A Toilet Wax Ring
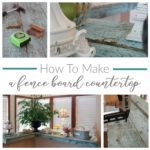 How To Make A Wood Fence Board Countertop
 Burlap Easter Bunny Ear and Butterfly Napkin Ring Tutorial
 Project Linen Closet – Clean and Organize
I have been looking everywhere for something like this but nobody seems to have rustic looking ones. Great instructions! I want it for my front door so I may even try leaving the top one off and adding a little mirror 🙂
Isn’t that neat!? I love the vertical aspect. Would fit about anywhere 🙂
I love her shutters! I would love to try those.
Thanks for sharing.
God Bless
Thank you, Shirley!! You should make some!! They really are a snap to whip up! I’m so glad you stopped by! Hope to see you again, soon! 🙂