How To Install Shiplap Over A Concrete Wall
This post is a tutorial on how we installed a new wood sub wall over a poured in place solid concrete wall. If you are working with a concrete wall that you want to be able to nail into, that has imperfections, needs to be level, or you need to cover odd things like gaps, holes, openings or maybe even old wood windows — this fix might work for you! We used our new plywood base to enable us to install shiplap over a concrete wall. Below you’ll find a full material & tools list, along with the method that worked for us.
Hey Foxes!! I promised to share the really ugly before (I know, this house had so many) of what our poured in place concrete wall looked like before the new shiplap wall was installed, and here it is!
[twenty20 img1=”23166″ img2=”23172″ offset=”0.5″]
The before actually looks a tiny bit worse than how we were living with it, because Jim removed the covers from the old, non functioning duct work holes to put up all the furring strips and had those up before I grabbed a shot. So I didn’t get a 100% accurate before, but you can see it was bad.
I also had a massive armoire in front of this space for years, that effectively covered the entire window from view. The other side of the wall is our private den, which normally has a curtain, but I had poster board acting as a makeshift block for light transfer for the “during” stage of the project.
You know that old saying — out of sight, out of mind.

In order to have a smooth, level, even surface to install our shiplap wall. Or any wall treatment for that matter, we needed to start with something new. We knew we wanted to be able to nail our shiplap onto the wall, so we decided on plywood.
NOTE: If you simply want to paint or wallpaper and need a smooth even surface, you could use the same furring method and install sheet rock instead of plywood. If you wanted a wider gap in your “shiplap” you could also fur out the wall, and simply use T1 11 siding. It depends on your personal taste and the final look your want.
WHAT YOU WILL NEED:
- First determine your work area size and your width and height needed.
- Furring strips, to length and quantity. We used 1 X 2 size. We ripped our own, and spaced ours at one every foot.
- Plywood. We used 1/4 inch thick plywood.
- Ram Set & power loads
- Brad nailer & nails — 3/4 in. nails for plywood to furring strips – 1/4 in. nails for shiplap to plywood attachment
- Table Saw (if you rip your own furring strips)
- Miter Saw/Chop saw, for cutting furring strips to length
- Level
- Tape measure
- Finish lumber/moulding to taste and needs. We used a corner piece for the left, and quarter round for the right.
- Nail hole filler — wood putty or Red Devil OneTime
- Putty knife
- Primer
IMPORTANT NOTE: Make sure to prime your plywood with the color you want to show thru for the gaps in your shiplap!
HOW TO BUILD A WOOD SUB WALL:
- Start with a clean, as level as possible surface. Grind down any extreme high points, remove obstructions.
NOTE: We had a window to contend with, so we added lumber to that first, in order to have something supportive to install the furring strips into.
- Use your Ram Set to install furring strips to the concrete wall.
- We installed our side pieces first, then the top and bottom pieces.
- Always continually check for level as you go!
- Next fill in with your vertical furring strips, again, we placed one every foot/12 inches.
- Prior to installing your plywood, pre-cut holes in your plywood for your outlets, electrical boxes, etc..
- Measure and cut plywood to fit your wall space.
- Install your plywood. We installed ours horizontally for fit purposes.
-
For shiplap tutorial [click here]
Now you have a smooth surface to work with!

Jim was so fast… he started installing the shiplap boards and I had to grab a picture of the completed plywood sub wall before he was done!
For the SHIPLAP installation portion
of the project, please see this post [CLICK HERE]

We used the same exact materials & method for the bedroom shiplap, as we did for our shiplap fireplace project. I feel like it creates good continuity throughout the house that they look the same.

If you want to see the NEW bedroom, and how we made-over a concrete box on a really small budget… come on over!
NEW BEDROOM RETREAT REVEAL [click here]

If you have any questions about this project, I’d be happy to answer them for you! Just give me a shout and I’ll get back to you ASAP.
In closing… I just have to say that I felt like it was really important to share our 100% honest before, now more than ever. It’s so easy to feel like what you have is less than, especially now, when we can see so much. It can be easy to get discouraged by all the pretty & perfect out there. I’m hoping if you’ve got a tough area to work on, or it takes you awhile to get there, that this raw before might make you feel a smidge better.
We’ve lived in apartments, a vintage home, a townhouse, a manufactured home, a brand new-build home, a dream home, and this funky little cottage bungalow. And in my experience, making your house a home by filling it with love is the most important DIY you can do. xo Shan

PS: When we get a chance, we plan to do the exact same thing on the den side. I think I’ll pop a little note inside like a time capsule, and we will seal that sucker up! LOL


More Ideas & Inspiration
 Simple Shiplap: How To DIY a Planked Wall with No Nails
 How To Install a DIY Paver Path
 How To Makeover A Bathroom Without Remodeling
 Easy DIY Plantation Shutter Installation
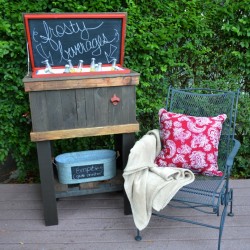 How To Build A Wood Deck Cooler
 Fence Board Planked Wall How To
 How To Fix Paint Bleed Through And Cover Stains
 How To Make A Wood Fence Board Countertop
Question how do you prevent moisture /mold when plywood is put over cement wall thanks
Hi Linda. It’s an interior wall, otherwise we’d have needed a moisture barrier. Great question!