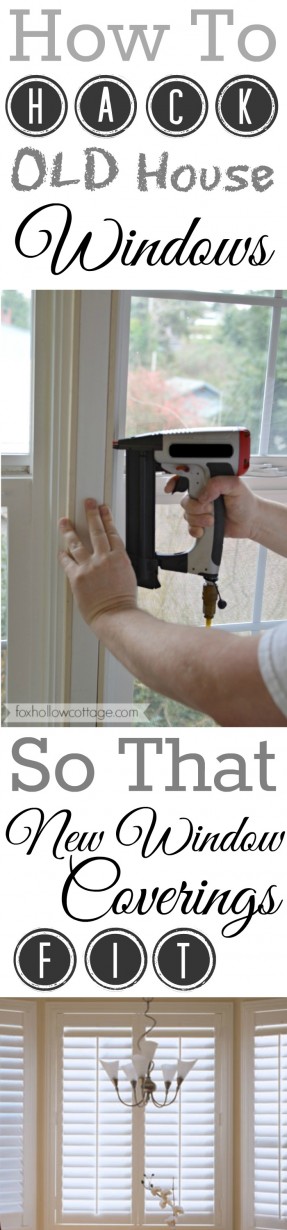
How To Make NEW Plantation Shutters Fit OLD House Windows
Do you have an old house? Non-standard window sizes? Windows that aren’t square?
Oh, and maybe some window trim that makes nothing fit?
Well then, welcome to my world.

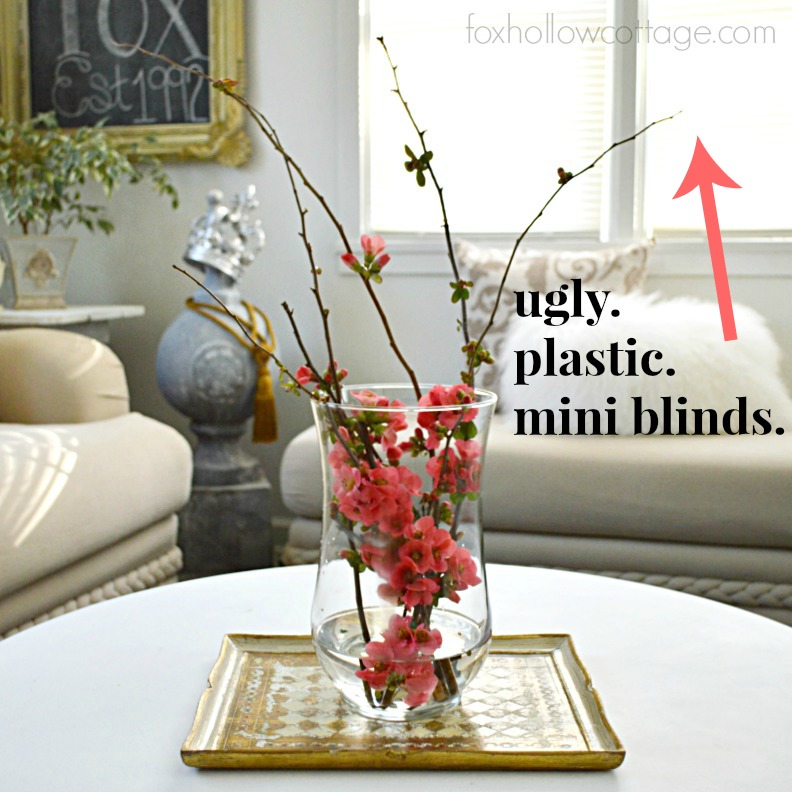
If any or all of the problems I listed above apply to you, you know how frustrating it can be to find anything other than curtains that will fit your windows properly. I know I was so frustrated, that I settled for having ill-fitting, cheap, plastic mini blinds on my windows for longer than I care to recall. Well no longer! We have new Norman Woodlore shutters on order with blinds.com and in order for them to fit properly we had to make a few adjustments to a set of our windows. Don’t worry, we spoke at length with a designer, sent photos and discussed the fix in depth before we ordered. When we sent the measurements they reflected the changes we were making.
Since we found a fix that worked for us we wanted to share it in case it might work for you too.
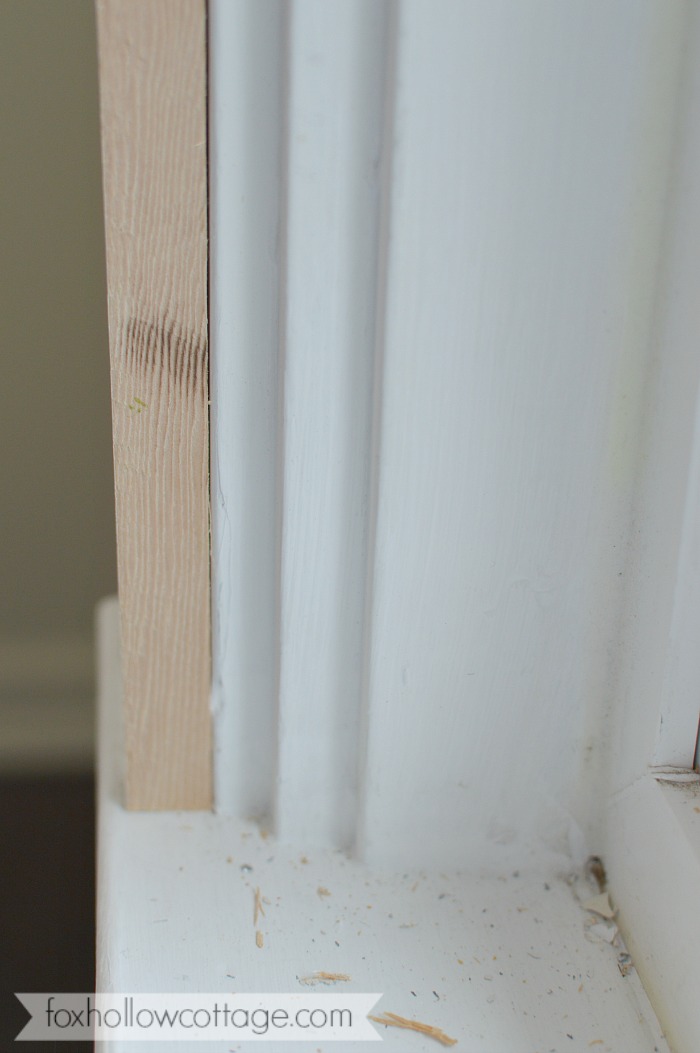
I’ll start with our problem: Our windows have several stair steps of trim that keep us from being able to properly mount the Plantation Shutters we want (and basically anything else as well).
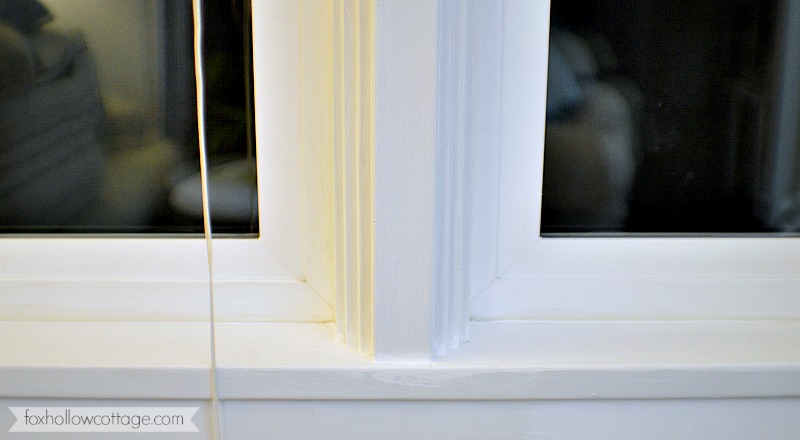
Stair Step Trim
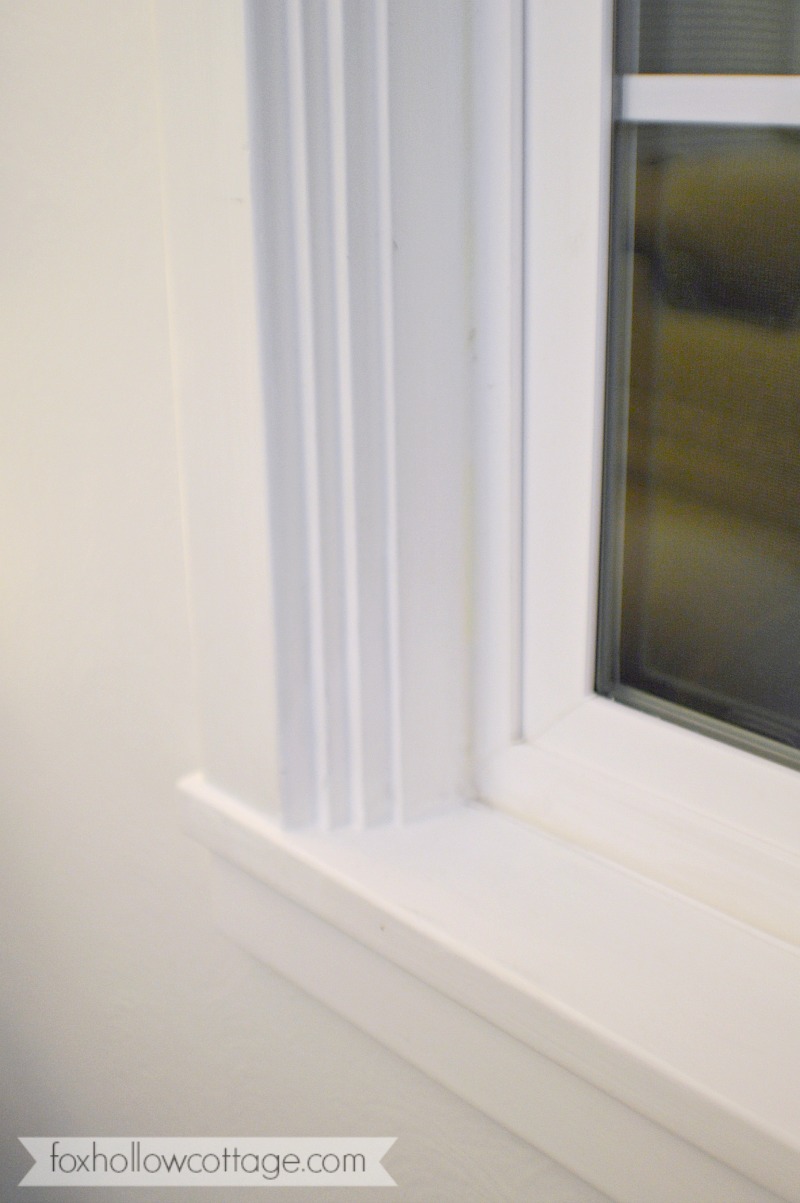
For an outside mount, the shutters require a certain amount of clearance between where the shutter frame sits on the outside window trim and the window sill for the louvers to be able to open and close. I’ve pointed out below we have three levels of additional trim. Which is normally pretty. It just happens to hinder mounting window hardware and in this case, the louvers being able to open.
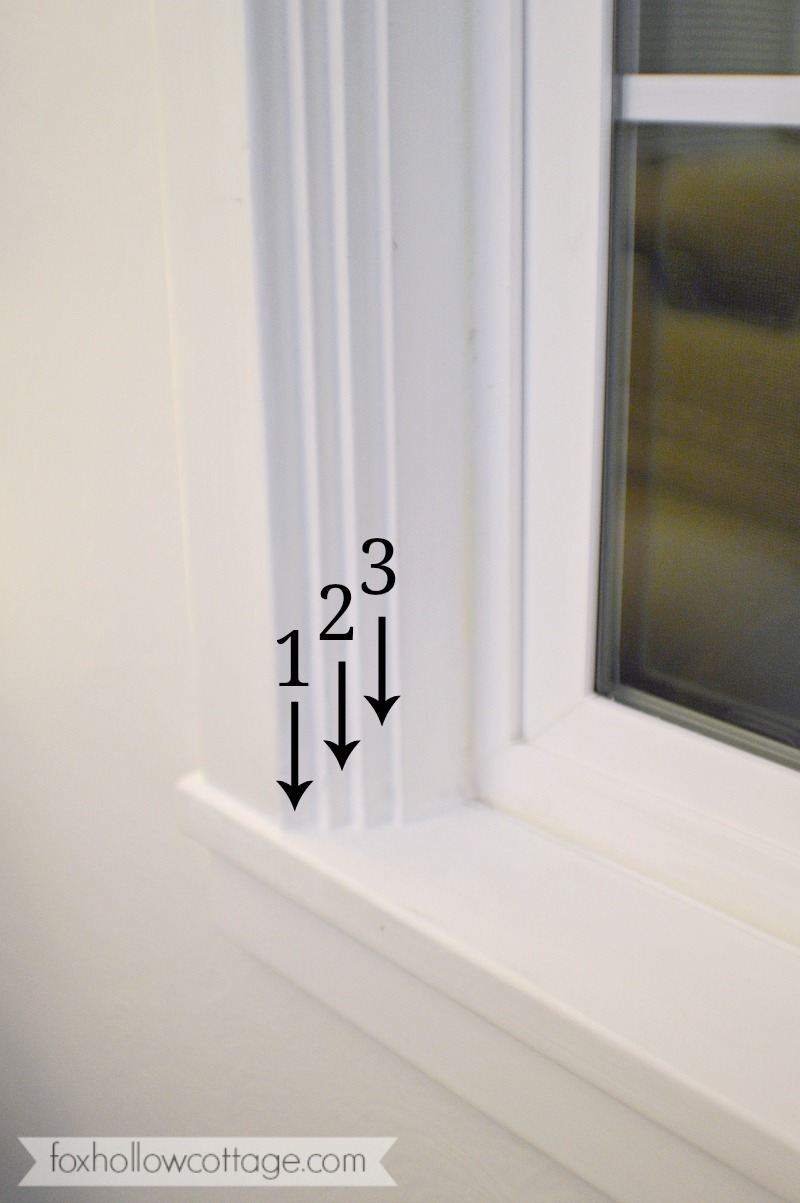
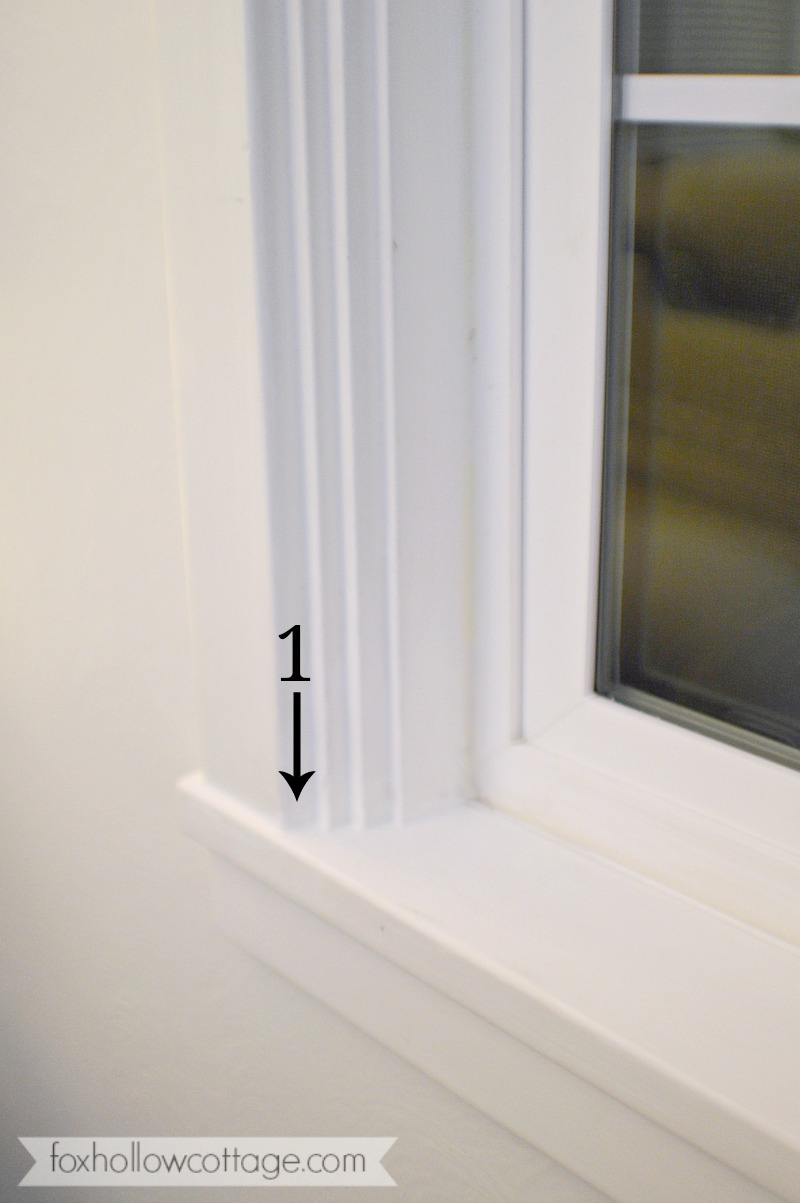
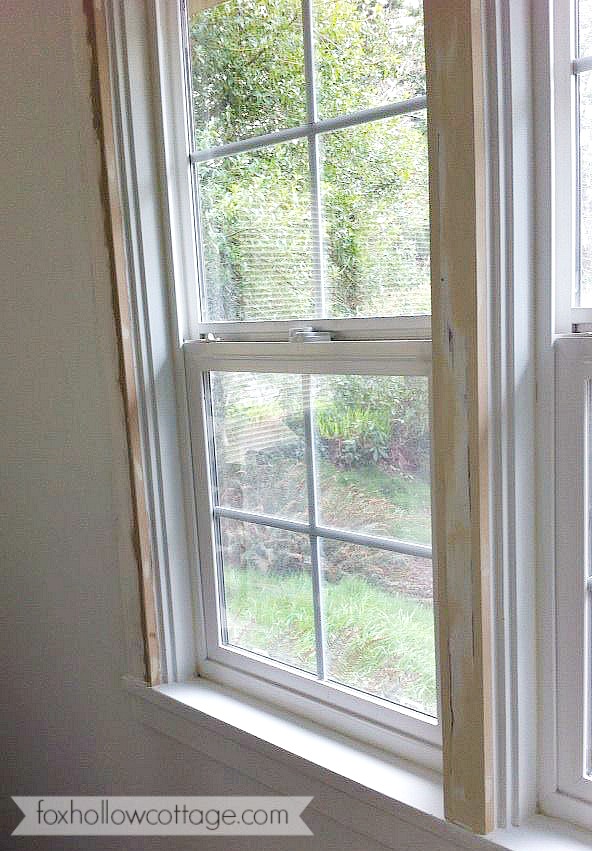
We need to delete the very first step, the number one step, to give the louvers proper clearance.
*Stair steps within the window sill area can also eat away at the depth you have for inside mount window coverings as well and our fix could remedy that too if executed properly. In fact, if we were not getting an outside mount shutter, we would be ding that, as our interior mount surface is so shallow, nothing fits our window. Even the skimpy blinds we had jutted out. Not pretty.
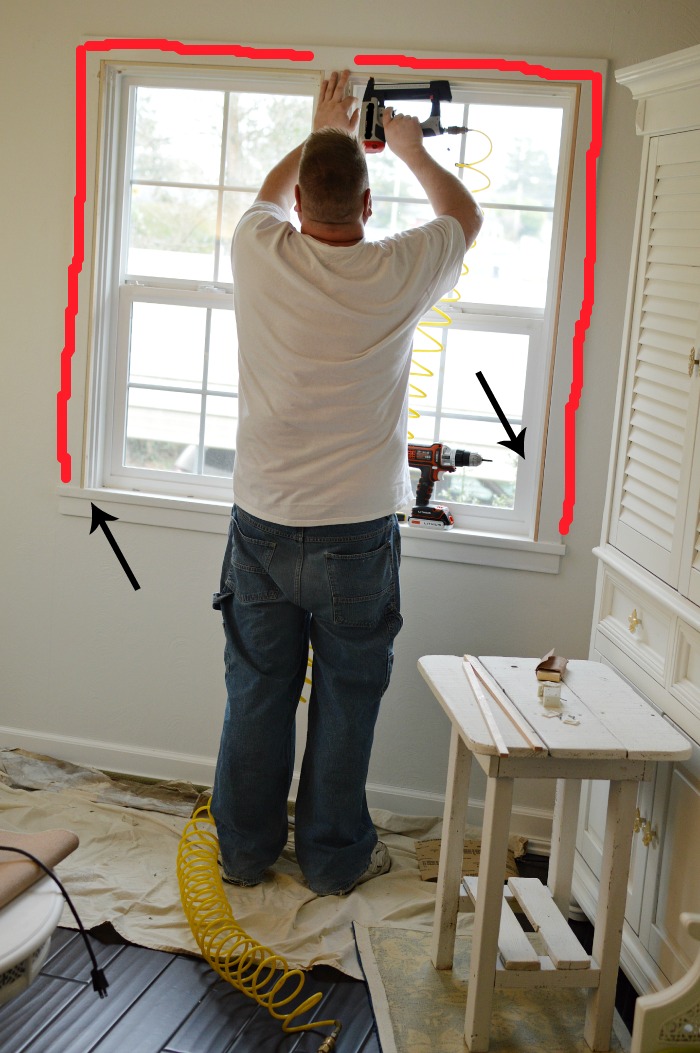
The full window encases two separate windows trimmed out and joined together as one. There is stair step trim on both sides and the top of the windows including the center split.
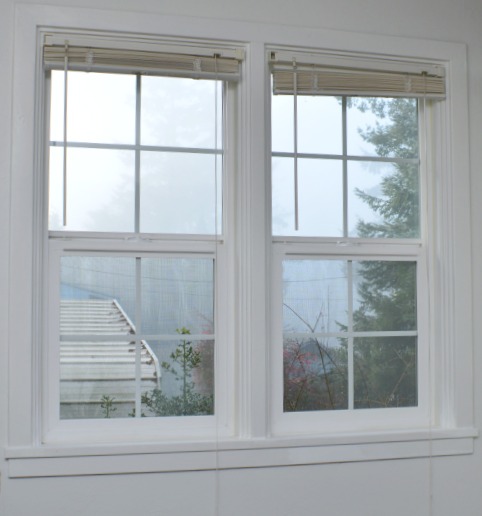
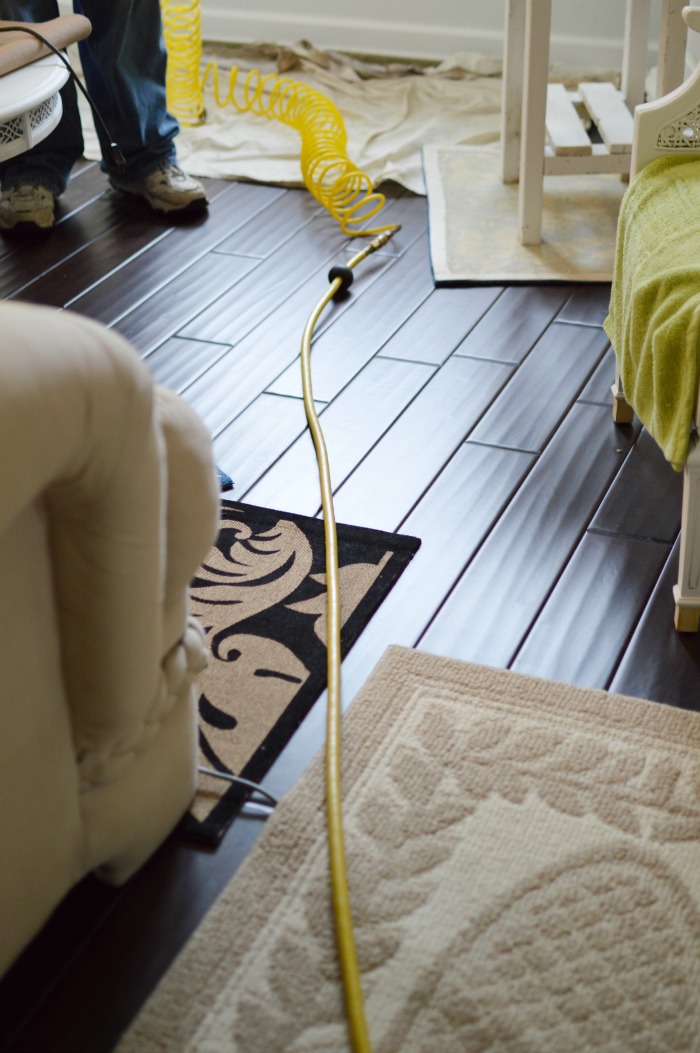
You may not have noticed the mini blinds much in past posts, but trust me, they stick out like a sore thumb! It’s going to be so nice to have the pretty new floors topped off with the new shutters.
HOW WE FIXED IT:
We meaning Jim (the hub). It’s not that I couldn’t manage to rip a few fill strips, nail them in, apply wood putty, sand, check to see if more putty is needed and then do a final sand. But it’s not my job. So I let Jimmy do it.
Actually, I believe I was still transferring the contents of the home decor storage room to it’s new location while he was working on it. All 497 thousand and 1 things. So my hands were a bit full!
Remember, I like to tear up lots of stuff all at once.
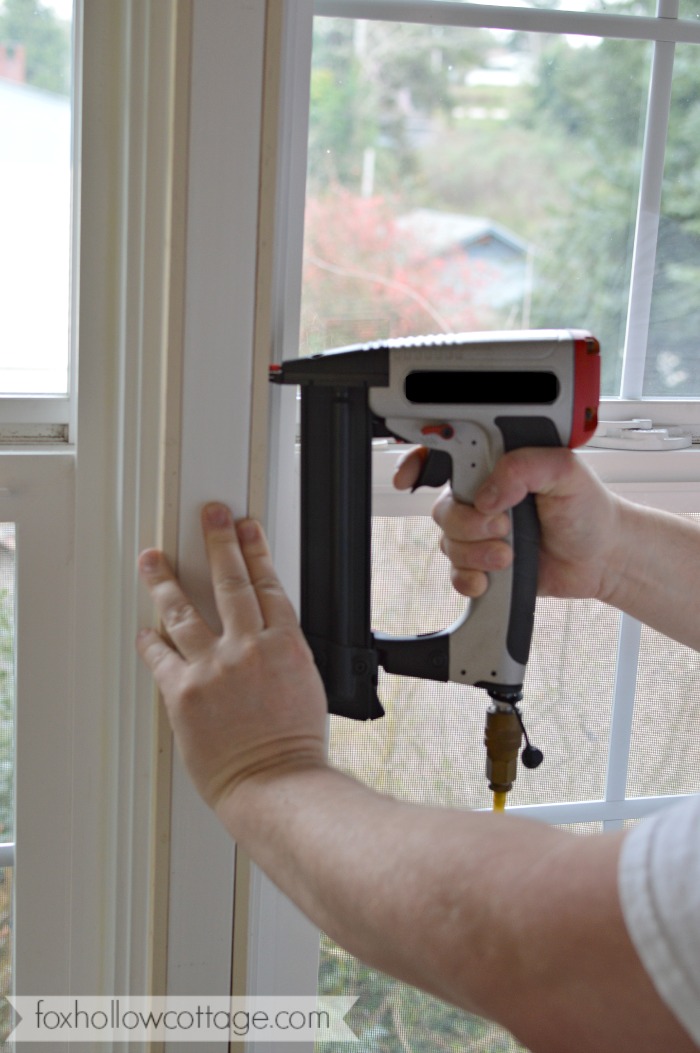
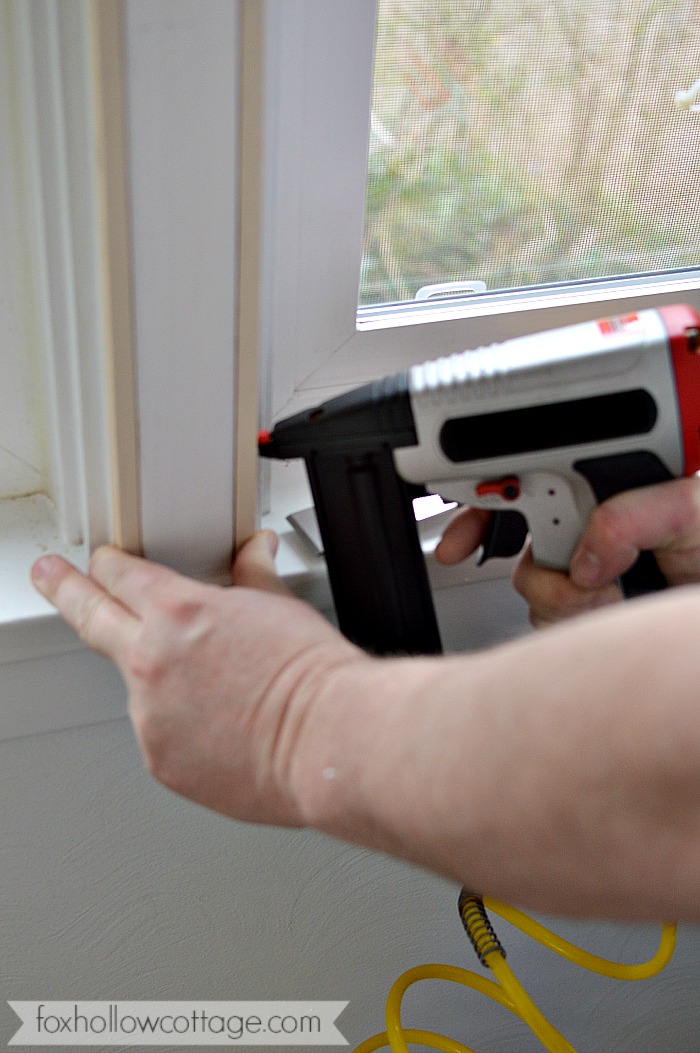
Here are some easy to follow photos for you. We needed to fill in that first step I highlighted earlier.
STEP ONE – Jim took measurements and ripped some lumber to fill in that void. We used a medium hardwood for this.
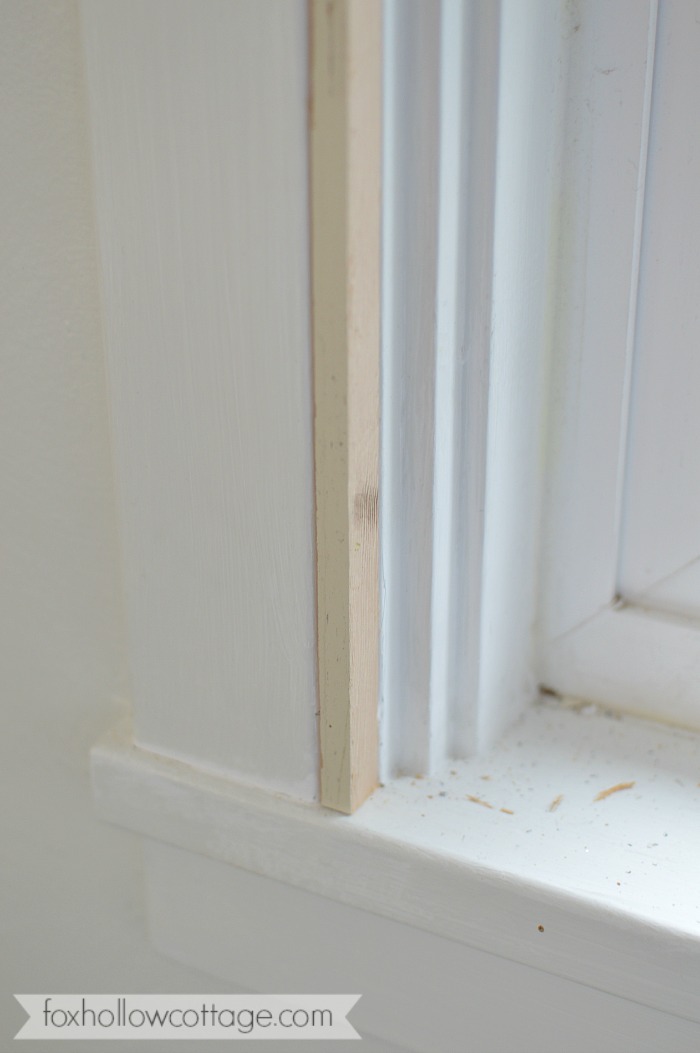
STEP TWO: Affix the fill sticks to the voided space with a nailer. Nail size will depend on the size of the fill sticks you require so I will not record a nail size here. You can use a finish nailer, but a hammer and nails will work too!
For extra hold, you could also back the fill stick with a liquid nails type product for added hold if you felt that would be an issue. We nailed a pretty hard wood, into hardwood and didn’t feel it an issue.
TIP – If you use a hammer and nails, make sure to pick up a “Nail Set”. This is a handy little tool that lets you counter sink a nail just below the surface you are nailing into. Then use wood putty to fill the hole, sand, prime and paint for a flawless finish.
Oh, you noticed my no-name nailer? Yeah. Hold a grudge much? I sure do. Blacked that manufacturer name right out! You might still recognize it, but I will not soon forget having our table saw catch fire when we were trying to finish our floors and how that was handled.
Speaking of… Our RYOBI table saw is working like a champ. I know, I’m rotten {grins}.
High on our (my) DIY Dream List is a Ryobi 18V Brad Nailer – It would make ME diy’ing much easier. I don’t know how to set the air compressor so if Jim isn’t home to turn it on and and set it to the right pressure, I won’t use it.

A cordless version would be perfect for me. Plus, I don’t want those hoses in my house. On my new floors. No, no, no!
STEP THREE – Fill with wood putty. A putty knife and wood putty are used to fill in the spaces between the existing trim and the raw wood filler pieces. Apply and let dry according to brand directions.
STEP FOUR – Sand to smooth. We used a palm sander with a 100 grit paper. It was butter smooth when we were done! Hand sanding work too if you don’t have an electric sander.
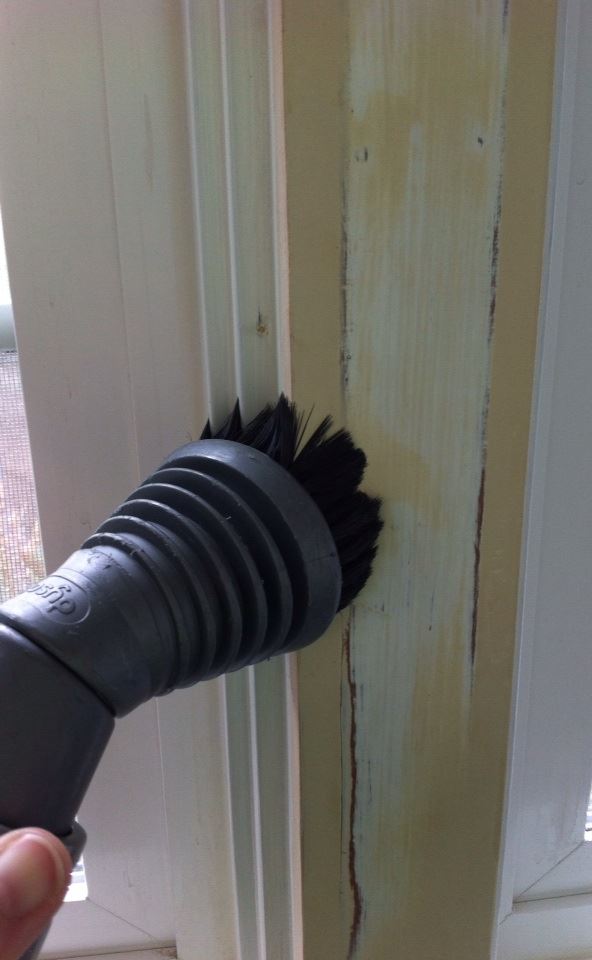
STEP FIVE – Prep for paint. Prepare your area for paint by thoroughly removing any and all debris and dust. I’ve got a hard working Dyson. I cleaned and prepped the area with the brush attachment. It removed every speck of dust. You can use a tack cloth as well, but I didn’t find it necessary.
STEP FIVE – Tape off your freshly painted walls. You don’t want to have to touch them up when you get your trim color on them! Make sure to protect your surfaces by putting down tarps, etc…
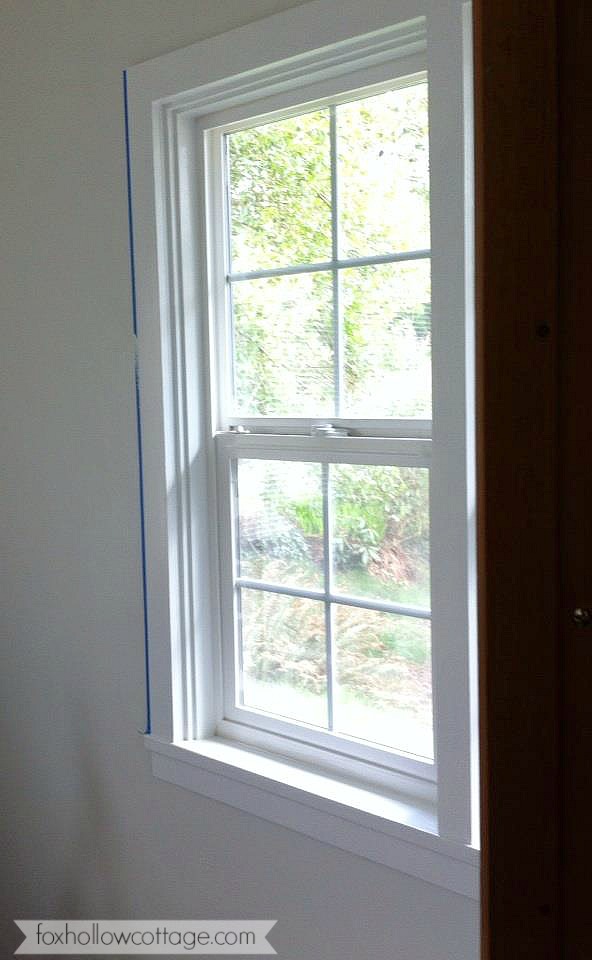
STEP SIX – Prime and paint. Prime to prepare the raw wood and wood putty to better accept your paint. Paint with product of choice. Stand back and admire the missing #1 stair step. Yay!!

The next time you see the word Plantation Shutters here are FHC, it should have the word REVEAL somewhere along with it! Since it’s getting so close now, I’m feeling more excited. Things often feel surreal to me. Even now, months later… I still can’t believe we have beautiful wood floors. I’m not certain why, but I’ve always sort of been that way.


If you like this post – Please pin and share – Thanks!!


Subscribe for free today to receive all my latest DIY tutorials, decorating ideas, upcoming projects & more, sent right to your in-box!

Join us on our adventures... and let's make our houses "homes" together!
Your email address will never be shared or sold. I promise!
More Ideas & Inspiration
 Before And After White House Paint Reveal
 Easy DIY Plantation Shutter Installation
 Aqua Blue Painted Interior Door
 Did You Know You Can Wax Raw Wood?
 Simple Shiplap: How To DIY a Planked Wall with No Nails
 Fence Board Planked Wall How To
 Simple Kitchen Organizing Ideas and Tips
 Little Cottage Exterior Paint + Dutch Door Reveal
I totally relate to that surreal feeling. And I can’t wait to see your shutters!
I know you do (: Pinch us right!?
Nice butt Jimmy baby, opps, I mean nice job on the trim Jim.
Wow! Can’t wait to see the “reveal”! It’s gonna look fabulous!!! Kudos to your hubby! Is he for hire??!! LOL!!~~Angela
I never would have thought of that. I’m taking notes for when I finally get to have some window treatments in the fall..you know…after I get windows. Oh my gosh, Shan, I’m SO excited for you! Can’t wait to see them!
What a great idea, now I can’t wait for the blinds to arrive :)!!
Have a great day,
Debbie
That is a lot of hard work..nice that Mr. Jim can do that. Great to have a handy clever Man around!