How To Replace A Toilet Wax Ring
When it comes to your toilet, the wax ring seal is one of the most important components. The wax ring connects the toilet to the pipes beneath it and helps to keep the area around the base clean and sanitary be creating a waterproof barrier seal. Though it’s not a fun job, replacing a wax seal on a toilet is relatively easy, and we’ll tell you what you need and how to do it!

Fun right? Wee.
Butt we all use them…
We really needed to replace the wax ring on our toilet and I thought you might need a quick how-to, so I thought it would be a great place to start. It’s actually pretty simple. We’ve done it several times. We like to put new toilets in whenever we move into a new house. We’ve moved lots. It adds up.
How To Replace The Wax Ring On A Toilet
When it comes to your toilet, the wax ring seal is one of the most important components. This ring connects the toilet to the pipes beneath it and helps to keep the area around the base clean and sanitary. If you smell bad odors or find water seeping out at the base of the toilet, you may need to replace the wax ring seal.
Tools You Will Need
Before you begin, you will need a few tools handy to change out the wax ring seal:
-
Wrench
-
Rubber Gloves
-
Rubbing Alcohol
-
Rags
-
WD-40
-
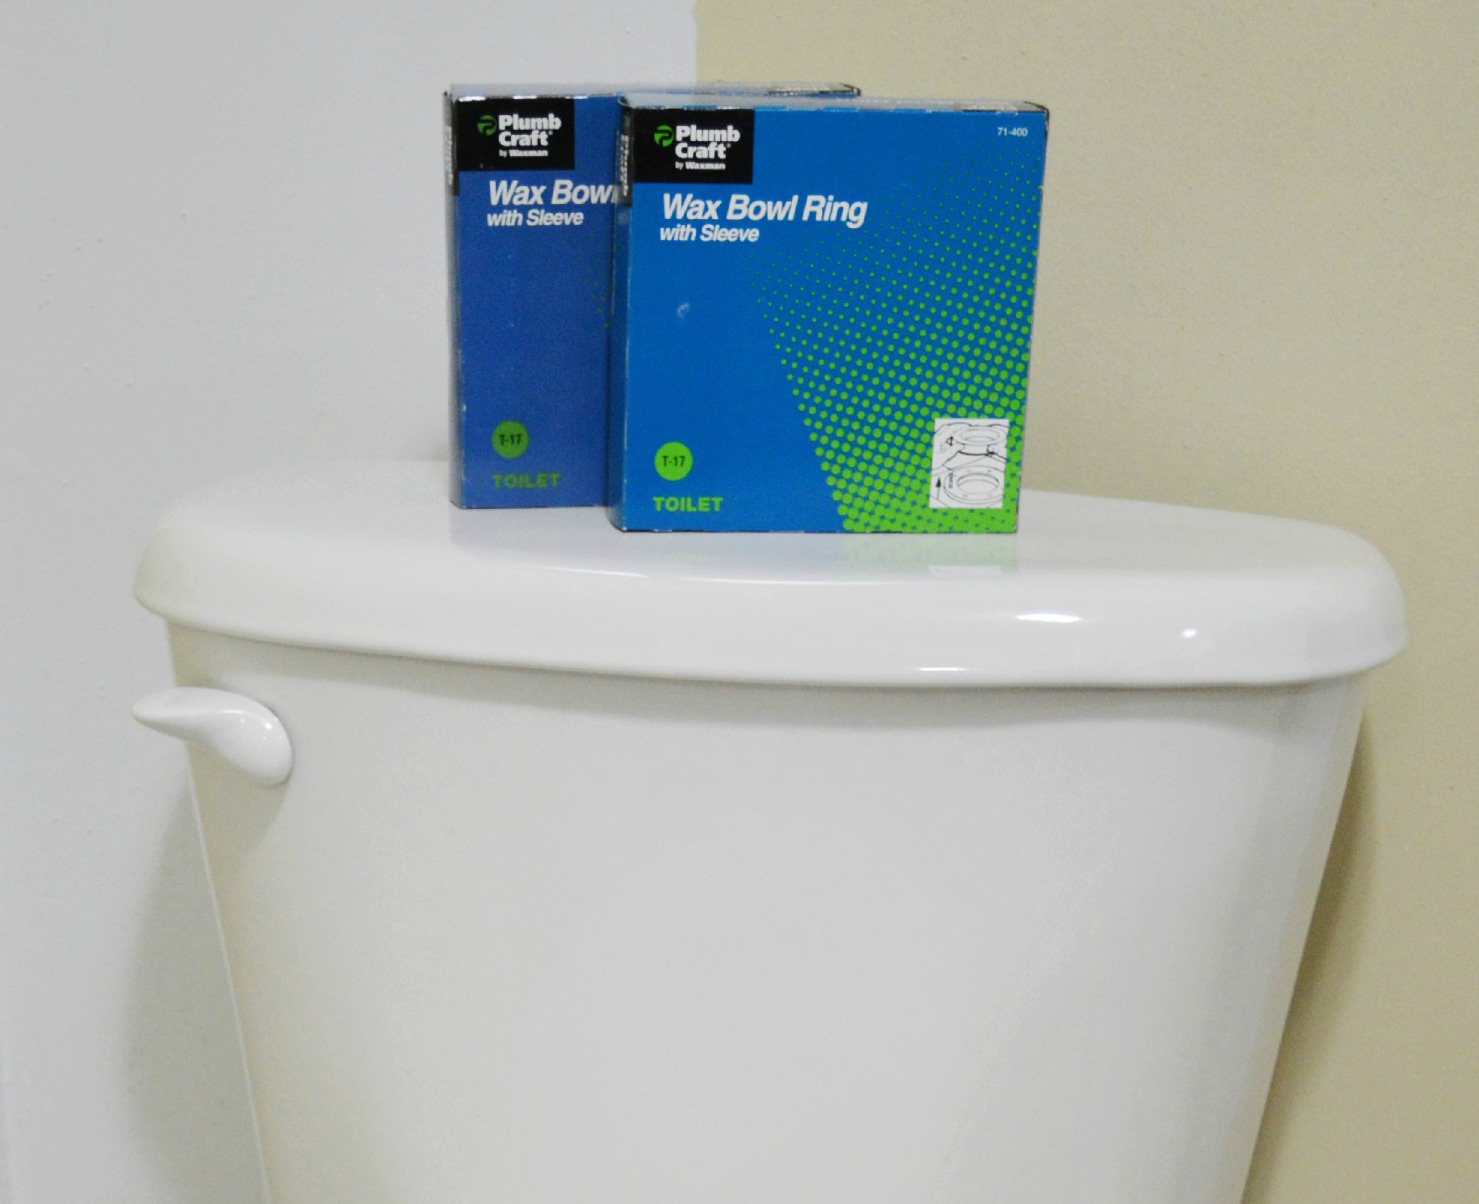
New Wax Ring Seal (My tip, buy two)

IMPORTANT — Before you begin, make sure that the water supply to the toilet has been turned off and that the toilet bowl and tank are empty. The shut off valve should be located beneath the tank or near the bowl. Once the toilet is empty, you are ready to begin. (If you’ve got a wet/dry shop vacuum, suck out any excess water)
1. Using the wrench, disconnect the water supply line by loosening the bolt. This bolt should be located near the toilet tank. Unscrew the bolts that connect the toilet to the floor. If they are stuck solid, try to lubricate them with WD-40. Otherwise, they may need to be sawed off with a hacksaw.
2. Remove the toilet and place it upside down nearby. Use caution, as the toilet may be very heavy. (an old blanket or thick towel is handy to set is on to prevent chipping the porcelain.)
3. The wax ring seal will be located where the toilet meets the floor. Wearing rubber gloves, remove the old wax ring seal and dispose of it. Clean residue with an old rag and rubbing alcohol.
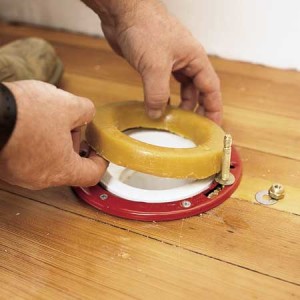
Photo courtesy of This Old House
4. Place the new wax ring seal where the old one had been previously. The new wax ring seal will be extremely sticky, so make sure that the wax ring is positioned properly before it comes into contact with its proper location. If the wax ring sticks out of place, you will need to start over. (this is where wax ring number two comes in handy!)
5. With a helper, guide the toilet back to its spot on the floor. The toilet will need to be set down so that it is level and so that the base is lined up with the anchor bolt holes.
6. Replace the anchor bolts at the toilet base. Carefully tighten the bolts with your wrench. Avoid over tightening these bolts, as this can cause the toilet to crack.
7. Finally, reconnect the water supply line and tighten the bolt. Once this is done, turn on the water supply, let the tank fill up and then flush the toilet.
Your new wax ring seal should last for many years, however, these do not need to be replaced on a routine basis. Wax ring seals only need to be replaced if the toilet wobbles, has a distinct sewer odor, if water seeps out from beneath the toilet or if the toilet or floor is replaced.
It might not be a glam or favorite diy, but it’s better then the alternative…


More Ideas & Inspiration
 20 Ways to Make Thanksgiving Extra Special
 Get Organized: Diy Wood Mail Sorter Plans and Tutorial
 Diy Office Wall Organizer Message Center Tutorial
  DIY a Glass Vase into a Cloche
 Pool Noodle Wreath Tutorial {a diy craft}
 Repurposed Wine Bottle Crafting {how-to cut a wine bottle video tutorial}
 How To Stencil With Chalk! {tips to get it right}
 Burlap Easter Bunny Ear and Butterfly Napkin Ring Tutorial
Thanks Doug for sharing this – it is just in time for my small bath remodel. I’ll be taking up the toilet to replace the flooring and will be needing to install a new wax ring.
Good to know girl! Hoping I don’t have to pull this up in my Pinterest “How to’s”, but if I ever need it I’ll have you to thank 🙂
Good to know, Ms. Shannon and thanks, Doug! I’ll file this one in my hubby’s “to do” box!!! I’m sure he thanks you too! LOL!~~Ang