Loft Makeover Part One – Real Simple DIY Board And Batten
Hey Foxes! I’m happy to be checking in with the completed part one of the loft makeover. We got the carpet and pad torn out, Austin (bless his heart) scrubbed as much of the drywall compound as he could off the old wood shiplap sub-floors… and, Jimmy and I got the board and batten accent wall done!

I did a live walk-thru on my Instagram stories before we started this project that showed exactly how much extra “stuff” I had stored up in the loft. Before we even started getting the carpet and pad up, I had to work thru that. I had furniture, two metal military cots, and a plethora of home decor. I gave one of my pink velvet chairs to my sister in law, and almost everything else got put in the shop for our garage sale. I just can’t keep everything. I thought I learned that after the massive garage sale we had last Summer when we liquidated our vintage booth and back stock. Apparently, I didn’t. Because I still had way more decor than one person needs!
[twenty20 img1=”21536″ img2=”21539″ direction=”vertical” offset=”0.5″]
So often when we work on a room makeover, I just do one big reveal. That’s not a bad thing, but it feels like a lot of the details that aren’t decor related don’t get enough individual attention. For instance. Jim and I worked for weeks & weeks over the Summer to re-case and custom trim the four big windows, down at The Little Cottage. Then I spent a few more weekends caulking and painting everything before we added the plantation shutters. And I never even blogged about it. Time gets away from me, and we start another project, and I feel like I’m doing a disservice to you when I gloss over such big details, and to my husband who helps me with so much of it! I take pictures and video and everything. I’m such a bad blogger sometimes you guys! I should be fired.
Not this time, I wanted to make sure and share the whole process, not just the pretty after part. Well, what I hope that will be the pretty part.

Now, what I decided on isn’t going to be for everyone, and it doesn’t have to be. I’m always saying you need to do what makes sense for you, your taste, your skill level, and your budget… in YOUR home.
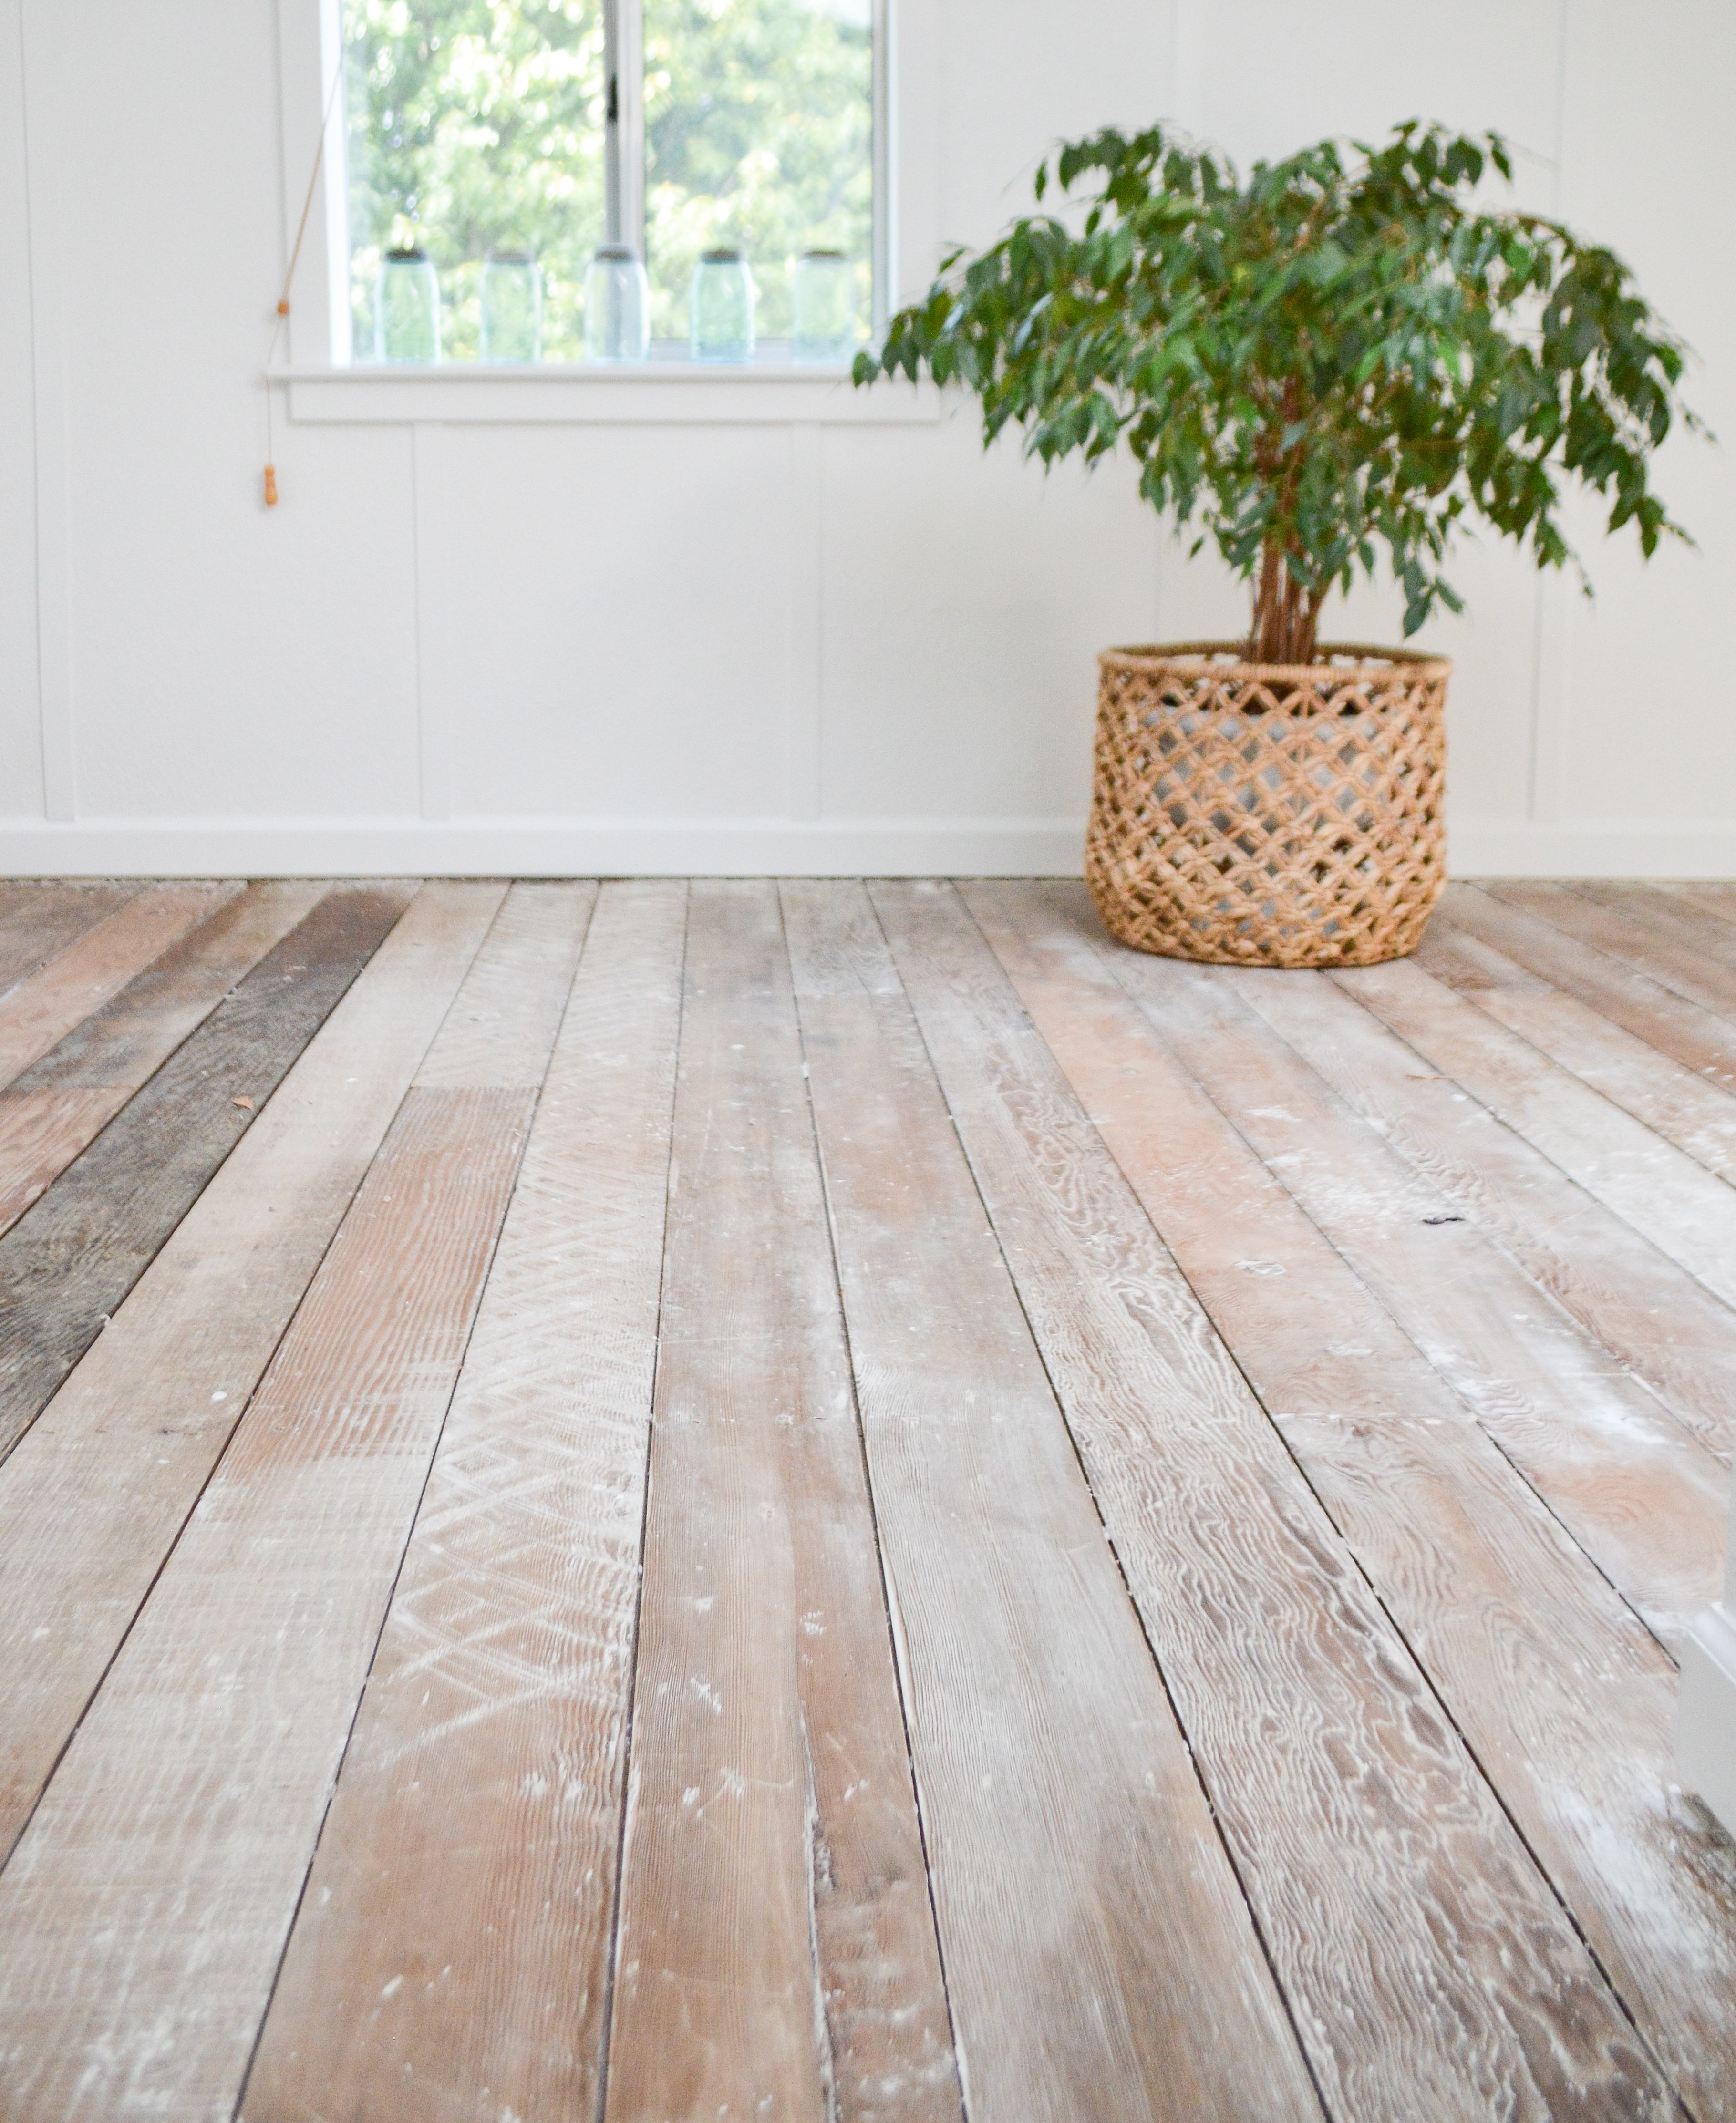
I did not like the beige carpet that was in the loft — at all. And I was 100% prepared to paint the sub-floor and throw down a rug because right now, I don’t have the physicality with my knee situation to put a new floor in. And even if I did. It’s not in the budget or a really even a priority. If we get new flooring, I want the same flooring throughout the house. So this worked for ME.
My son Austin is home for the Summer and he spent two days going board to board and scrubbing the drywall compound off the shiplap wood sub-floor for me. He used warm water, a little scrub brush and old towels. We started with TSP, but the warm water alone, scrubbing and drying as he went worked just as well, and was chemical free. I helped him get started and we determined what worked best, and then he dug in. He was spoiled and well rewarded for helping me! I couldn’t have done it without him.
Next up, Jimmy and I started on the Board and Batten.


I wanted a big fat board running the length of this main wall, divided by the window. We bought clear vertical grain Douglas Fir for our project. Pine is cheaper, but it’s also a softer wood and tends to have a lot of knots and flaws. We didn’t want that for our project. You can also use MDF but Jim pretty much refuses to work with that.
As some of you know, we took a big hit late last Fall when we found a bunch of rot on the entire two-story back side of our house when we were painting. It required ten huge new windows, siding, etc… and a lot of money to repair. That is why you see an aluminum window, not being replaced. It’s in good condition, and we can always replace it from the exterior later. Plus I figured by the time I added a window covering it would barley show! I do still need to clean it though.

Once the window was re-cased and trimmed out, the main vertical board was installed, and we started putting in the battens. We used really thin lattice pieces for two reasons. They are inexpensive and most importantly, the depth allowed them to flow right into the baseboards seamlessly. Since we weren’t putting new flooring in, I certainly didn’t want to replace those. Anything chunkier would have sat on top of the baseboards where they meet.

The ceiling line is not even close to square or even, but some things you just need to roll with. Neither is the wall… and that is why you see that section with the boards nailed in wedged against the one batten. If I shot it from the side, you’d think the wall was 4 months pregnant.

When all the wood work was done, it was my turn to come in and caulk the heck out of everything! The caulking and painting has always been my job.

I really don’t mind at all. I find it very zen. I just put on my music and paint away. I continued the Sherwin Williams in Extra White from down below up into the loft.

I had intended to use Sherwin Williams Pediment on the board and batten wall, but after I primed everything, I knew I wanted the simplicity of white. And I was also afraid a color would just accent the many imperfections in the ceiling line.

Funny story: I’m not saying I “recommend” this… but I ordered the woven window shade before we decided to re-case the window. Do you see where this is going? Yup. It was too big. Well, we decided we didn’t have anything to lose since it was custom ordered, and we rolled it up super tight, tied it up (several inches in from the ends), and shortened it with the chop saw. And it worked!

I need to give the floors a quick sweep, clean the windows and get this pretty spot all spiffed up now! It’s got such a neat feel. And it holds so many good memories.
DIY BOARD & BATTEN:
-
We used clear vertical grain Douglas Fir
-
Our horizontal board is 8 inches wide
-
It was placed where the two side wall lines died into the ceiling
-
We used lattice (.25 X 2) for our battens
-
Batten placement will depend on your exact wall width
-
We used a compound miter saw for our cuts
-
We used a brad nailer to attach the boards and the batten
-
We did use some liquid nails on that troublesome board where the wall bowed
TO FINISH:
-
Lightly sand any rough spots/raw edges on the wood with 220 grit sand paper or sanding block
-
Wipe clean of any dust or debris
-
Caulk all seams
-
Fill all nail holes, sand, wipe clean
-
Prime all raw wood, lightly sand, wipe clean
-
Apply wall paint, repeat is necessary
-
I used Sherwin Williams, Harmony paint in Extra White eg-shel
We also added a new woven blind, pot light & smoke detector

Thank for popping in. If you’ve got any questions at all, I’m always happy to answer. Can’t wait to share the next step with you!! XO Shannon
See the completed LOFT space [click here]
! This Loft Guest Bedroom Makeover features a daybed, white walls, vintage finds + DIY board and batten! #loft #roommakeover #boardandbatten #modernfarmhouse #cottagestyle #farmhousebedroom")

Subscribe for free today to receive all my latest DIY tutorials, decorating ideas, upcoming projects & more, sent right to your in-box!

Join us on our adventures... and let's make our houses "homes" together!
Your email address will never be shared or sold. I promise!
More Ideas & Inspiration
 $5 Coffee Sack Chair Makeover
 Painted Vinyl Linoleum Floor Makeover Ideas
 How To Make A Wood Fence Board Countertop
 How To Build A Wood Deck Cooler
 How To Make a Shabby Wood Trough Box
 Spray and Chalk Paint Folding Chair Makeover
 Complete Guest Bedroom Makeover Budget, Sources + Tips
 Fence Board Planked Wall How To