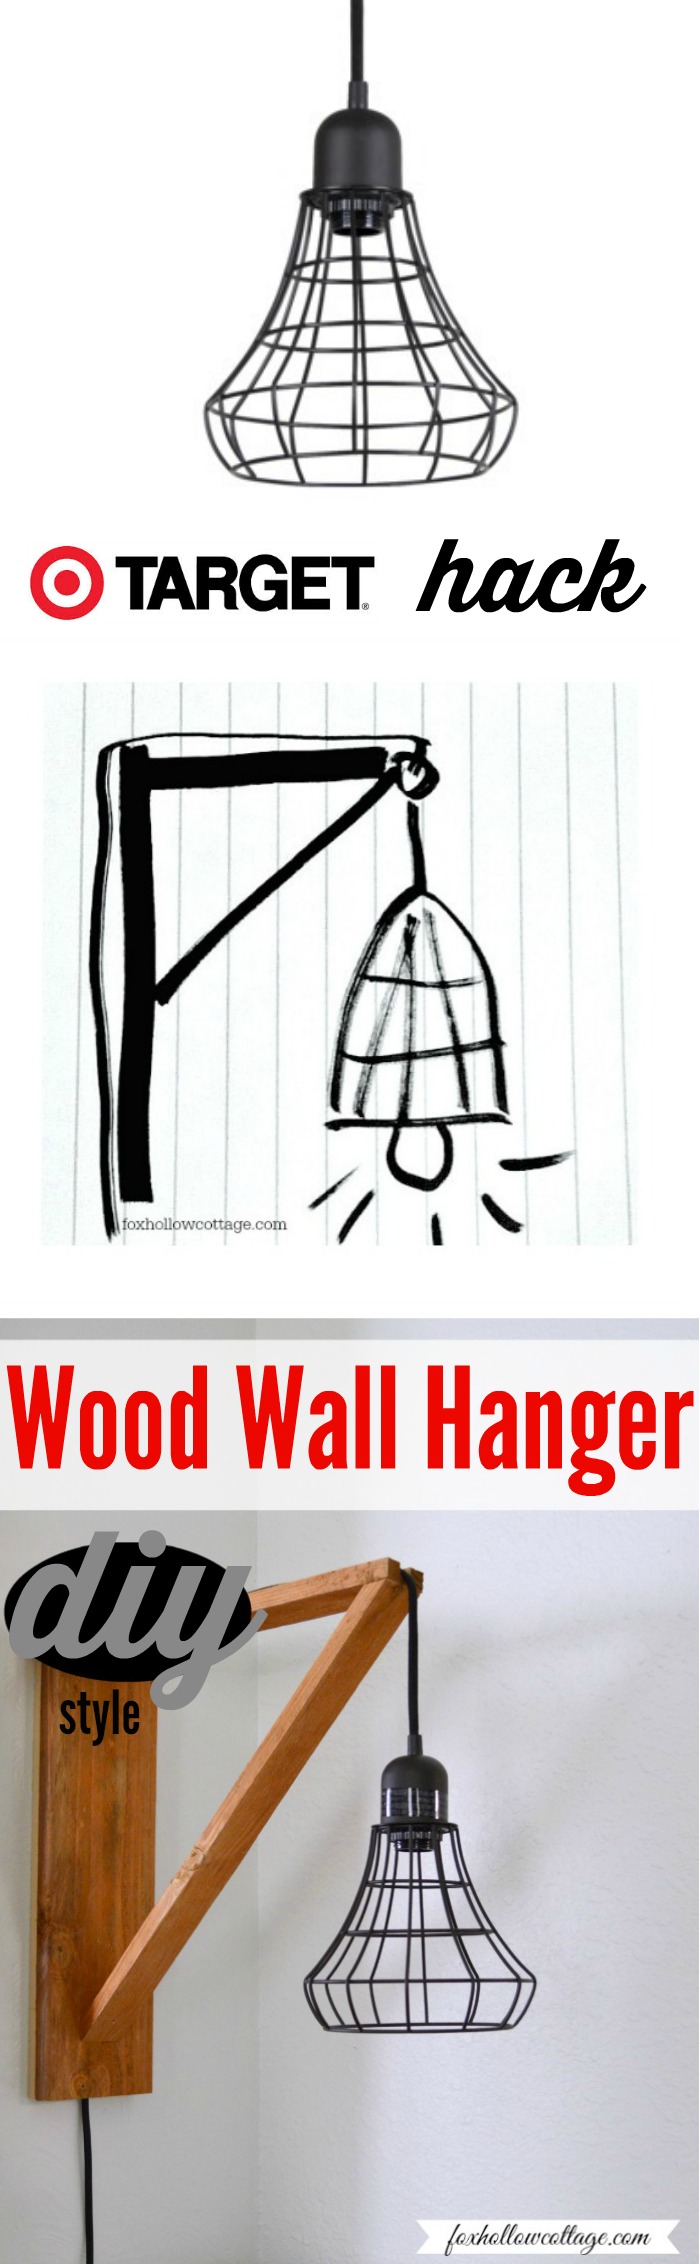
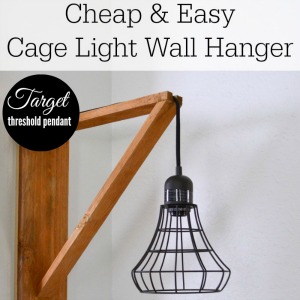
Target Hack: Diy an Industrial Cage Light Wall Hanger
Hey Foxy Peeps!! I made something fun this weekend and I wanted to share it right away. No fancy pictures, I just snapped some real quick! It’s a really easy project that I made it in about ten minutes. Hope ya like it.
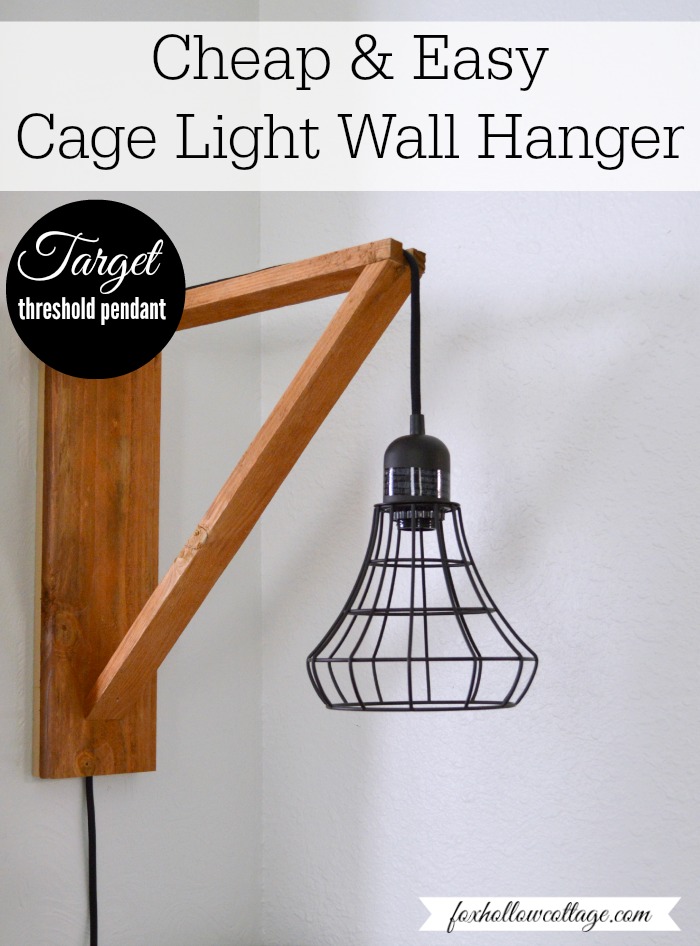
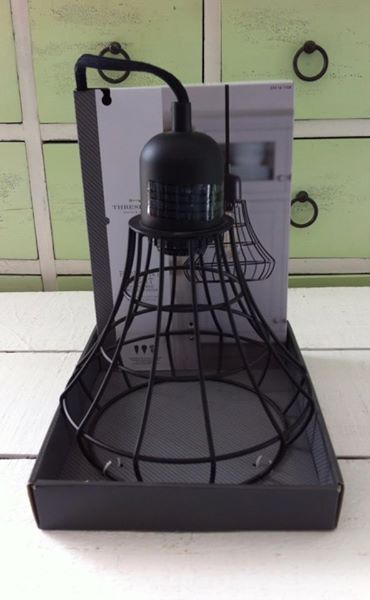
A few weekends ago, Jim and I picked up a cool Threshold Industrial Pendant light at Target for Austin’s room. I loved the price of $22.99 and that it plugs in. Meaning, you don’t need an electrician… or a ceiling outlet. We were about to see if we could get someone to come and install one in our home (from somewhere like https://scv-electrical.co.uk/electrician-eicr-reports-landlord-certificates-greenwich/, if we were close enough) when we found this. After all, my old house is lacking in those for sure.
Electricians.
.. and ceiling outlets!
Even though it could, I knew I wanted this to pop out from the wall and not hang from the ceiling. I was rolling around a few ideas in my head, like I do when I’m working out an idea, but I wasn’t sold on anything.
Sunday morning rolled around, and while I was planning out my to-do’s for the day I just grabbed a marker and did a rough sketch. Sometimes, any plan is better than no plan and I needed to get to it!

Tools and Supplies:
- Cost: Free, wood was on hand — Or, about $2 bucks.
- Supplies/Tools: Miter Saw or Miter Box. Wood; Fence Picket, Scrap Wood and or/Trim, Drill/Drill Bit, Screws and Screw Driver, Hammer and Nails, Nail Set, Sandpaper, Chisel or Router.
- Optional: Table Saw if you need to rip any wood. Nail Gun. (I used 18 gauge 3/4 inch finish nails).
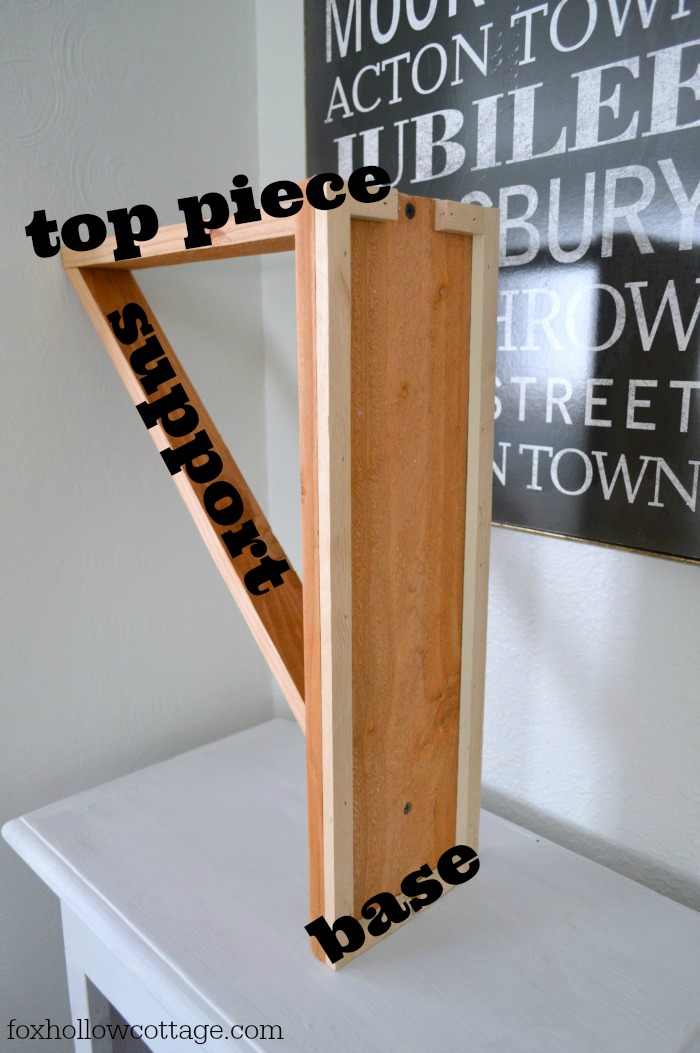
Cuts:
- Main base piece is 6 x 18
- Top Piece is 2 x 14 – make a center groove with a chisel or router before assembling.
- Support piece is 2 x 20.5
- Scrap pieces are cut to fit base back. This is to pop out from the wall and afford the cord a space and natural fall.
To Assemble:
I’ll be using the completed project to demonstrate. I couldn’t hold it, build it and take photos. Sorry. So not that talented!
For your first connection. Pre drill your (upper) base and top piece. Screw together.
Tip – You pre drill to prevent your wood from splitting when you insert the screw.
Repeat for the (lower) base and the support piece. Remember to attach the mitered/angled cut side to the base.
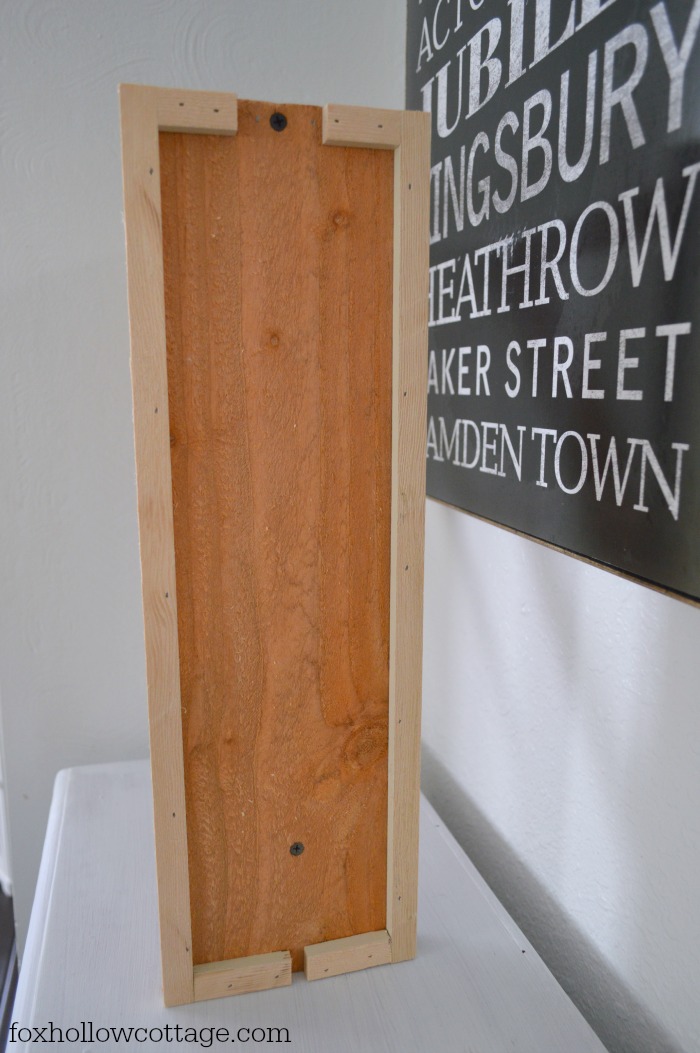
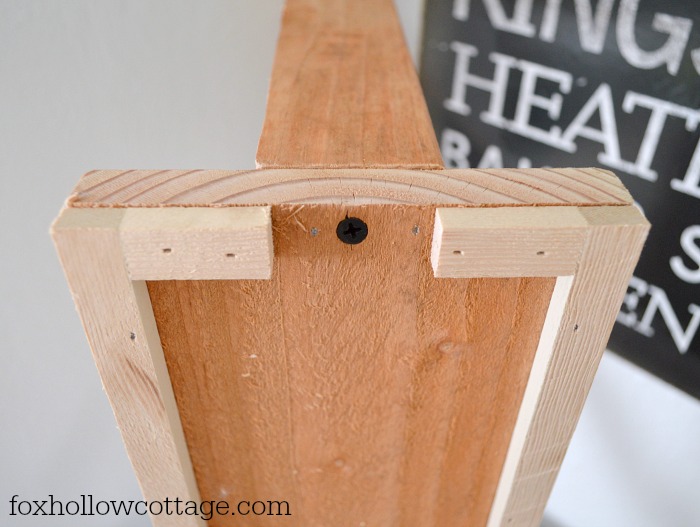
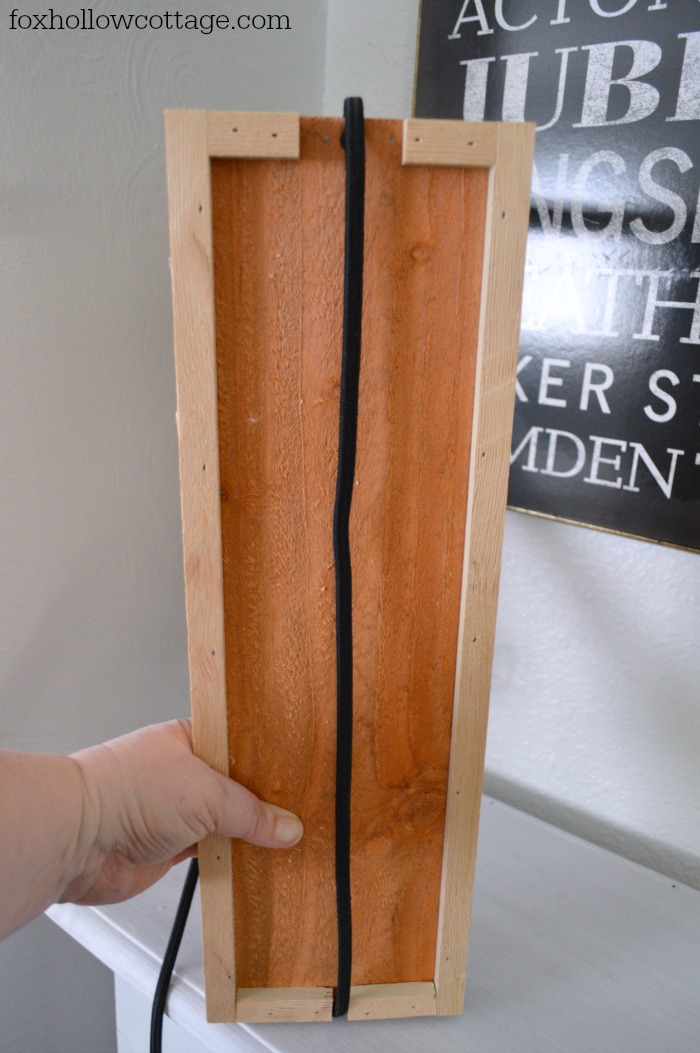
The back should look like this. (Ignore the edges at this point)
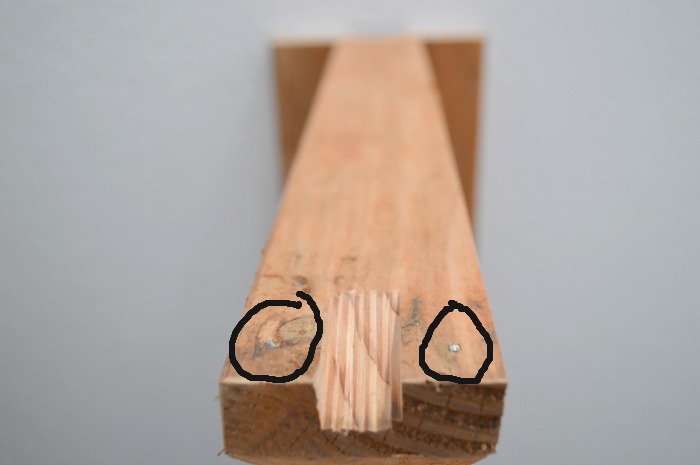
Next, attach the top piece to the support with two small finish nails. To get your nails flush or counter sunk, use your nail set to tap them down a pinch. Then fill with wood putty and sand for a seamless look. I used ruff fence picket and I’m going rustic, but I still don’t want popped nails!
Now, unless you have a router table and bit to channel out a shallow valley down the middle back of the base for the cord, you’ll want to make your base pop out from the wall so the cord can snake up the back, rest along the top and settle into the groove. We actually do, but I didn’t want to drag it all out and set it all up. If you are interested in creating your own, you can check out these router table plans.
This is how to do that.
Start by adding some trim to the two sides. I used .25 inch by 1 inch scrap we had on hand (when we rip wood, we always save the good bits).
Next, add two smaller pieces on each side, leaving the middle open for the cord.
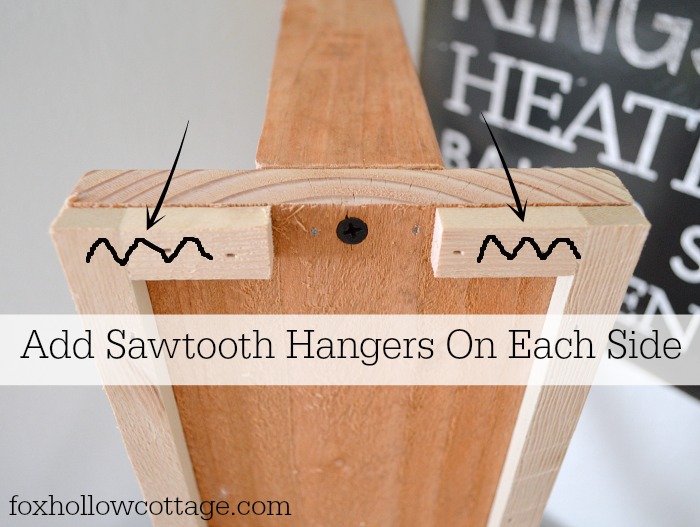
I’ll be adding 2 sawtooth hangers after I sand and paint (or) stain mine. I have not decided which yet… ? One on each side will ensure it hangs level and doesn’t shimmy around.
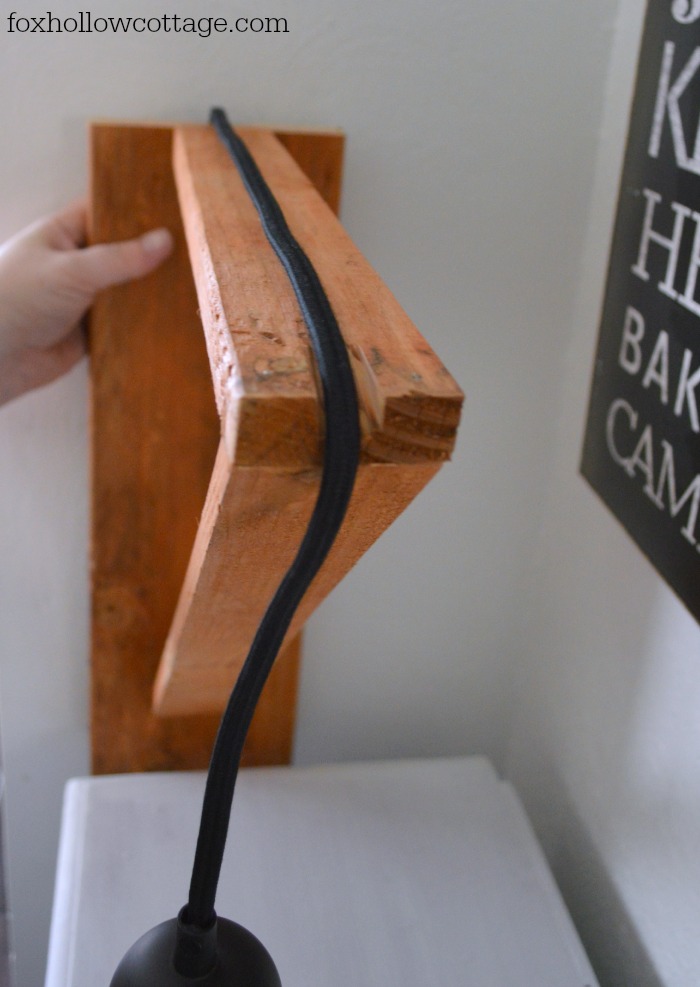
Do the same at the bottom, leaving a spot for the cord.
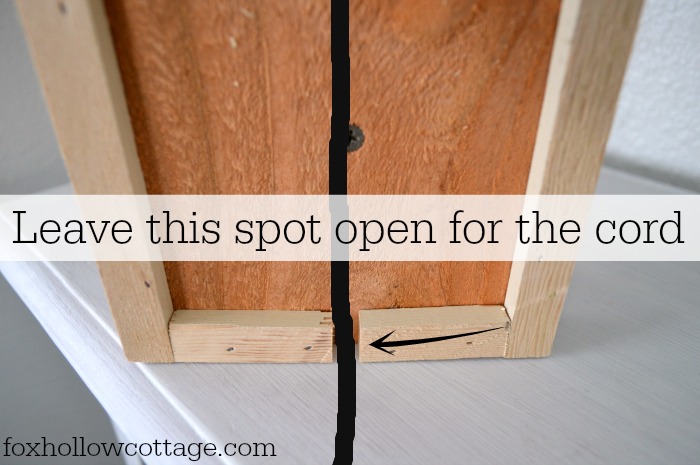
Like so.
See how the cord falls right in that groove?
That is it!
It took about a gazillionty times longer to describe how to make it, than it took to make it.
Trust me though, it was super fast and very simple. Nice and cheap too at just under $25 total.
Plus, totally beginner friendly!!
I’ll show you the finished project in place when I complete everything else for Austins’ room. I’m sure you could make some smart changes or tweak this to make it your own. I was going for realllly simple. I’ve heard of some people taking it to the next level and adding sensors into their lights with components from websites similar to Octopart.com so they are touch sensitive or have motion sensors in them. If you go and make yours super awesome, please show me!!

If you liked this project please pin & share!
Target Hack: Diy an Industrial Cage Light Wall Hanger
If you want to see it finished and in it’s new home…
please click HERE.

Sharing at: Thrifty Decor Chick


More Ideas & Inspiration
 How To Pick The Perfect Lighting
 A Super Budget Bathroom Makeover
 Diy Projects and Realities of 2013
 Happy Spring Cottage Kitchen Tour
 Tips and Ideas for Making Cut Flowers Last
 A Fireplace Mantel Makeover {the beginning}
 How To Make a Natural Reed Diffuser (and diy a custom scent too!)
 Holiday Home Tour: Christmas at the Cottage
this is cool! but I have read your directions 4 times and I don’t see that you mentioned how you got the grove in the in the top front piece where the cord hangs down the front.
HI Nicole!!
I did a no-no I didn’t want to encourage 😉 I held the board up to my miter saw and let the blade eat a little channel just by hand, sliding in and out from the blade. You can also use a router, clamp the board down and use the bit to create a channel. Sorry for the mystery step!! Shannon
Fab DIY Light tute Shannon!! Gorgeous – love the industrial look and perfect for a boys room!