Fence Board Planked Wall How To
Our latest update here at the cottage has been to add a planked wall treatment. With a Fox Hollow Cottage twist. In this tutorial I’ll show you how to plank a wall with wood fence boards, even a basement level cement/concrete wall you can’t use nails on. We used easy to find and afford inexpensive fence boards and made minimal cuts. Making the cuts was easy with our chop saw, but an ordinary saw will work just as well, you might just break a sweat. It was very beginner friendly and perfect for a smaller space or accent wall. Depending on the finish, this wood plank wall can look more rustic, or more like shiplap, with heavier paint and smaller joints.
The planked wall I’m sharing today has a slightly different vibe then you get with the smooth boards or planks and very tight joints like the shiplap style lots of folks are using. It’s bit rougher, and has more of… “rustic, barn wood, farmhouse flavor”. But keep scrolling to the end, where I share this exact same project with a heavy paint application, and see how different it looks.

Since budget is always a factor and we try to keep our costs down, we went the least expensive route. After doing some material cost research that turned out to be 1 x 6 pre stained Douglas Fir fence boards.
Do I like the color? No. – Does it matter? No.
I knew it was getting painted, so I didn’t care one bit. Plus, it was super cheap.
The entire walls worth of wood cost us only $28.00 – WIN!
So if cheap and easy is your thing.. keep reading!
Fence Board Planked Wall How To
Using fence boards means less cutting and less measuring.. both of which will make your project go faster. We only had to make our length cuts. The boards were already the perfect width. So zip-zip and on you get to move on to the next step.
I meant to share this much sooner. I don’t know where my days fly away too? If you find them, send them back this way would you!?
Jim and I have been hard at work giving our combination powder bath and laundry room a makeover. You can see where we started here.
And get a little peek of our progress while I share our new planked wall!

*As with about every project we undertake here at the cottage, we had a problem. Our wall is solid concrete. Yay. So fun. So instead of being able to use a nail gun.. and a construction adhesive. We had to depend on an adhesive alone. It just makes it a bit more challenging. If you can install yours with nails. Lucky you – This should be even easier!
SUPPLIES:
-
1 x 6 Fence Boards
-
Saw (Chop Saw, Miter Saw, Table Saw or even a Radial Saw will work)
-
Sanding Block
-
Construction Adhesive (you’ll need what is beat suited to your particular walls)
-
Spacers (we used quarters, they worked perfect)
-
Paint and Paint Brush
-
Trim
Optional: If you have electrical outlets, you’ll have to address those.
You’ll need new boxes or extension boxes to pull the outlet out and make it flush with the new wall. If you do not have electrical knowledge, please consult a professional.


TIP: Paint your wall before you install your boards. Whatever color you use can/may show though your spacing so you’ll want that uniform. I used white. I knew I would be using white paint to finish my wall so this made sense for us.
TIP: Start with a smooth, uniform wall. We had to do some repair to ours before we started to accomplish this. Again, old house. So much fun. (we’re used to it)
-
Measure your wall and assess your material needs.
-
Gather supplies.
-
Plan out your pattern, this will dictate your cuts.
-
Make your cuts.
-
If you plan to paint and want a finished look… Paint it now, BEFORE you install it.
Knock Off Rough Edges with a Sanding Block

I gave ours a soft, slightly rounded finish.

-
We installed our wall with a running bond pattern. That means your design will run in a 2 – 3 – 2 pattern. One row with two boards, the next with three, the next with two, repeat. Seams meeting up every other row.
-
Use a level to ensure a straight line across your wall and start your first course working off that.
-
Start applying your boards to the wall at the bottom. We began with a two board run for our first course.

-
We placed our adhesive on the back of the boards in a long, wavy S pattern.
-
Firm even pressure and a little wiggle as you push it onto the wall should do the trick.
-
If you can, use a nail gun to further anchor your boards to the wall.
-
Place your spacers.

-
Install your next run, checking for level.
-
Place spacers, install next board, repeat.
-
When you reach the ceiling line. You are done with your wall!
-
Trim to taste.

TIP: We knew our wall was not level (big surprise!) so we planned to end our last course, and cover it with our trim.
There was so much to do in this room that we simply painted this particular wall, and hung a giant mirror when we moved in. We were busy dealing with the window to nowhere. Crazy, CRAZY scabbed in wall.. an exposed hot water heater.. the floor.. oh, and the rest of the house too.
You can see why it didn’t make the top-ten back then!
[twenty20 img1=”6595″ img2=”7039″ offset=”0.5″ hover=”true”]
Back to the wall at present. Sorry, memory lane sidetracked me there for a second.
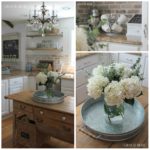
With the less than perfect finish of our boards, I was not shooting for a smooth, polished look. I let the finish of the wood set the tone and decided to do a white wash.
I used my paint at full strength and applied with a brush. I worked some into the seams, but did not go for full coverage. With the pre-stained finish I suggest a primer coat first to seal and prevent bleed through. Then paint to taste.
I applied three coats of my white wall color and called it good. I like the less than perfect look. It’s got a good feel to it. I debated leaving it natural, but this room has no windows, so it was a short-lived thought.

This is a weekend project.
We got it done in two days total work time. With Jimmy cutting and me sanding the boards, to the install, new outlet, me painting and popping some trim in. Not counting our special situation waiting for the adhesive to dry. If we had nailed in, I could have painted right away. Waiting was smart though, I sure didn’t want any boards falling off the wall! So far so good. It’s been up for weeks now and everything is staying put beautifully.
As always, thanks for stopping in to see what we are up to. We are so happy to say goodbye to that ugly wall we inherited. I hope this was a helpful post that might work for a room in your home as well!!
~Shannon
With a full coverage paint job, and a few storage & decor updates, the room now LOOKS LIKE this…
CLICK HERE TO SEE THE REST!

See the Laundry Room & Powder Bath Reveal
CLICK HERE!

We love creating accent walls!
CLICK HERE to see my No-Nail DIY Shiplap Project

CLICK HERE to see our DIY Brick Wall Project!

Want to see our most up-to-date
Before & After projects?
CLICK HERE

Disclosure: Please note that I am not a professional contractor. This is what worked for us, in our home.
I am simply sharing our personal results.
The images and content of foxhollowcotttage.com are protected by copyright laws. Do not copy or distribute any content without permission. Do not edit or remove watermarks from any images. If you want to share any content in part or in full you must receive permission from foxhollowcottage.com prior to doing so.


More Ideas & Inspiration
 Gracie Blue Farmhouse Home Tour
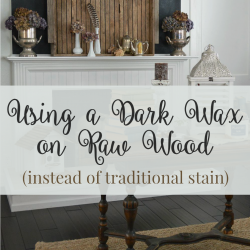 Did You Know You Can Wax Raw Wood?
 Cottage Farmhouse Features From #foxhollowfridayfavs
 Farmhouse Kitchen Vintage Wood Bakery Sign
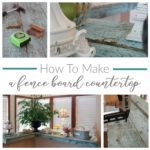 How To Make A Wood Fence Board Countertop
 How To Makeover A Bathroom Without Remodeling
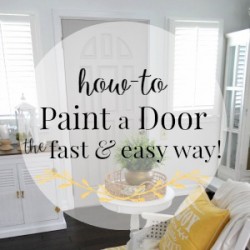 How To Paint A Door Fast and Easy
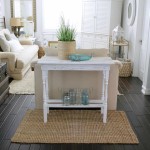 DIY White Washed Wood Table
The wall looks awesome painted! Just one comment/ tip for those using fasteners (nails or screws): those boards are pressure treated for the outdoors, so the chemicals in them will rot normal nails/ screws. You have to used galvanized fasteners to avoid that issue and then it will hold up forever without any issues. Keep up the great work!
Hi Dillon, Pretty sure since the product is being used indoors, where is won’t be getting wet, there won’t be any reaction from the pressure treating. For outdoor use, totally correct. Thanks for information!! Appreciate you sharing that 🙂
Could you do this in an apt or in a rental home? If not is there anything that you could think of that could hold that to the wall without excess damage?
Gosh Ally, I’m not sure how you could? Maybe doing the smaller pieces on a plywood backing, and putting that up in sections.. but not sure how you would attach that to the wall safely and securely without damage? It might be possible to put a few heavy anchors into the studs? And have minimal filling when it’s time to move. That might work. If it was a private rental, you might talk to the owner, maybe they might not mind if you were doing the labor and material for free 😉 Much luck to you!! (oh, and google “temporary wall ideas” and such, I know there is removable wall paper now!)
I saw this posted on buzzfeed and stumbled onto your site! I totally want to to do this to my bathroom….thanks for motivation!
Hi Beth! Thanks for popping over, I’m glad you found it useful. It was simple and inexpensive and we were very happy to share!!
Did you need to do anything to protect the wood from moisture?
I did not David, because it’s only a powder bath, no shower or tub. We do have wood walls in our upper bath and I have painted them with an enamel paint. No problems in the 10+ years we have lived here. The shower top is boxed in and has a strong exhaust fan.
Can you tell me where you got your pre-stained fence boards? Also, how long were they when you purchased them? Thank You and Have a Blessed Day 🙂
Hi Margo! We got those from a supplier here in Oregon. They are redwood. You might find the same at a Lowes or home Depot. I think they were 6 foot lengths. So we did 6 and 3, staggered.
Do you have a shower in that bathroom? If you do, you’ll want to remove the wood. The moisture and steam from the shower is going to get in the wood and rot it. It will create a lot of mildew and spell disaster for your bathroom.
It’s a laundry/powder room combo. so we are good. thanks!
Love this wall! Sharing on fb today!
Well Thank You! That sure is sweet of you (:
I love that paint color! I am going to see if it looks good in our master bedroom!
I would love to do this in our own powder room. It looks just wonderful!!