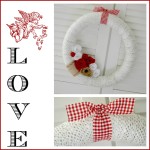
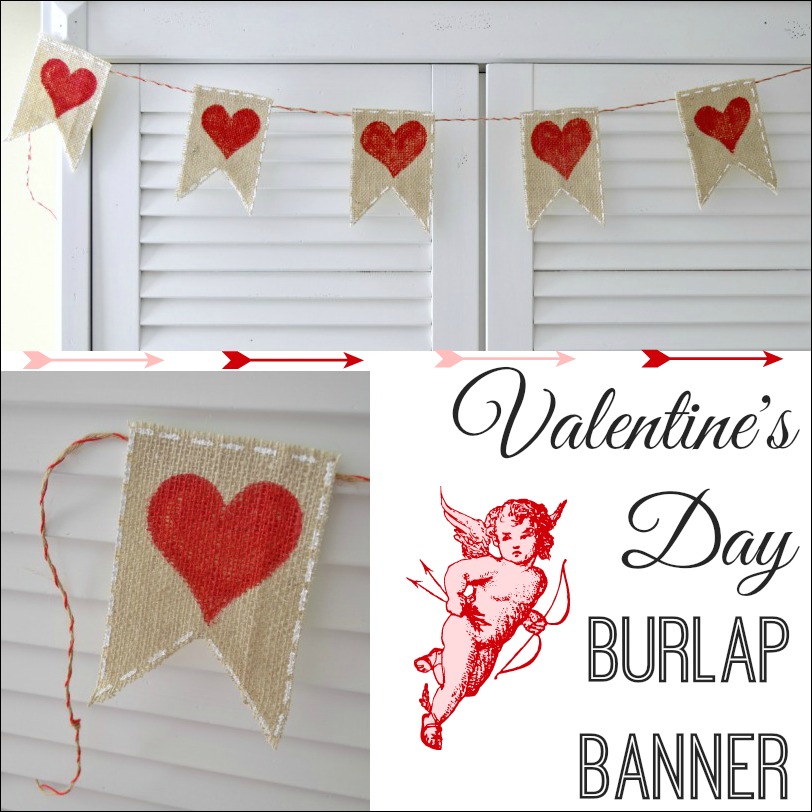
Valentine’s Day Banner in Burlap {a tutorial}

Hey there!
I’ve been getting crafty.
Granted, I had a false start…
Translation; I looked at my supplies and did nothing with them.
Is that “crafters block”?
Sometimes it takes me a bit to get my mojo going.
Does that ever happen to you?
I can’t force it or fake it. I have to let my supplies spark my creativity or foster an idea.
On occasion, that takes awhile.

I went for take-two the other night.
I clicked the TV on for a little background noise, got comfy at the farm table and crafted away!

It’s a simple craft.
Most of my stuff is.
It seems to be my style.
If you can call it that.

If you’d like to make your own burlap banner for Valentine’s Day I’ll share how I did it.
 foxhollowcottage.com")
- Burlap
- Scissors
- Baker Twine to hang up your banner. (I used the rustic jute bakers twine I made.)
- Paint of choice. Craft paint and chalk style paints work well. (If you use a chalk paint, you can even use your hair dryer to speed up the drying process!)
- Craft paint brush. Small to medium size.
- Optional – Chipboard Template. (You may free-hand cut or make a template with cardboard. I just happened to have something on hand so I used it.)
- Mod Podge
- Felt to back your burlap.
– This is where my tutorial might be different from others you’ve seen. I back mine burlap because:
- It gives the otherwise floppy burlap more structure. The banners hang beautifully when they have been backed.
- You won’t get back light shining through and distorting you design so you can hang them in doorways, across archways in windows and even outdoors… and you’ll still be able to clearly see the design.
- Marrying the burlap and felt helps prevent fraying. Your cut lines will stay crisp and true.

- Lay your template on your burlap. Trace outline. Cut to shape.
- Apply adhesive to felt. Apply in the shape of your template (outline, then fill in). Cover with burlap piece and press to join together. Let dry.
- Cut felt. Follow along the burlap that is already cut to shape and use it as a cutting guide.
Note; This beautiful thins about this craft is that it’s easy to customize!!
You can use any color/shape. The possibilities are endless!!
- Use paint to outline desired shape. I decided on a heart. Free hand is fine. It’s what I did.
- Fill in shape with paint.
- Paint little dash/lines to create a faux stitching look. I used white craft paint.

To hang:
Simply apply a bead of glue to the back of your banner pieces and press the twine onto the felt/back. I spaced mine apart the width of a banner piece.


Hope you enjoyed the tutorial and maybe got a tip or two that’ll be helpful!!
If you make your own burlap banner for Valentine’s Day, I’d love to see it. Please make sure to come by my facebook page and post it one my wall.
I’m working on my mantle and a Valentine’s Day wreath now.
I’ll be back to share it as soon as the post is complete!
Take care everyone…
Before you begin your burlap craft, head and see Ann at On Sutton Place!
She’ll show you how-to prepare your burlap before you start working with it! I’ve followed this tutorial and had great results. Really wonderful for larger projects like runners, pillows, etc…
How To Wash, Dry and Cut Burlap

(Ann has tons of gorgeous burlap projects so peek around while you’re there!)


More Ideas & Inspiration
 Make a $5 Valentine’s Day Wreath {w/burlap and yarn}
 HGTV Dream Home 2018 Details Tour
 Make Your Own Shabby Vintage Candles
 Valentine’s Day Decorating DIY to Vintage
 Simple Kitchen Organizing Ideas and Tips
 Valentines Day Cottage Style Home Decorating
 Living Room Makeover Reveal (at The Little Cottage)
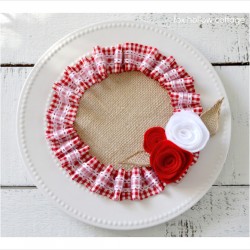 A Valentine’s Craft {in burlap and ruffles}
Super cute & easy! Love it!
So cute~love it!!
Love burlap crafts and this is super cute!
Thank you for sharing the tutorial!
Hanni
Gosh you have been busy! I have had fun looking thru all your cute stuff!!!
XOXO
Andrea
Love the faux stitching (since I can’t sew)! Super cute!
Kelly
That is a super sweet banner! The faux stitching just makes it. I’ve got it pinned and I’m crossing my fingers that I can get one made by Valentine’s Day.
I love your simple and cute ideas, they are always so doable!
Lynn
Love your faux stitching and great idea to put cardboard on the back!
Love this! The stitching is my very favorite 🙂 Oh… and the burlap 🙂
So pretty Shannon! So that’s what you used your DIY Baker’s twine for! Great idea! Pinning!
Oh, Shan! That is way, way cute! I love the simplicity of it – and it packs a big punch! Such a sweet banner, girl!
Good Morning Shannon, What a fabulous banner. When I looked at the first picture I thought you had sewn a running stitch around the outside, but then as I read the instructions the stitches were painted…brilliant idea.
Have a lovely day.
Best Wishes
Daphne
Very cute! Would be a great project for kids too!
Super cute! Love the two-colored twine and the white-painted stitches around each “flag.”
It’s just darling Shannon. I love the stitching you added!