How To Strip + Reupholster A Wood Dining Chair
Brand new dining chairs can be incredibly expensive, and most people need at least four of them. But I find them second hand for great prices all the time, and frequently for free! Even sets of 6 and 8 — with captains chairs and all! They most often just need a little love. Today I’m sharing how we did a simple strip down, light repair, and added new upholstery to a beautiful pair of wood dining chairs. This dining chair makeover is very affordable, and super beginner friendly.
Today I am joining some great ladies to share a little DIY inspo with ya! We are going to gather monthly, and this is our first project share for the new year. We are calling it the DIY Inspire Collective. And when I’m done showing you my project, there will be easy links for you to click around and visit the girls, meet someone new and maybe learn something new too! Have fun!
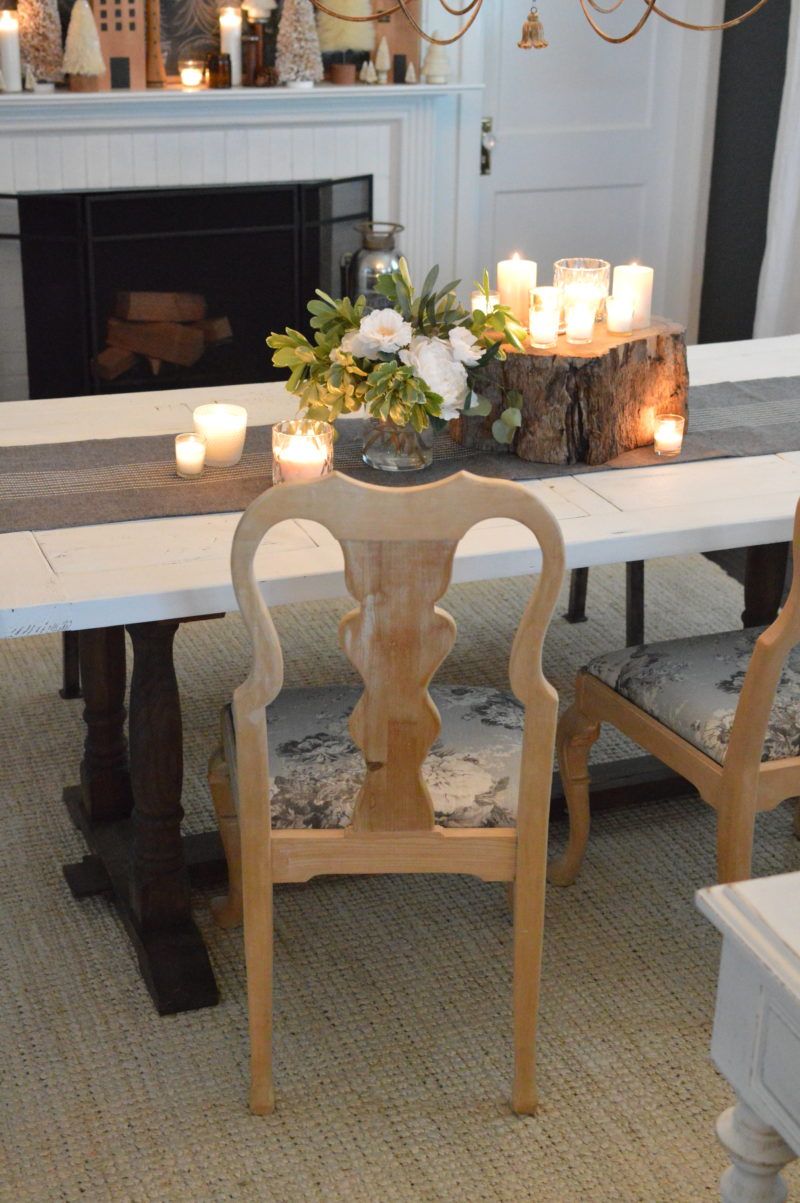
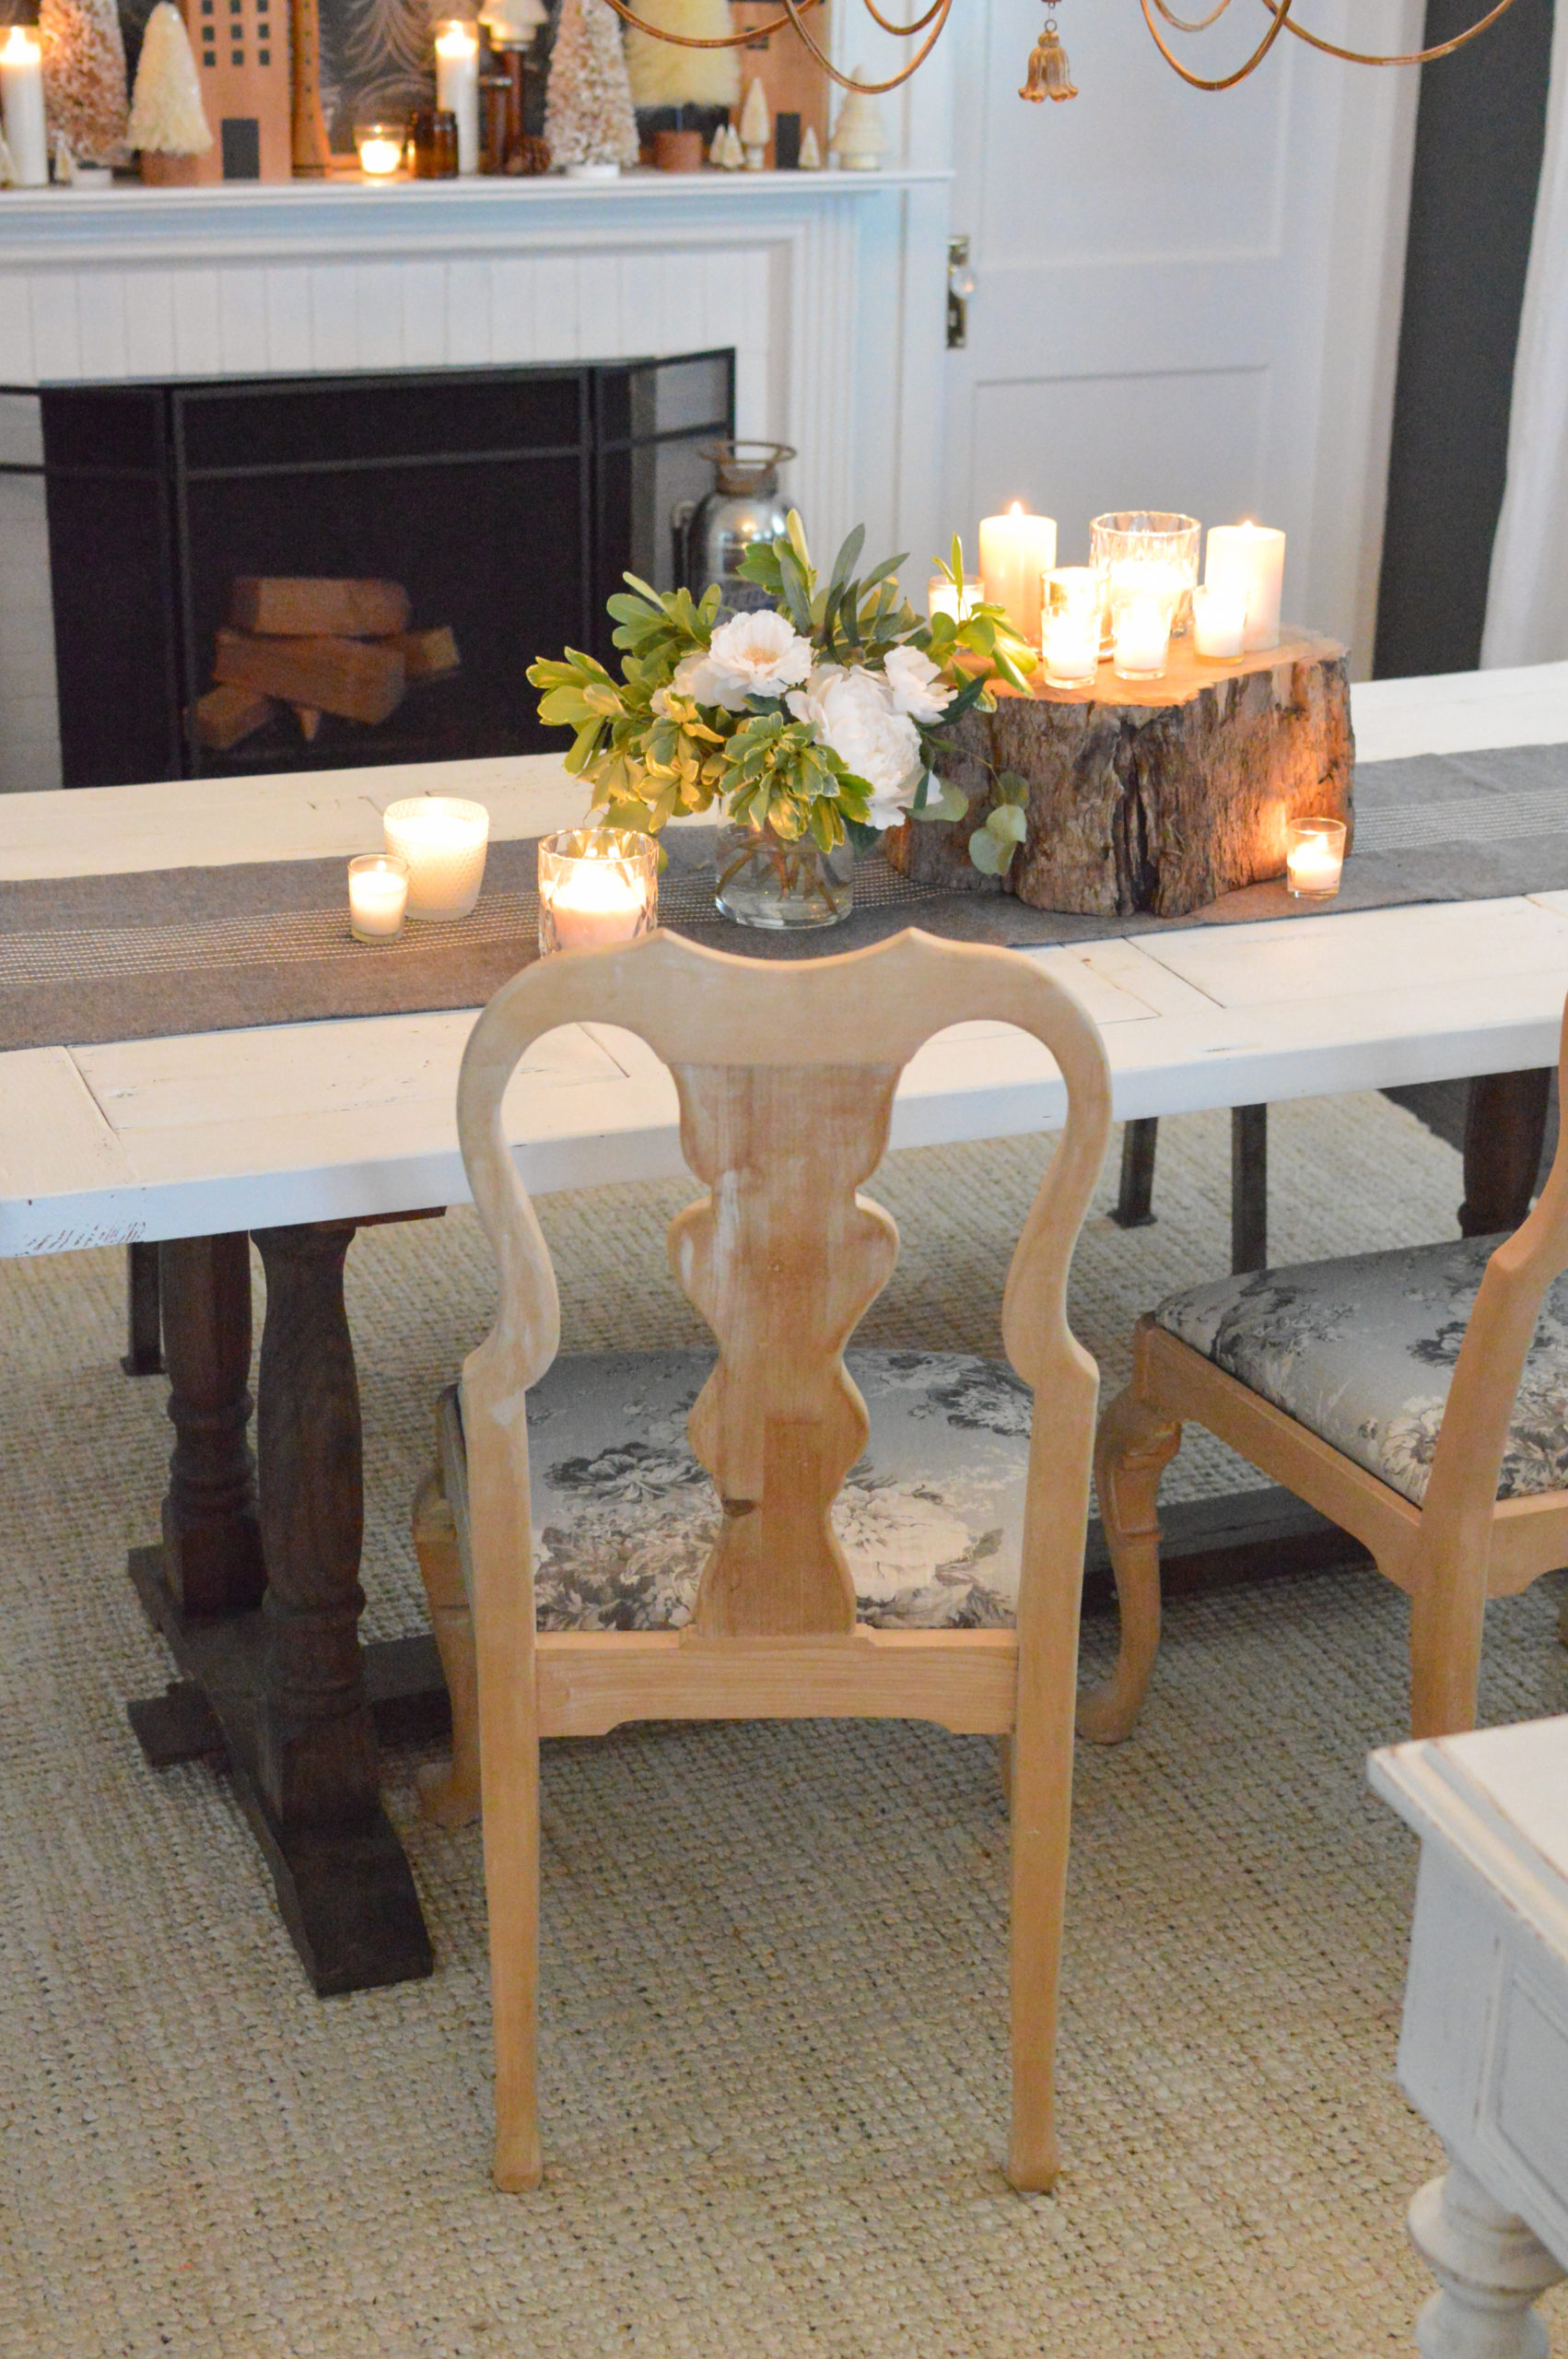
Let me start by saying I needed more chairs, like… well, I didn’t need them at, but when does that ever stop us? I have this thing for chairs and they are something I am always drawn to! So when I ran across these cuties being let go for $5 each, I bought myself another project. And then they sat. And sat a little more… until now! With Jim’s stripping & fixing and my reupholstering, they are so beautiful again.
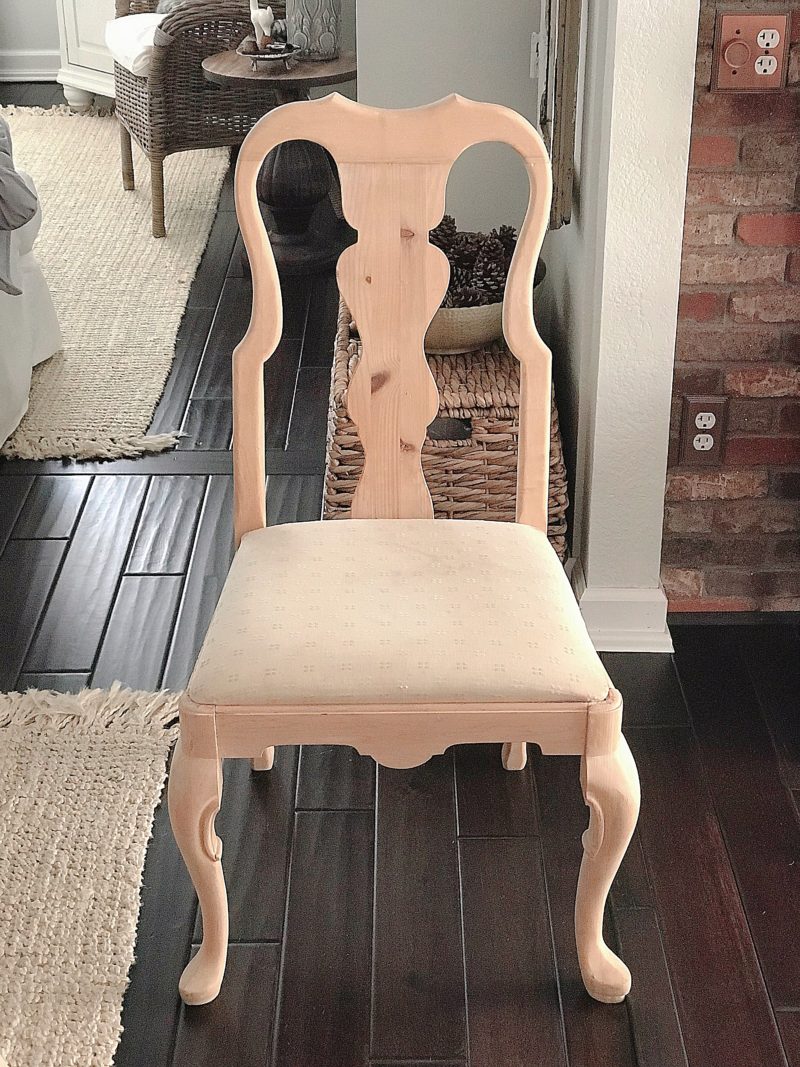
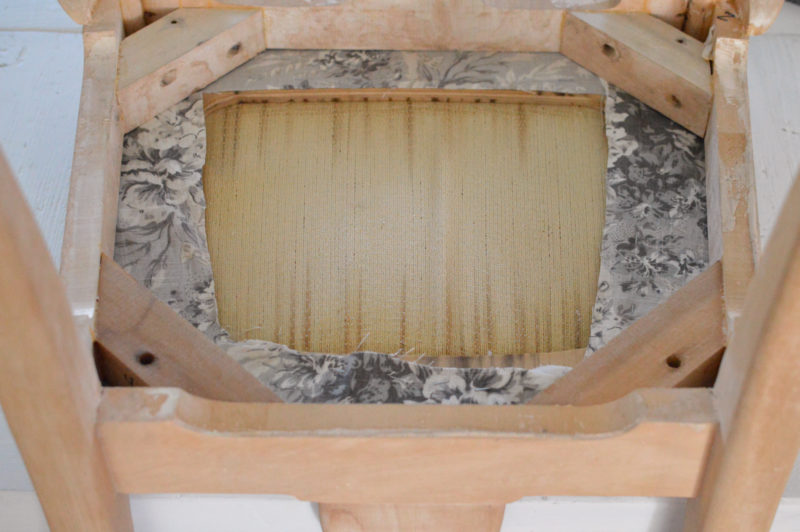
DURING — STRIPPED WOOD CHAIR & ORIGINAL SEAT FABRIC
I’ve included convenient clickable shopping links for you. Some may be affiliate links. Click here for full disclosure.
How To Strip A Wood Chair Down To Natural Wood.
Most unfortunately, my laptop crashed and had to have a whole new operating system and hard drive installed. I lost everything, so I don’t have the before photos of the wood frame before we stripped it down to the bare wood, nor do I have the process photos. Fortunately, it’s very simple and straight forward!
WHAT YOU’LL NEED TO STRIP A WOOD DINING CHAIR:
-
We used Citristrip, saran wrap, fine grade steal wool, and 220 grit sand paper and/or sanding block.
-
Apply the Citristrip per manufacturers instructions.
-
We wrapped ours with saran wrap to keep the product wet and activated.
-
Intermittently scrubbing a little with the fine grade steel wool, re-applying where needed, and repeating the process until the old finish was lifted.
-
The previous finish had yellowed, and had an undesirable orangish tint, although it was not particularly dark.
-
Once the old finish was removed, the entire surface was cleaned up with.
-
To complete this portion of the makeover, the wood was lightly sanded smooth with a 220 grit sanding block.
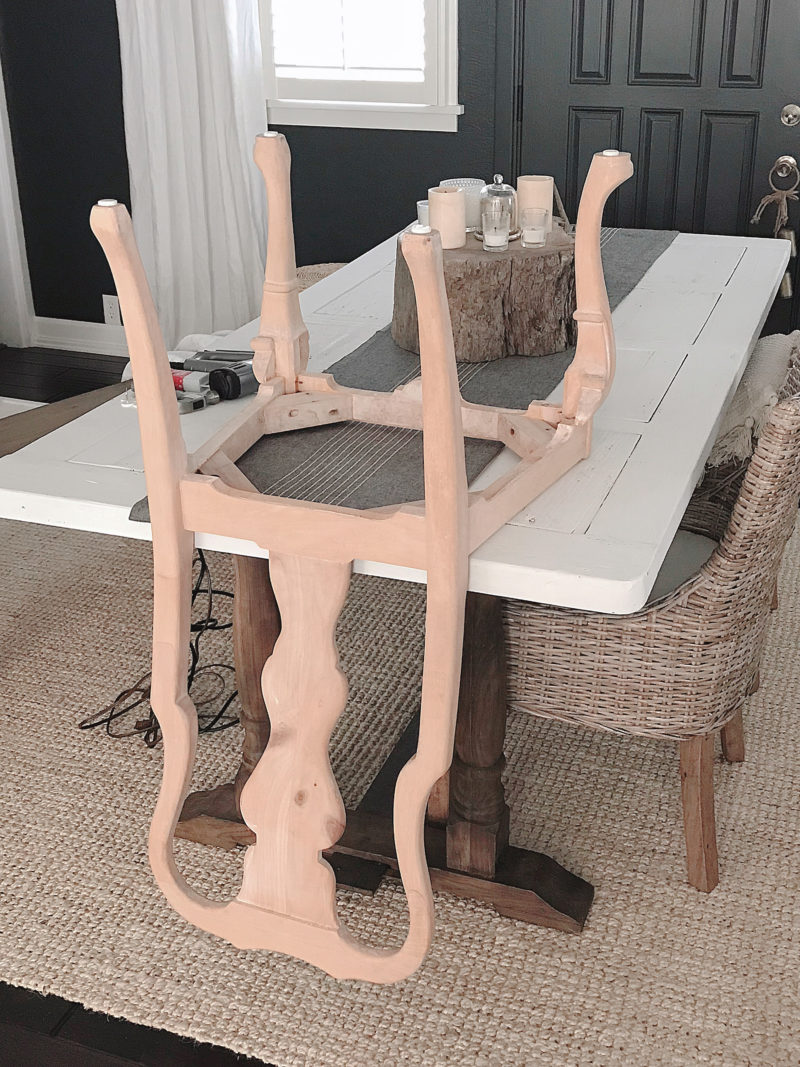
THE REPAIRED & STRIPPED WOOD CHAIR BASE
How To Reupholster A Dining Chair Seat
There are admittedly many levels of skill & proper tools needed for reupholstering, but not for these chairs. This style of seat is very simple and straight forward to recover, using basic tools and a staple gun!
WHAT YOU WILL NEED TO REUPHOLSTER A DINING CHAIR SEAT:
-
Pliers (needle-nose work best)
-
Flat head screw driver
-
Angled razor knife (for extra tight staples)
-
Staple gun & staples
-
Fabric — for best results and longevity, use an upholstery weight fabric.
-
My fabric — this is my Waverly Ballad Bouquet Platinum fabric [click here]
FABRIC SELECTION TIP: Florals and non-linear patterns are going to be more forgiving with placement than fabrics with any kind of stripes or checks. Basically anything with a straight line will require a more precise application.
-
Optional: Trims and embellishments like upholstery tacks, etc…
RECCOMENDED:
-
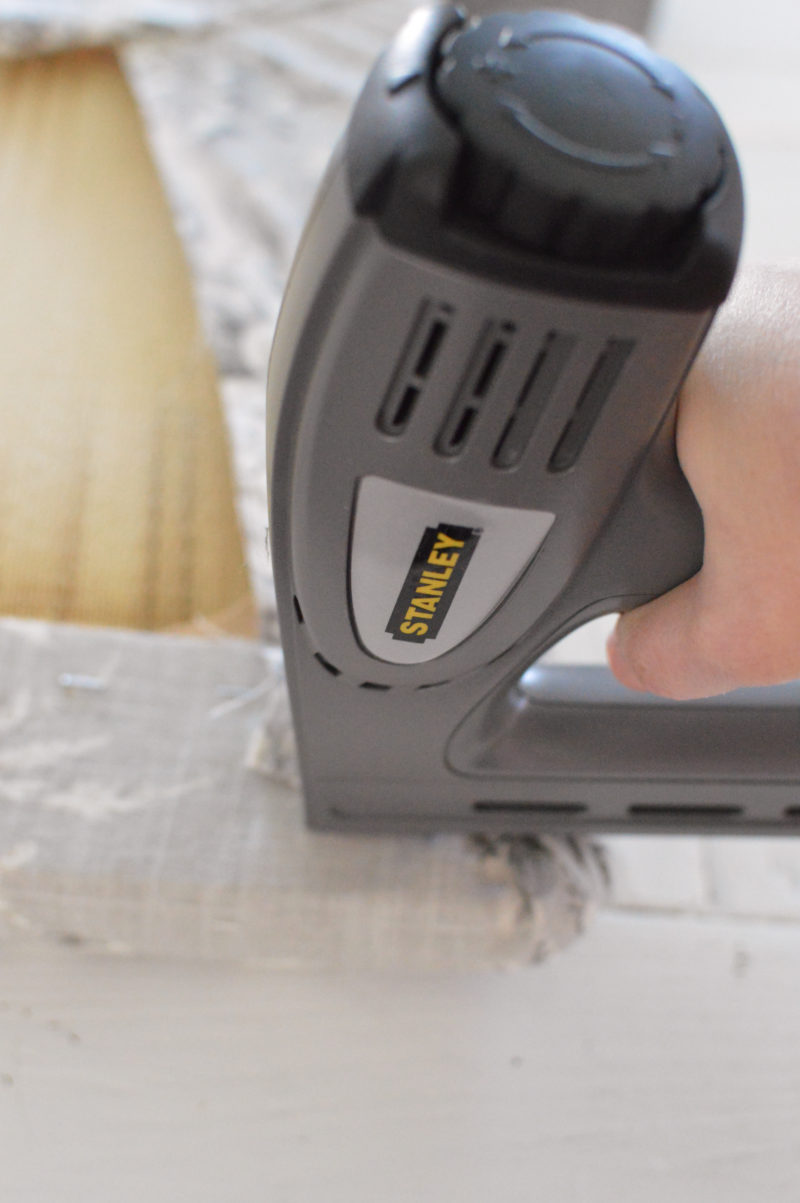
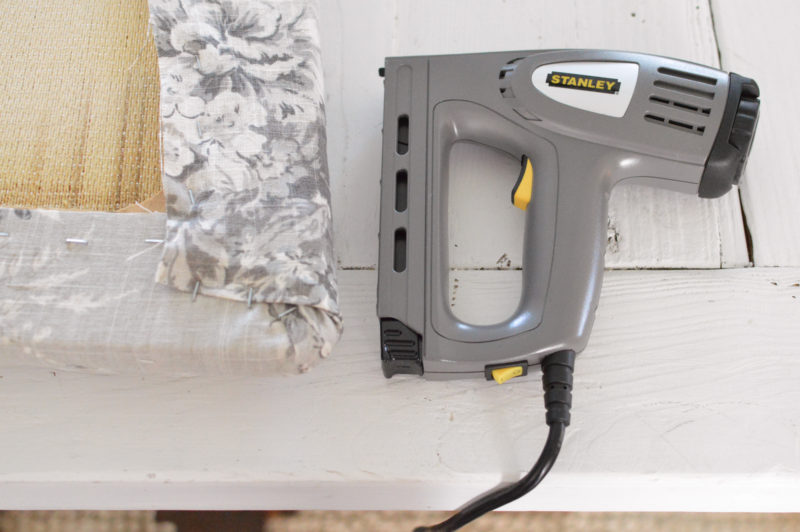
I use a Stanley electric staple gun and highly recommend it, it makes the job so much faster and easier, without the hand fatigue. My hands aren’t super strong and I love mine so much! It was very inexpensive and shoots staples and brads. The difference between using this, and the old manual one I used before is like night & day. In fact, Jim had to put a lot of the staples in for me in the past because I couldn’t hold the stapler down hard enough to get the staples to go in flush. With this I could staple all day!

HOW TO ADD NEW FABRIC TO YOUR SEAT BASE:
-
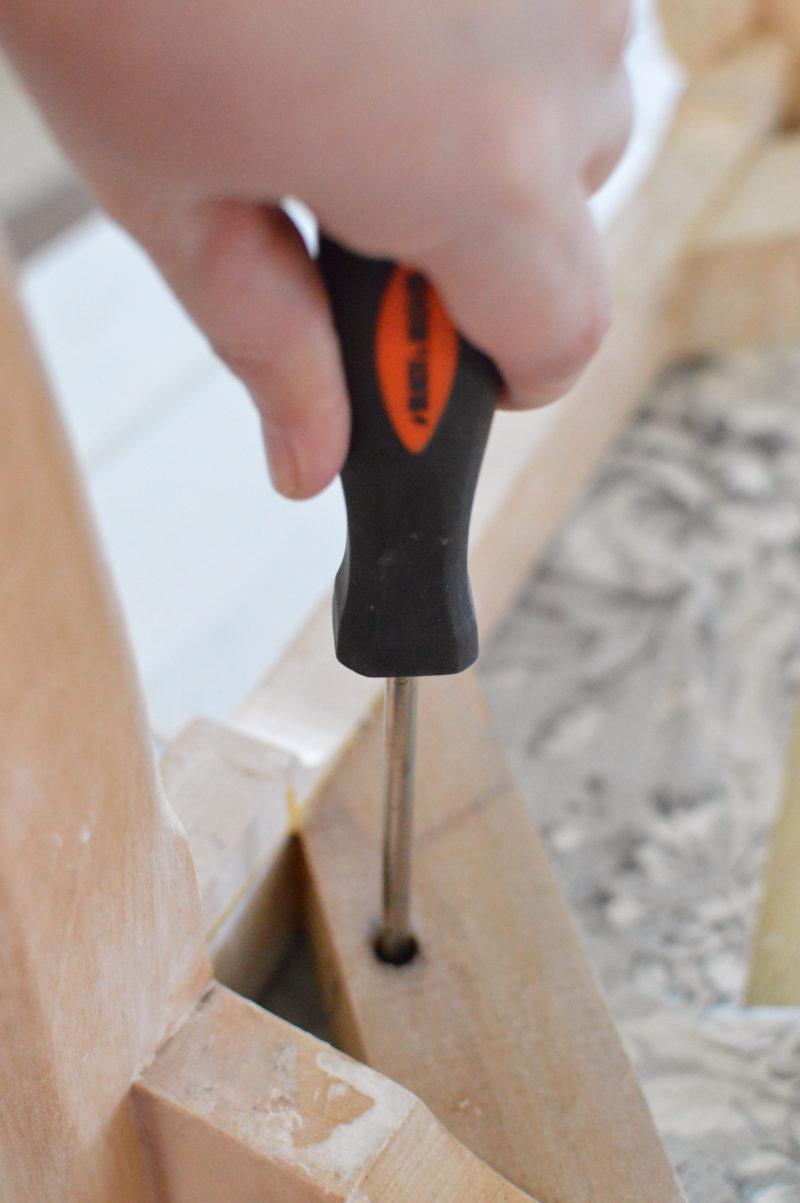
If you aren’t changing the chair itself and simply want to recover it, start by removing the seat from the base. This is easily achieved by flipping the chair upside down and unscrewing the seat from the base.
TIP: Set the screws aside somewhere safe to use for reinstalling the seat base when you are done recovering it.
-
Once the seat and base are separated, flip the seat upside down on a flat surface and remove the backing (if present) and then start removing the staples holding the current fabric in place. Most can be loosened with a flat head screw driver to allow enough room for the needle nose plier to finish prying them out.
-
STUBBORN STAPLES: Some of my staples were very, very tight and flush to the wood. I had to carefully and gently slide the angled razor tip under the staple. Moving slowly and gently, work at the staple — don’t rush or add to much torque, as you risk snapping the end of the razor off. If you are lucky, not too many staples will be that stubborn.
-
Once all the staples are out, you can remove the fabric.
TIP: you can set the fabric aside to help determine how much new fabric you will need. You can also use it as a template for cutting your new fabric to the right shape and size for your chair seat.
-
Take stock of your seat cushion material and determine if it needs to be replaced. Replace if needed. I got lucky and mine was in great shape! Which was very lucky , since it had a slight shallow channel along the rim that the wood base sits down in.
-
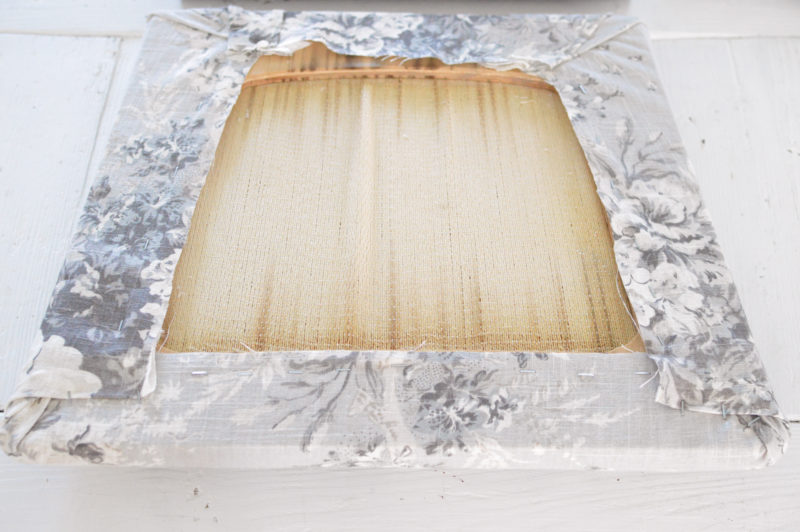
Once you are ready to add your new fabric to the seat, place your fabric face/pattern side down, and then center your seat face down on top of it. I am err on the side of caution kinda girl, and probably had a little more material than I needed, but I’d rather that, than the alternative!
-
For this seat shape, I opted to start my re-upholstering at the front right corner, working over to the left, I constantly checked and adjusted as I went, pulling the fabric taught, and making sure it was staying in place, and my seat was remaining centered. Next I went down each side toward the back corners. I next secured the back from the center, and worked towards each back corner. Your seat shape may be different so if you feel something else will work better, or make better sense, certainly do that!
I was working alone and couldn’t hold the fabric, the staple gun and my camera at the same time, so I hope my verbal instructions are clear and helpful! Darn that only having two hands.
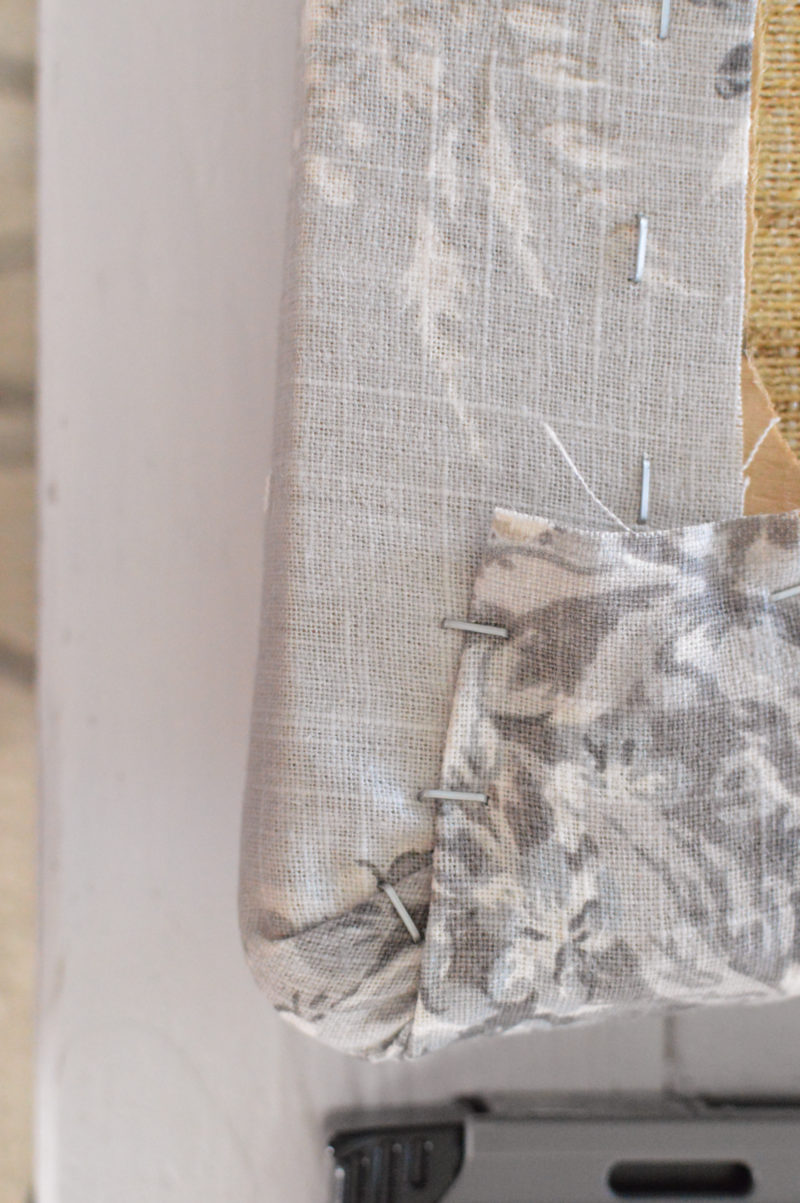
-
I ended up settling on three little pleats at each corner, but I know there are alternative ways to complete a corner. Of course feel free to research further if this isn’t a look or finish you’d be comfortable with. I am not a professional. Just a at-home DIY’er.
OPTIONAL: If you want a more polished/professionally finished look, you can cover the entire bottom of the seat leaving a 3/4 inch reveal all the around with a lightweight fabric. No one is going to be looking under my chairs, and I didn’t want to add more staples to remove in case I’d like to re-cover them again in the future so I skipped this step.
-
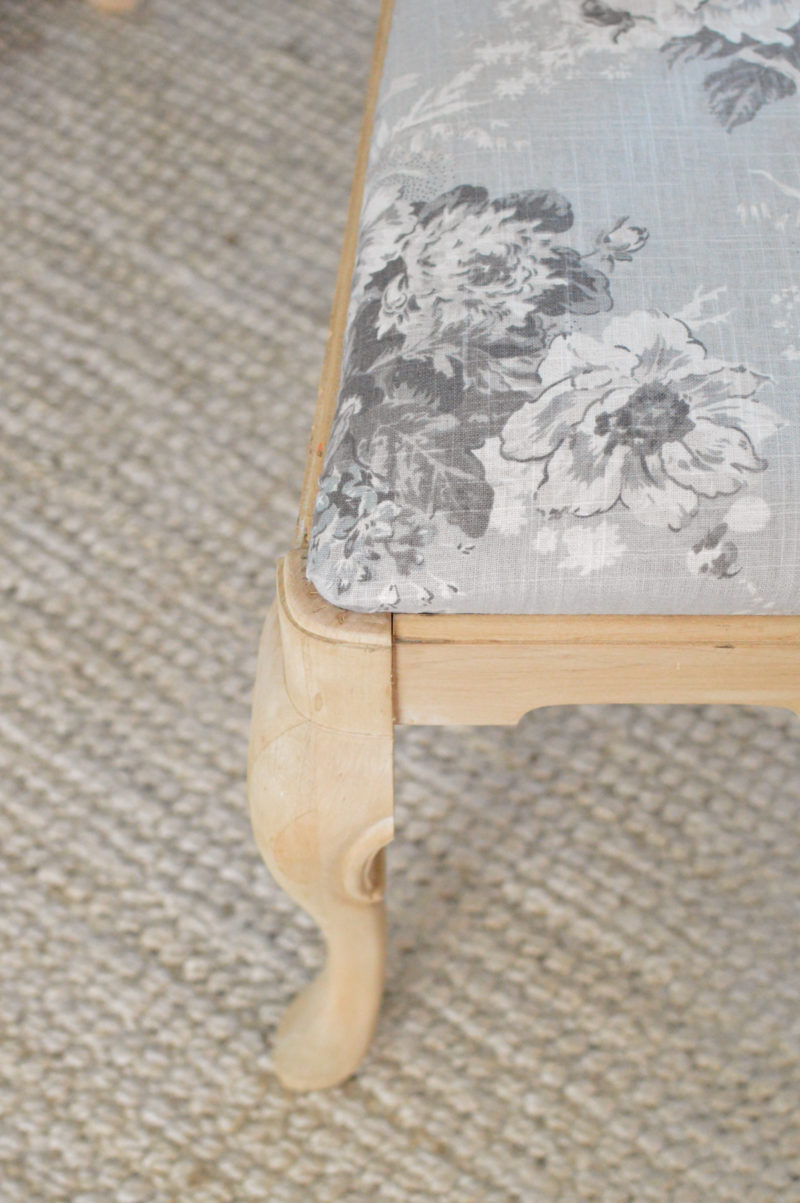
Once you’ve got your fabric on your seat and are ready to put your seat and base back together, simply pop your seat on a flat surface, upside down, and set your chair base on top of it. Use the screws you saved to re-attach it.
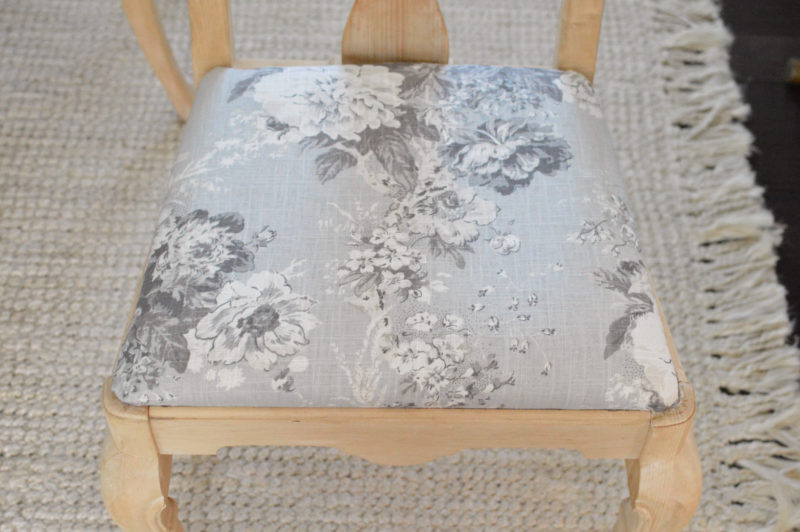
I hadn’t recovered a set of chairs in several years, so I myself went with a big floral! In a neutral shade of course. It was very easy to work with, and I’m so glad I remembered that little “stripes are harder” tidbit while I was looking. I almost went with a ticking stripe, and because the seat base is slightly tapered in towards the back of the chair, I could have been very frustrated working with it. Being frustrated has zero appeal to me.

This project was fast, and easy. The chairs were $5 each, Jimmy tightened them up and stripped the old finish off (lucky me!) and the 3/4 of a yard of upholstery fabric was on sale at Joann’s for twenty one something dollars.
MY PROJECT TOTAL: about 30 bucks!
I’m super happy with my $15 each solid wood dining chairs. I know these chairs were very expensive, because they had the original Macy’s sales information tacked to the underside of one of seats! We found it when we flipped them to start working on them. At the time I wished we had been able to get 4, but I’ve since started using the live edge bench that Jim made us, and just the two is absolutely perfect!

I discovered the chairs are a perfect fit as a desk chair at the console table too! And I JUST got my laptop back. It’s going to be so nice to work on it again after so long without it! I was sad to lose everything, but at least it was under warranty! Whew.

I’ll be back sharing these exact chairs again soon… with a little update! Because as much as I love the pale wood, they just plain don’t look great in my space. With my vanilla toned rug, my cocoa table legs, and my dark wood floors, this color doesn’t play nice at all.
If you have any questions, you know the drill! Ask away in the comments, or email me at foxhollowcottage@gmail.com – XO Shan
MEET THE NEW CREW!

Just click on the links below the photos, and pop around to visit the girls and check out their projects!
DIY VINTAGE ARTISAN POTTERY

DIY WOOD PLANTER BOX CENTERPEICE

DIY MERCURY GLASS CANDLE HOLDERS

HOW TO STRIP AND REUPHOLSTER A WOOD DINING CHAIR

DIY WOOD TRAY


More Ideas & Inspiration
 Simple Serving Tray – A Coastal Home Decor DIY
 Little Cottage Exterior Paint + Dutch Door Reveal
 Outdoor Furniture Review
 How To Style A Teakwood Bowl For A Coastal Look
 Before And After White House Paint Reveal
 Charming French Cottage Farmhouse Home Tour
 Simple Winter White Cottage Decorating Ideas
 DIY Planter Pot Poles For Cafe String Lights
What a steal! Jim did a great job and Citristrip is the best stuff! Love the fabric choice. Great tutorial!
Lucky he did all the real work 😉
Isn’t that pretty?
Might need to make some pillows! (you know I don’t have any)
Shannon, if you do make pillows, I hope you post this as another DYI! My darling children gave me a new sewing machine for Christmas and I’m itching to try it out!
The chairs are gorgeous! I think I’m going to have to get some of that beautiful fabric and re-do my desk chair! Re-upholstering a dining chair is one of the most satisfying things! So relatively little work for so much outcome!
I plan to strip a small entry chest and mirror soon. What did you say you cleaned up with after applying the Citristrip and finishing the stripping? Somehow that didn’t come across on the instructions. Thank you!
Oh gosh, you are too kind. I think if I do make pillows… I’d be winging it so I’d steer you to a more professional seamstress for a tutorial. haha.
I can sew a straight line and that’s about it. But it’s enough 😉
Oh I know! Aren’t they? You can change the whole look and feel and most times, it’s not hard at all!
We used a little steel wool and some mineral spirits if I recall.
Shannon
Great job! I too love chairs and have accumulated quite a collection … waiting for warm weather to start working on them. My plans are to either paint them white or do a white-wash finish. Thanks for the heads up on the stapler! Going to check that out for a purchase.
I love a good white-wash! That sounds pretty 🙂
I love this so much and I appreciate doing this with you my friend!!!
It’s going to be so fun!
Shannon, the chairs are SO beautiful! I love the fabric you chose! Thanks for the inspiration!
Wow! Terrific job!
Thanks Karen 🙂
Your chairs turned out beautifully Shannon! I’ve never tried this before, but after reading your post, I think I can do it! Thank you for the inspiration.
Oh I know you can!! And if you don’t expect absolute perfection, even better 😉
Happy almost weekend ~ Shannon