How To Build A Wood Deck Cooler
Hi there, if this is your first time at Fox Hollow Cottage, welcome!! I’m Shannon and I’m so happy to have you stopping by.
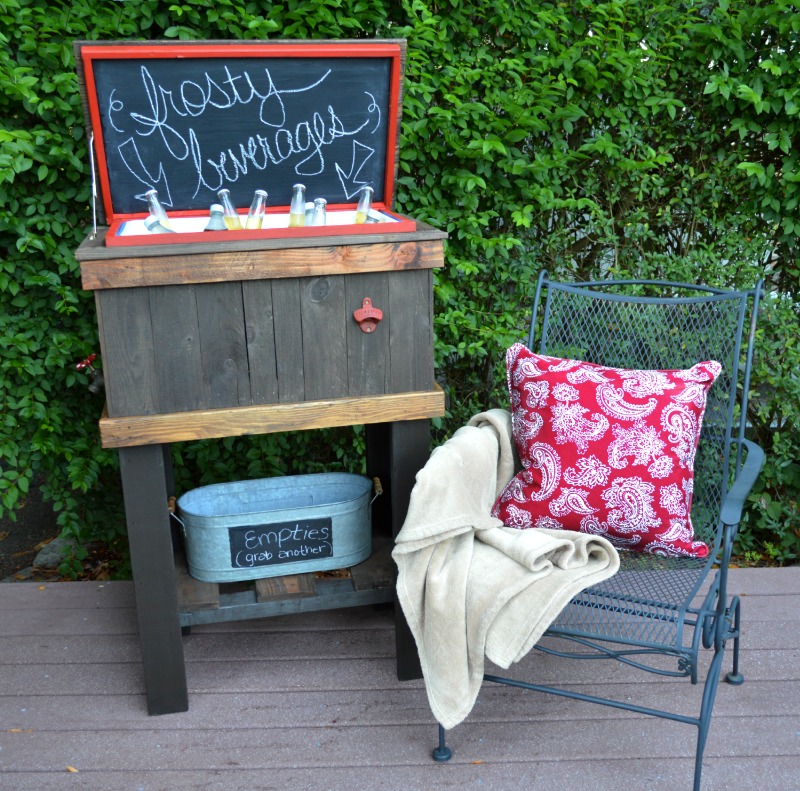
Today is a great day at Fox Hollow! Not only did my husband and I get to make something we’ve been wanting, but we get to share a full tutorial (with loads of pictures to help along the way) on how to build a wood deck cooler with you! Best part? We used FREE pallet wood and a Coleman cooler we already had on hand, so the cost was minimal!
Meet the newest member of the Fox family, Phil. He is sure to be the hit of every deck party we host for many years to come!

I’ve christened him Phil, because I like to name things and because “Phil er’ up” came to me and made me laugh.
But mostly, because I’m a big dork.
So here is the skinny. I am a ScotchBlue™ lover, have been forever. Like, since I lived at home and my dad first taught me how to paint when we put a fresh color on my bedroom walls. Hey, we had to protect those mirrored closet doors right? So when 3M contacted me about working on this project that would involve some ScotchBlue™ Painters Tape, I said yes without missing a beat.
I told the hubs and he was right on board to help create a project, in fact, he had been wanting to make a deck cooler and this was the perfect excuse to put off boring things on our to-do list and build something fun, that we really wanted!
And.. we are going to show you how to make one too!! (please excuse the exclamation points I get excited.)
Since you’ll be building around YOUR specific cooler, exact measurement and materials can/will vary.
Please treat this tutorial as a “guideline”. We know you can do it!
Supply List:
- We used a Coleman® cooler
- ScotchBlue™ Painter’s Tape for Exterior Surfaces
- Stain
- Paint (to taste)
- Brushes
- 3M™ Sanding Blocks
- 2 Lid Hinges
- Lid Hinge Arm (to hold it open)
- Nails and Hammer (or Nail Gun)
- Drill
- Hose Bib
- 8 inches of .5 inch Flexible Tube
- Epoxy
- Bottle Opener (I found ours on Etsy)
- Mandatory: Ice and Frosty Beverages to Celebrate when the build is done!
Lumber:
- We disassembled two free pallets and used the wood from those to create this project.
How To Build A Wood Deck Cooler
To Build:
1. Start with the legs. We used 8 – 2 x 4’s. Cut all to the same length for desired height.
2. Nail 2 – 2 x 4’s together as pictured below to create each leg.


3. Flip your cooler upside down and work from the bottom up. (this is how you will determine how deep the cooler needs to sit in the base) and where and how wide to attach the legs. Attach the legs by measuring and making your cuts. Then place and nail-in the pieces between each leg as highlighted below in RED.

4. Nail-in two more boards as shown in BLUE below. These will be the bottom shelf support and make up the frame of your deck cooler.

5. Flip your new frame over and remove the cooler. Set Aside.
6. You are now ready to add your cross pieces, as shown in YELLOW below.

– Here is a clear shot of the bottom shelf.

7. Next you will place the cooler back into the frame and get ready to add the top lip section and trim.
The lip can be as deep as you’d like it. Ours is made from a 1 x 4 – The trim is 1 x 1.


8. Measure. Cut. Dry Fit. Then toenail in to attach the upper and lower support pieces as shown highlighted in GREEN below. These pieces will not show, they don’t have to be pretty.
*Repeat on back, and both sides.

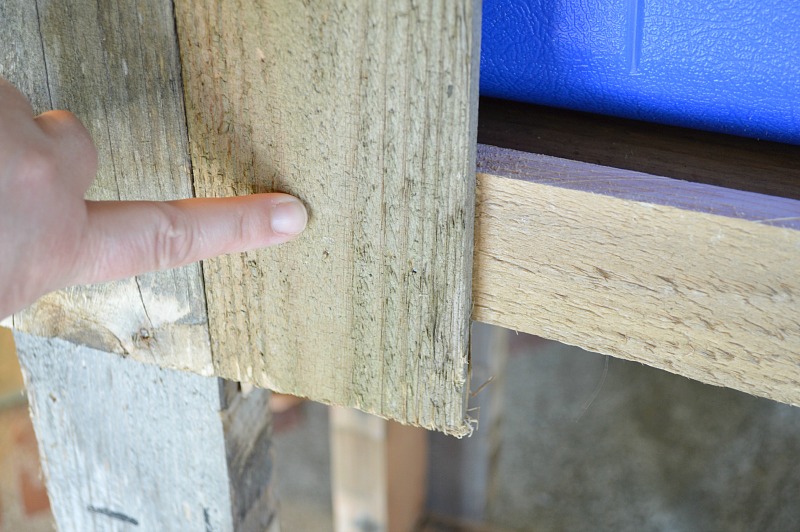
9. Now, you need to cut all the boards that wrap the frame and cover the cooler body. As shown in HOT PINK below.

10. Cut all boards the same length. We used some of the thinner stuff for this. It was about a half an inch thick.

11. We started wrapping by adding a board to each end and working in, ripping a board to fit in the center and complete the wrap. This keeps you from having one odd skinny board on the end.
*Repeat for back and both sides.

– This is where you’ll be nailing into those cross boards you toenailed in back in step #8.

12. Use 6 – 1 x 3’s cut to proper length to trim out the pieces you put on in step #11 to cover the cooler body. This step is highlighted in aqua in the photo below.
*Repeat on back and both sides.

13. The Lid. Use 1 x 1.5 inch wood to make the lid frame. To do this, measure the outside of the trim you used in step #7 adding about a quarter inch for wiggle room. This way, the lid can close flush to the top lip section.
13.a When you have the 1 x 1.5 inch lid frame made, check for fit. Then nail your lid boards to the frame. We also used some of the thinner boards for the lid.

– If you don’t want the chalkboard inside the lid, you can add a small piece to stabilize the lid, add your hinges and be done with this part of the build.

 DIY Tutorial — How to build a pallet wood deck cooler. Super cheap and easy #diy deck cooler project build. We used free pallet wood and a #Coleman ice chest to make a fun party statement piece for our deck! We also made the lid hinged and added a chalkboard lid. Created with #thehomedepot and using heavy #3m blue tape. Stain and paint to taste. #diyprojects #homedepot #partner #deck #cooler #icechest #coleman #summerproject #tailgate #palletideas #palletprojects #foxhollowcottage")
14. I decided I wanted to add a chalkboard feature to the inside. I thought it would add a fun element since it would be for celebrating and family gatherings. My oh-so-patient husband measured to make sure the lid had enough depth, it did, so he removed the lid and the small stabilizer piece.
To make the chalkboard insert, he cut a quarter inch think piece of plywood to fit inside the lid. We painted it with a few coats of chalkboard paint, let it dry, then nailed it inside the lid, re-attached the hinges and put it back on.
– I’ll talk about our lid being separate later.

15. Add drainage for melted ice. This is where you will add the hose bib. Glue flexible tube to hose bib. Let dry. Drill hole in cooler as shown. Push tube through hole from exterior. Screw hose bib into wood. Cut off any excess tube on the inside of the cooler. Glue around tube on inside of cooler to seal.
*After this step is complete you can not remove the cooler from the frame!!!!

16. While we wanted a rustic look, I don’t want anyone getting injured! I hit the entire surface of the deck cooler with a 3M™ Sanding Block in a 60 grit. Some of the rougher spots got a 40 grit hit first. I sanded it just enough to knock down anything major and smooth it out.
– Photo below is B.S. (before sanding)

17. Now let’s Paint & Stain!
This is where the ScotchBlue™ Painter’s Tape Exterior Surfaces 2097 came into play and impressed. the. heck out of me! I’ve used Scotch Blue™ Painters Tape for exterior painting before. In fact, my dad and I painted the exterior of this house and I personally taped off and painted 23 windows. I’ve used rolls and rolls of Scotch Blue™ Painters Tape in my lifetime. When I said I was a Scotch Blue™ Painters Tape girl, I was not kidding!

I had not had the opportunity to try this particular Scotch Blue™ Painters Tape though and I was surprised at how effortless it was to use.
- When they say it tears in a straight line, they mean it.
- It stuck to our rough pallet wood, first try, and stayed stuck. (It’s not meant for this type of rough wood, but it performed so well! This is my personal experience.)
- It was easy to manipulate and get right up to the seams where two surfaces met.
- Not too stiff, not too flimsy. Call me Goldilocks, but it was just right.
- It removed well too, in one piece, and left no residue.
It made taping off, which I am not super patient about, fast and easy.
So I went wild.

18. I used a combination of paint, stain and varnish on this project. For anyone who uses stain, you know it’s pretty much like water! It travels like crazy too. Well this tape did not let a single-little-itty-bitty-teeny-tiny-bit of stain through. Not a drop.

Remember how I said I was impressed? Yeah.
When I added the red paint, and tapped over the stained sections… again. Perfection.

I really like it when things work.
Wrapping up: I seasoned the chalkboard [click here for a quick how-to and WHY] . We added added a lid hinge to hold the cooler open ,and threw in some ice and drinks to take it for a test run!

We designed our cooler to use during parties without the actual cooler lid. It doesn’t get real hot here, and we will only be using it for a few hours at a time so it’s not an issue for us. We wanted sort of an “ice tub stuffed with drinks vibe”. (Plus I wanted the chalkboard feature!)


Oh! I almost forgot: If your cooler comes with handles or lid hinges, just remove them before you start.

You can view all the fantastic projects being featured at Centsational Girl for the Get it, Got it, Go blog-hop. Big thanks to ScotchBlue™ Painter’s Tape & The Home Depot for sponsoring the Get it, Got it, Go event!


If you have any questions about how to build a wood deck cooler, please leave a comment and I’ll be happy to provide additional instruction or information. I think it took longer to type this all out, than it did to build it!!
Happy Entertaining!
From Phil, Jim and I
PIN IT TO MAKE LATER

We love working with wood! Be it new lumber, reclaimed wood or free pallets — here are some more projects you might like…
[click here] or on the image below

Reclaimed Vintage Crown Molding Made Into Shelves
[click here] or on the image below

And our NEW Favorite Outdoor Project!
DIY Cafe Light Poles in Flower Pots [click here]


More Ideas & Inspiration
 How To Build A Beverage Station DIH Party
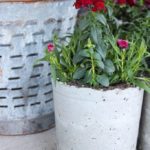 How To Make Concrete Flower Planter Pots
 Simple Serving Tray – A Coastal Home Decor DIY
 Sun Room Bar Repurposed Wood Countertop
 How To Install a DIY Paver Path
 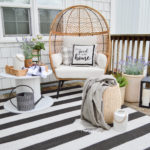 Cozy Spot For One Spring and Summer Deck Refresh
 How To Make a Shabby Wood Trough Box
 Before And After White House Paint Reveal
This looks amazing! Wow what a fun project! This could really work year round.
Thank you! I loved Jim’s vision for it (: We look forward to using it for many years.
This is excellent! I pinned a similar cooler months ago but there was no tutorial–Thank you! Phil looks terrific and I love his personal touches. I LOVE this!
Phil is everyone’s best friend (: I wish I knew how to do one of those color rendered drawings for the tutorial.. hopefully this was easy to follow.
I love this!! What a great DIY…this is on my “must have/must do” list. 🙂
What an awesome project Shannon! I’d love to have one on our patio!
I’ve seen your skills, you could totally make one!!
I love that! We’ll still be entertaining outside for months and this would be perfect!
Thank you Randi! We’ve used it a few times already and are so glad we made it! Happy Fall (:
Shannon – this is so incredibly awesome!!! Love it!
Thanks Kellie!! Happy Fall to you and your family (:
This is an amazing project! I need one of these in my life!
Hi Kelly, thanks for popping by (: Easier than it looks… lol. Takes much longer to explain, than to make.
What a great project! You did an awesome job!
Thanks a bunch Amy!!
Awesome project!
Phil is one awesome cabana boy Shannon! You and the hubs rocked this DIY! I want one.
He did! I think so too 😉 I was only in charge of pictures, and sanding/finishing on this one (and telling him to add a bottom shelf.lol) He was the builder.
that is SOOO cute!! I love it. Pinning.. i wish I could make something like this!
You can!!! You really can. Not hard, swear. Just a process. Actually, a very simple build. No fancy cuts, no fancy tools!!
Shanon! This is seriously awesome! Love it
Thanks!! I will make sure Jimmy sees the comments 😉 Thanks for popping by. Shan
Shannon that is awesome!!!! I have a hankering for a cold Corona right now so I’m on my way over! 🙂
You could be here shortly 😉
Soon, I’ll have the guest cottage ready… ?
I know you want to visit the coast.
hands down this is the most awesome project ever. Will you guys build Mike one:)? He would love it.
Thanks so much! Joint effort for sure 😉 And yes!! Just come on over and pick it up. We’ll have it ready.
‘Phil’ likes crazy chicks, so it’s okay. Great job on the cooler. I would love to have a phil on my deck. Wonder if he can serve the drinks too?
We partied with him on Labor Day and he was the center of attention 😉
Happy Fall Laura!!