
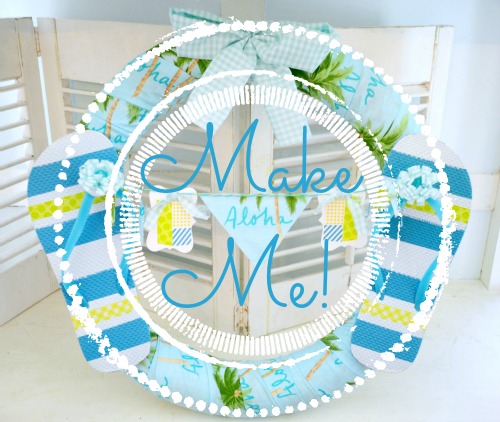
Pool Noodle Wreath Tutorial {a diy craft}
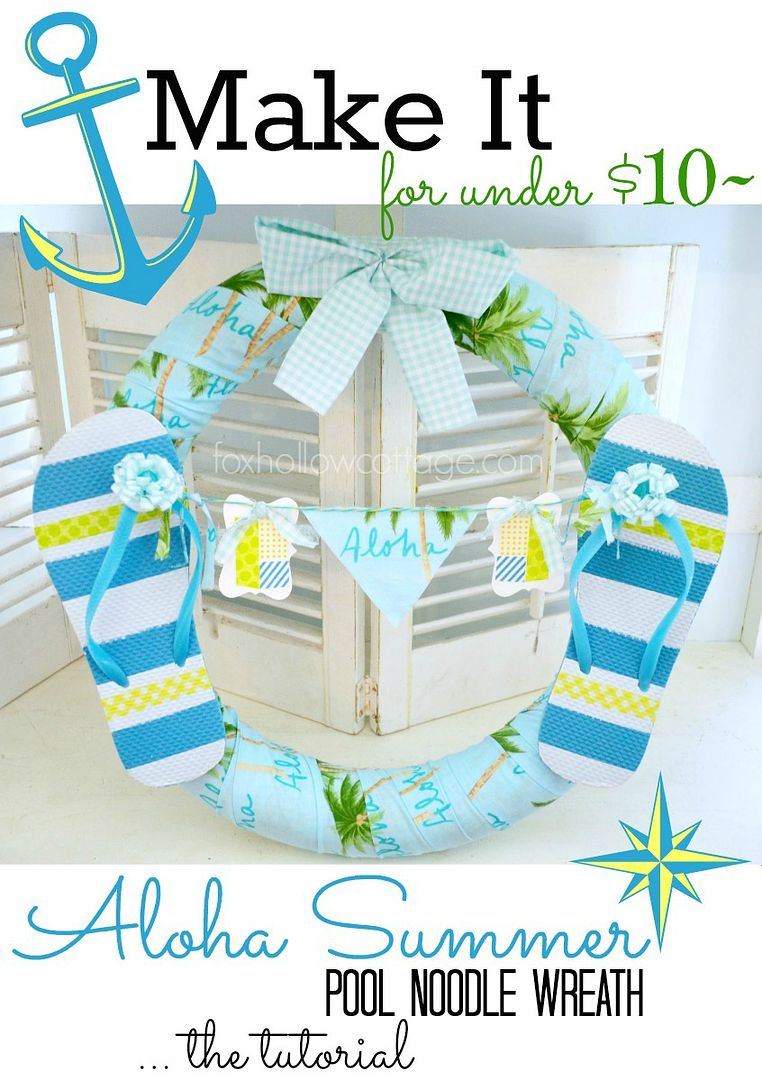
Hi Guys! I’v been painting like crazy but took a little break to show you how I made my Aloha Summer Pool Noodle Wreath, just like I promised to a few days ago. Plus, I missed you guys and my blog! The painting is coming along. I’ve got the sun room done top to bottom (if you don’t count the vaulted stairwell). We are paying someone with the proper tools to do that part. I really won’t be much use to my family if, you know, I break my neck and die!!
Anyhow… this is a super fun and easy craft. Cheap too. So that is always a bonus!
Let’s get Started!!
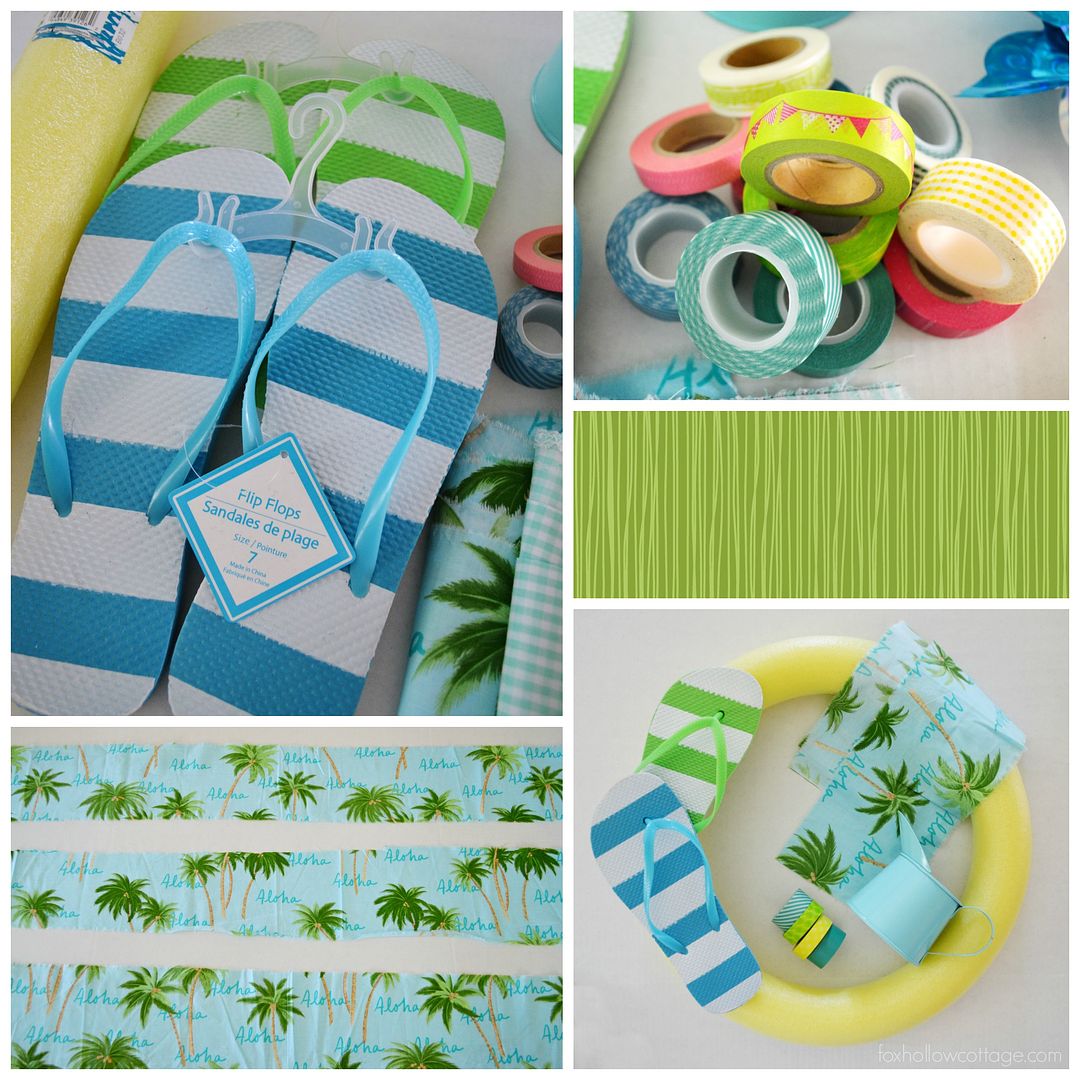
I gathered my supplies which consisted of:
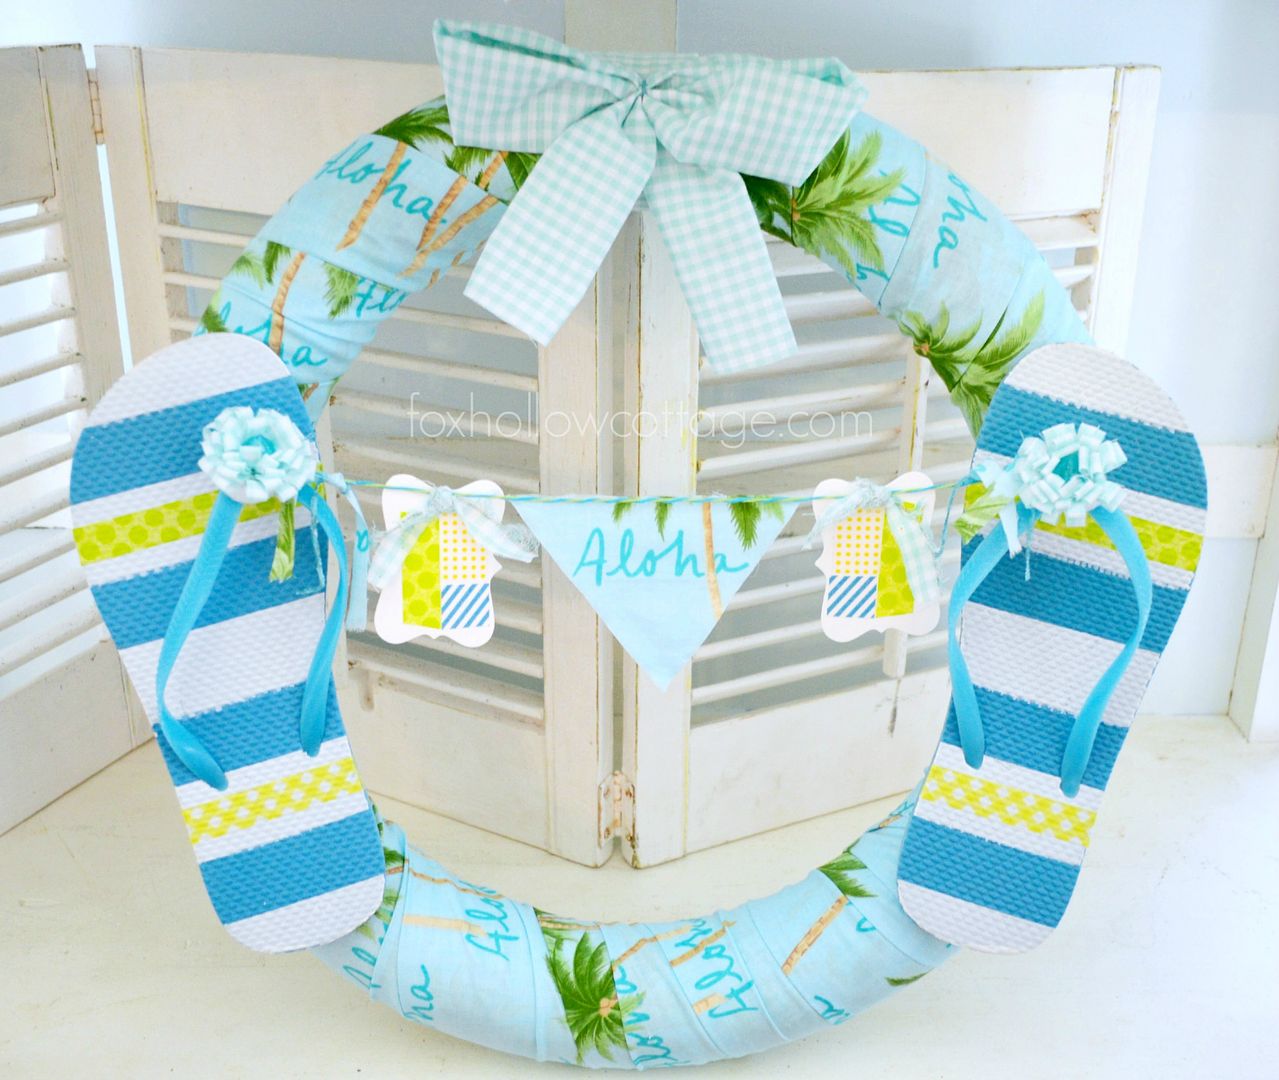
1. A Dollar Tree Pool Noodle Wreath
2. 2 Dollar Tree Flip Flops
3. Small Amount of Fabric
4. Misc. Washi Tape
5. 2 Paper Tags
6. Embroidery Floss
7. 2 Faceted Beads
8. Glue Gun
9. Clear Packing Tape
10. Scissors
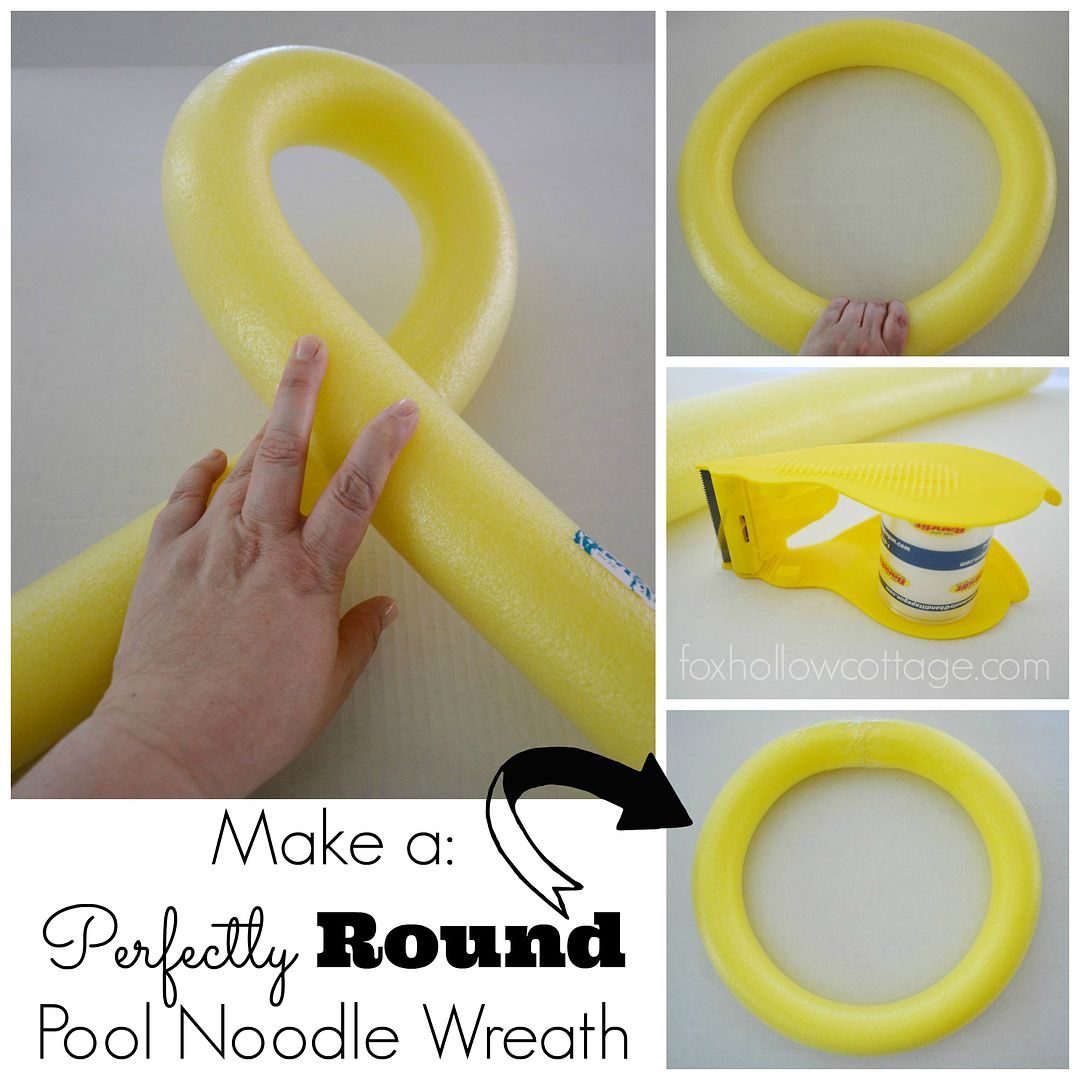
Before you start your crafting, you’ll need to get your noodle into a circle.
To do this, I twist my noodle and work it to relax it. Twist it, bend it, break it down a bit! Smoosh it with you thumbs as you work it into a circle. Don’t be afraid, I’ve never broken one! After you get it bent and manipulated and have it settled into a circle shape, secure it with clear packing tape. I find this work better then anything else.
Now You’re Ready To Craft!
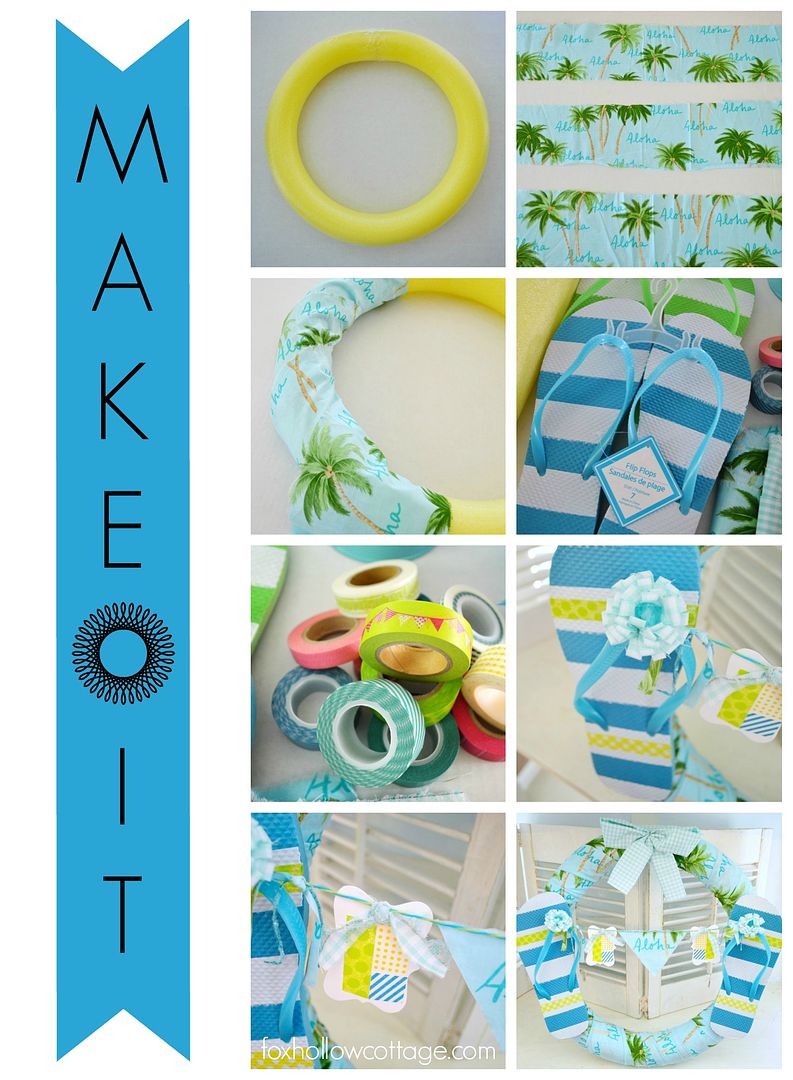
1. Get your noodle base into a circle and tape it to secure.
2. Next, cut your fabric into strips. Approx 3 – 3 foot X 6 inch strips should cover your base.
3. Wrap your noodle, securing your strips with your glue gun, making sure your seams are in the back.
4. Next decorate you flip-flops with Washi Tape (if desired).
5. Glue fabric flower to flip-flop (find a easy flower making tutorial here).
6. Pop a bead in the center of the flower for a little dazzle.
7. Secure your flip-flops to your wreath base with your glue gun.
6. String some embroidery floss between the two flip-flops
(I used two colors and twisted them together to look like bakers twine)
7. Take your paper tags and decorate with Washi Tape.
8. Secure to embroidery floss with a dot of glue and cover with a knotted bit of scrap fabric.
9. Decorate the center as you like. I cut a bit of my fabric with the word “Aloha”, but you could add anything that strikes your fancy or even a third paper tag!
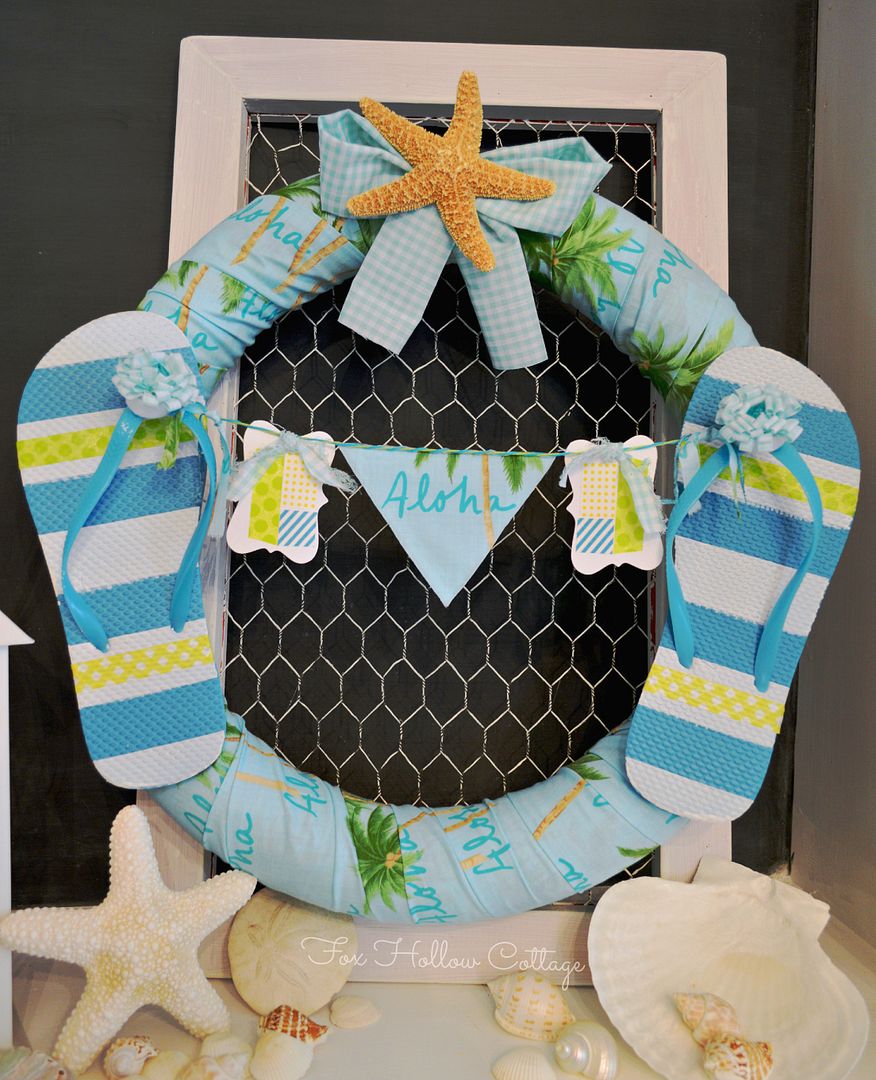
10. Pop a bow on top in the middle if you’re into bows…
11. I glued a little bit of floral wire on the back to act as a hanger.
12. Done – Hang it up and enjoy!!!
If you have any questions I didn’t cover about how I made this, please just give me a shout!
Pictured below: I did end up adding a starfish to the center of the bow.
I just sort of felt like it need something!
So, if you’ve got a spare starfish, throw that on too – I think it’s extra cute.
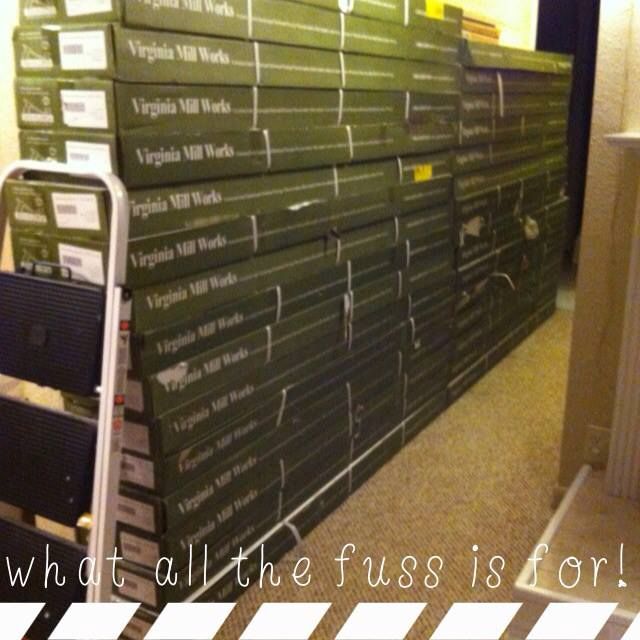
I hope to have at least a peek or two of the project we’re working on ready to share with you next week. I’ll make sure to at least get a picture of the flooring we’re putting in.
Happy Weekend Everyone!!

PS: This is the 1,700 lbs of flooring that we are prepping to put in.
PPS: Pop over to SAS Interiors, I’m sharing my thoughts on what makes a Meaningful Home today!


More Ideas & Inspiration
 Beautiful Aged Terracotta Pot Paint Makeover
 Patriotic Summer Pool Noodle Wreath-The Tutorial
 Little Cottage Exterior Paint + Dutch Door Reveal
 New Home Decorating Tips and Ideas
 Flip Flop Summer Pool Noodle Wreath Tutorial
 Ready, Set, Summer — Outdoor Entertaining Ideas
 Budget Bridal Shower Decor and Ideas
 Before And After White House Paint Reveal
Cute wreath! Guess I need to go buy some noodles..lol. Can’t wait to see the finished floors!
They make the best wreaths! Cheap and so light they hang about anywhere 🙂
I love your pool noodle wreaths! And I can’t wait to see your new floors! Awesome!!
OMG this is cute. this is beyond cute!
You know I love this!! It’s been re-pinned a TON and now I am pinning this tutorial so more peeps can enjoy the Aloha fun!!
xoxo {I can’t wait to see the flooring too!}
My back started hurting when I saw all those boxes but it will be oh so awesome. And it’s the time of year when pool noodles are on clearance everywhere plus only a buck at the dollar store.
Bliss
That wreath is adorable and I can not WAIT to see your NEW FLOORS!!!! Have a wonderful weekend!
So cute Shannon!
Shannon, how cute is that wreath!!!!! What a creative and fun way to celebrate the middle of the summer and pool and beach time!!!
You have lot of work ahead I see… but you will love love love new floors. We have been doing one room at at time in hardwoods.. . almost done!!!
having put wood floors in our entire main floor of our home, as soon as I saw the stack of flooring I laughed…I remember that sight..stacks and stacks of flooring…you think how could I possibly need that much..but you do..Have fun! Its gonna look Fabulous. And thanks for the tip on working the noodle..I keep buying them to craft, but the kids keep stealing them for the pool!
Hugs
Karin